21
21
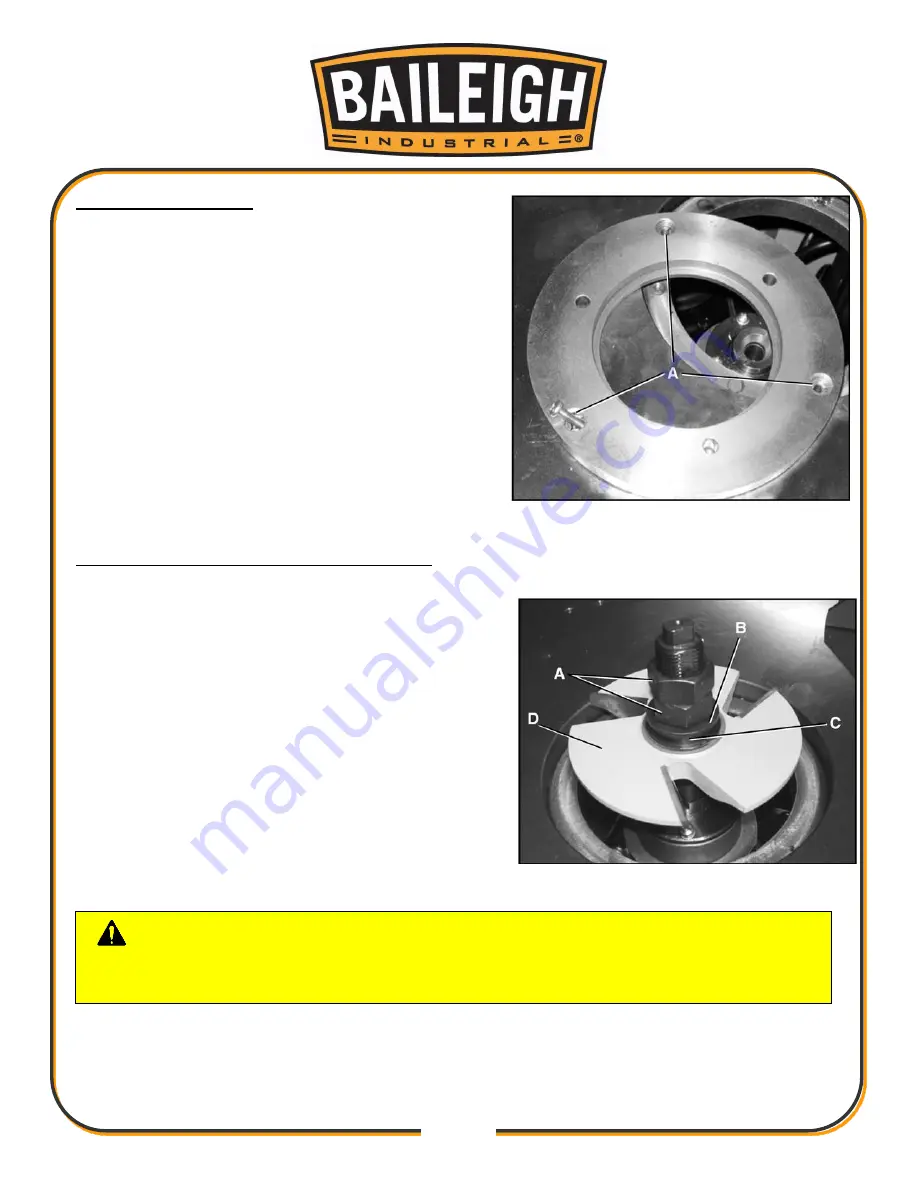
Setting Table Inserts
The table inserts are preinstalled at the factory. They
should be adjusted so that the top surface of the
insert is level with the tabletop.
If any adjustment is necessary:
1. Remove the three screws in the top of the insert.
2. With the screws removed, you can see the three
insert leveling screws (A, Fig. 12)
3. Using a 6mm hex wrench, turn the adjusting
screws so that the insert sits flush with the table.
4. Replace the screws removed in step 1.
Fig. 12
Attaching Cutters and Collars to Spindles
Next step for spindle.
1. When attaching a cutter, remember to position the
cutter as close to the bottom of the spindle as
possible.
2. Remove both spindle nuts (A) and special washer
(B). (Fig. 13)
3. Decide which collars you will need to use, if any,
and place over the spindle.
4. Attach the cutter (D) to the spindle.
5. Add collar (if any) and then attach the special
washer (B). Fig. 13 shows a collar (C) installed
above the cutter.
Fig. 13
CAUTION:
MAKE CERTAIN that the special washer goes on just before
you replace the spindle nuts. This washer prevents the spindle nut(s) from loosening
if the cutter is stalled.
Содержание SS-2822
Страница 29: ...26 26 Electrical Schematic...
Страница 53: ...50 50 BODY PARTS DIAGRAM...
Страница 55: ...52 52 ELEVATION PARTS DIAGRAM...
Страница 57: ...54 54 SPINDLE PARTS DIAGRAM Spindle and arbor is separate...
Страница 60: ...57 57 FENCE PARTS DIAGRAM...
Страница 62: ...59 59 ELECTRICAL PARTS DIAGRAM...


