background image


38 

38 

Cutter Head Removal 

1.  Disconnect the machine for the power source. 

2.  Removed Handwheel. 


3.  Remove right side cover and left side cover. 


4.  Loosen screws A. B. C and remove. 


5.  Remove Chip Bracket. 


Содержание IP-2008-HD

Страница 1: ...L INC IS PROHIBITED Baileigh Industrial Inc does not assume and hereby disclaims any liability for any damage or loss caused by an omission or error in this Operator s Manual resulting from accident n...

Страница 2: ...FEED RATE 19 TABLE ROLLER ADJUSTMENT 19 CALIBRATING THE THICKNESS SCALE 20 DIGITAL READOUT 21 SETUP OF FEED ROLLERS CHIP BREAKER AND PRESSURE BAR 24 Checking Pulley 26 Adjusting Motor Mount 26 Adjusti...

Страница 3: ...ROTATING KNIFE INSERTS 36 MAINTENANCE 37 Cutter Head Removal 38 Changing Gearbox Oil 41 Control The depth of Cutting 42 TROUBLESHOOTING PLANER OPERATING 44 TROUBLESHOOTING MECHANICAL AND ELECTRICAL 45...

Страница 4: ...e to Seller of any suspected defect in the Goods prior to the expiration of the warranty period The original end user must also obtain a RGA from Seller prior to returning any Goods to Seller for warr...

Страница 5: ...urther remedies provided under this Agreement or at law or equity Attorney s Fees In the event legal action is necessary to recover monies due from Buyer or to enforce any provision of this Agreement...

Страница 6: ...Description of the functional parts of the machine Capacity charts Set up and start up instructions Machine operation Scheduled maintenance Parts lists GENERAL NOTES After receiving your equipment rem...

Страница 7: ...es a hazard or unsafe practice that will result in severe Injury or Death Safety signs with signal word DANGER or WARNING are typically near specific hazards General precautions are listed on CAUTION...

Страница 8: ...e or uncomfortable loud noises BEWARE OF PINCH POINTS Keep hands and fingers clear of all potential pinch points These include sprockets and chains along with belts and pulleys DUST HAZARD Wear approp...

Страница 9: ...operating ENTANGLEMENT HAZARD ROTATING BLADES Contain long hair DO NOT wear jewelry or loose fitting clothing HIGH VOLTAGE USE CAUTION IN HIGH VOLTAGE AREAS DO NOT assume the power to be off FOLLOW PR...

Страница 10: ...a substantial risk of injury to the operator or others and may do substantial damage to the machine Any modifications or alterations to a Baileigh machine will invalidate the machine s warranty Please...

Страница 11: ...hine parts Protective clothing and steel toe shoes are recommended when using machinery Wear a restrictive hair covering to contain long hair 14 Use eye and ear protection Always wear ISO approved imp...

Страница 12: ...in machine in top condition Keep clean for best and safest performance Follow instructions for lubricating and changing accessories 29 Reduce the risk of unintentional starting Make sure switch is in...

Страница 13: ...7 5Hp 5 5kw 3Ph 60Hz 220VAC 27A Shipping Weight Approx 1280 lbs 581kg TECHNICAL SUPPORT Our technical support department can be reached at 920 684 4990 and asking for the support desk for purchased m...

Страница 14: ...low for cleaning the entire surface For a more thorough cleaning some parts will occasionally have to be removed DO NOT USE acetone or brake cleaner as they may damage painted surfaces WARNING SUFFOCA...

Страница 15: ...ow these guidelines when lifting with truck or trolley The lift truck must be able to lift at least 1 5 2 times the machines gross weight Make sure the machine is balanced While transporting avoid rou...

Страница 16: ...al to be processed through the machine Space needed for auxiliary stands work tables or other machinery Clearance from walls and other obstacles Maintain an adequate working area around the machine fo...

Страница 17: ...r The accuracy of any machine depends on the precise placement of it to the mounting surface Locate the planer in an area that is level and provides a solid foundation Make sure that any potential kic...

Страница 18: ...s snug enough to hold the extension in position 2 Install the three leveling set screws finger tight and then loosen 1 2 turn 3 Place straight edge across the extension and the main table 4 Level the...

Страница 19: ...contact Running on low voltage will damage the motor In the event of a malfunction or breakdown grounding provides a path of least resistance for electric current to reduce the risk of electric shock...

Страница 20: ...er is to be hard wired to a panel make sure a disconnect switch is readily available for the operator During hard wiring of the Planer make sure the fuses have been removed or the breakers have been t...

Страница 21: ...ckback Fingers Provide additional safety for the operator B Serrated Infeed Roller Pushes workpiece toward the cutterhead C Chipbreaker Breaks off chips created by the cutterhead to prevent tear out a...

Страница 22: ...CHANGING FEED RATE The planer has two selectable feed speeds that feed stock at 22 and 28 feet per minute 6 7 and 8 5mpm To adjust speed move lever D until it clicks into place When the shifter knob...

Страница 23: ...he handwheel A Fig 6 to raise the table so that the in feed roller is about 1 16 above the calibrating board 3 Remove calibrating board from planer and turn the planer ON 4 Turn the handwheel clockwis...

Страница 24: ...corner incremental When working in the incremental mode you can zero out at any time When you get close to your finished thickness zero out the display and measure workpiece thickness Use the display...

Страница 25: ...and hold the SET button until the second zero to the right of the plus sign starts to flash and immediately release it 4 Cycle the SET button by pressing it until the number reads the correct whole n...

Страница 26: ...3 7 938 11 32 0 344 8 731 3 8 0 375 9 525 13 32 0 406 10 319 7 16 0 438 11 113 15 32 0 469 11 906 1 2 0 500 12 700 17 32 0 531 13 494 9 16 0 563 14 288 19 32 0 594 15 081 5 8 0 625 15 875 21 32 0 656...

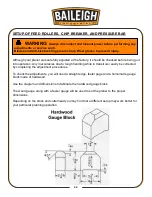
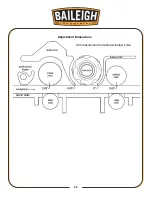
Страница 27: ...straight edge feeler gage and a homemade gauge block made of hardwood Use the diagram and dimensions to fabricate the hardwood gauge block The wood gauge along with a feeler gauge will be used to set...

Страница 28: ...25 25 All measurements are shown below knife Adjustment Dimensions...

Страница 29: ...haft pulley are not in line loosen screw B 2 Move the motor to left and right until adjusted to proper position and tighten the screw again Adjusting Belt Tension 1 Use the two jack bolts A to adjust...

Страница 30: ...ed is more desirable as there is less strain on the motor and a better finish is obtained since there are more cuts per inch of stock in length When the shifter knob is pushed all the way in as shown...

Страница 31: ...just screw B under the table 4 To adjusted the roller on the both sides Used the control lever you can let rollers upward or downward from the table Note Make sure both roller are at the same level Th...

Страница 32: ...rectly under front edge of head casting B as shown 3 Lower head casting until front edge of head casting B just touches the top of the gauge block 4 Move gauge block to the opposite side making them t...

Страница 33: ...lace gauge block under the infeed roller Loosen Nut A turn screw B that will make the feed roller moves upward or downward Then making roller touch the top of gauge block When adjustment have been fin...

Страница 34: ...perly as explained under CHECKING ADJUSTING AND REPLACING KNIVES 3 Place the gauge block on the table directly under the cutterhead as shown Using 0 020 feeler gauge placed on top of the gauge block r...

Страница 35: ...nt or behind the workpiece to avoid kick back injury If the cut is too heavy and bogs down the planer a Turn the planer OFF immediately by pressing the red EMERGENCY STOP button on the power table con...

Страница 36: ...or Keep your work area clear When planing long stock get assistance to receive the workpiece from the outfeed table Avoid planing wood with high water content Wood with more than 20 moisture content o...

Страница 37: ...ill aid in smoother feeding and help prevent pitch buildup Clip Marks If clip marks occur 6 152mm in from each end of the board the pressure bar is too high Turn both right and left hand adjusting scr...

Страница 38: ...he machine planes a taper across the full width of the board the table is not parallel with the cutterhead First check that all knife inserts are properly installed If they are then the table itself m...

Страница 39: ...ark so you can keep track of the rotations IMPORTANT When removing or rotating inserts clean saw dust from the screw the insert and the cutterhead platform Dust accumulation between these elements can...

Страница 40: ...elop on the bed with a commercial rust remover Use compressed air to blow out the interior of the machine in order to keep chips and sawdust from accumulating on the belts and pulleys Check the drive...

Страница 41: ...38 38 Cutter Head Removal 1 Disconnect the machine for the power source 2 Removed Handwheel 3 Remove right side cover and left side cover 4 Loosen screws A B C and remove 5 Remove Chip Bracket...

Страница 42: ...39 39 6 Loosen Nut on motor bracket 7 Remove belt 8 Remove cutterhead pulley...

Страница 43: ...0 9 Place two pieces wood stock on table and raise table until touch the wood stock 10 Loosen and remove nut D The cutterhead gear box can be remove from left side 11 Using a soft mallet remove cutter...

Страница 44: ...tterhead Changing Gearbox Oil 1 Disconnect the machine for the power source 2 Loosen the nut A on the outfeed hole 3 Clean out old lubrication and let it dry 4 Tighten nut A 5 Replace clean lubricatio...

Страница 45: ...allowable maximum depth of cut no more than 1 4 in one pass Parts Lubrication Required No Descriptions Grease Oil 1 Lead Screw Yes No 2 Gear Box No Yes 3 Chain Yes No 4 Chain Yes No 5 Chain Yes No 6...

Страница 46: ...43 43...

Страница 47: ...eplace knife inserts Rough raised grain Dull knife inserts Rotate or replace knife inserts Excessive depth of cut Decrease cutting depth Moisture content too high Remove high moisture content from woo...

Страница 48: ...is still engaged Rotate stop button to disengage Overload automatic reset has not reset Allow machine to adequately cool before attempting restart If problem persists check amp setting on the motor s...

Страница 49: ...ng voltage is incorrect you have a power supply problem If voltage between starter and motor is incorrect you have a starter problem If voltage between starter and motor is correct you have a motor pr...

Страница 50: ...47 47 PARTS DIAGRAM...

Страница 51: ...48 48...

Страница 52: ...49 49...

Страница 53: ...50 50...

Страница 54: ...51 51...

Страница 55: ...2 Socket Head Cap Screw M10 1 5P 25 4 1 14 050324 902 Gear Pulley 1 1 15 006001 071 Flat Washer 10 25 3 0t 2 1 16 000105 101 Socket Head Cap Screw M10 1 5P 20 1 1 17 001301 101 Cap Screw Left Cap M8 1...
Страница 56: ...ket Head Cap Screw M6 1 0P 16 12 14 051267 902 Bearing Housing 4 15 012005 001 Key 8 7 18 2 16 360411 000 Rear Outfeed Roller 1 17 000105 101 Socket Head Cap Screw M10 1 5P 20 9 18 014111 000 V Belt A...
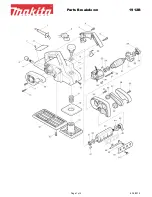
Страница 57: ...7 000105 104 Socket Head Cap Screw M10 1 5P 35 20 38 050303 000 Right Cutterhead Bracket 1 40 000003 102 Hex Screw M8 1 25P 16 2 41 170512 901 Fix Washer 8 42 280055 901 Spring 2 43 360408 902 Shaft 4...
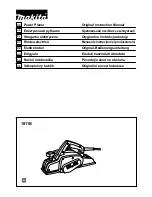
Страница 58: ...t Press Plate Seat 1 78 050305 000 Front Press Plate 10 79 280053 000 Turn Spring 10 80 360410 902 Shaft 2 81 000202 101 Set Screw M5 0 8P 5 9 82 190025 902 Limiting Shaft 1 83 000105 107 Socket Head...
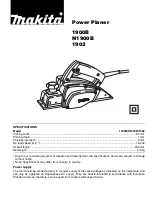
Страница 59: ...ing 6200 1 103 11 000803 103 Socket Head Button Screw M10 1 5P 20 1 103 12 006001 078 Flat Washer 10 5 19 1 5t 1 104 280054 901 Rear Outfeed Roller Spring 2 105 290024 901 Screw 2 106 290025 901 Screw...

Страница 60: ...136 920319 000 Roller Assembly 2 136 1 190027 906 Roller 1 136 2 361233 000 Roller Shaft 2 137 000004 103 Hex Screw M10 1 5P 30 4 138 000104 104 Socket Head Cap Screw M8 1 25P 16 4 139 006001 053 Flat...

Страница 61: ...495 008 Electromagnetic Switch Mounting Plate 1 172 170505 000 Base Side Cover 2 175 050314 008 Foot 4 176 006001 083 Flat Washer 11 37 3 0t 2 179 000204 107 Set Screw M8 1 25P 30 1 180 008308 100 Loc...

Страница 62: ...1 Spacer 2 208 016008 000 Chain 40 60P 1 209 032101 002 Needle Bearing NA 6906 4 210 014105 000 V Belt A56 1 211 016013 000 Chain 40 107P 1 212 016003 000 Chain 40 80P 1 213 940699 000 Manual 1 226 04...

Страница 63: ...53 008001 100 Hex Nut M3 0 5P 5 5B 2 5H 2 254 006302 100 Spring Washer 5 1 9 3 2 255 000303 102 Round Head Screw M5 0 8P 8 2 256 000301 204 Round Head Screw M3 0 5P 15 2 257 472001 003 Cable SJT18AWG...

Страница 64: ...AL LTD UNIT 1 FULLWOOD CLOSE SWIFT VALLEY INDUSTRIAL ESTATE RUGBY WEST MIDLANDS CV21 1QH UNITED KINGDOM PHONE 44 0 24 7661 9267 FAX 44 0 24 7661 9276 WWW BAILEIGH CO UK BAILEIGH INDUSTRIAL GMBH HOFENE...

Отзывы: