


EDITING PATTERNS
Em
br
oide
ry
Ed
it
Embroidering
E-73
E
2
Designing Repeated Patterns
■
Sewing Repeated Patterns
Using the border function, you can create stitches
using repeated patterns. You can also adjust the
spacing of the patterns within a repeated pattern
stitch.
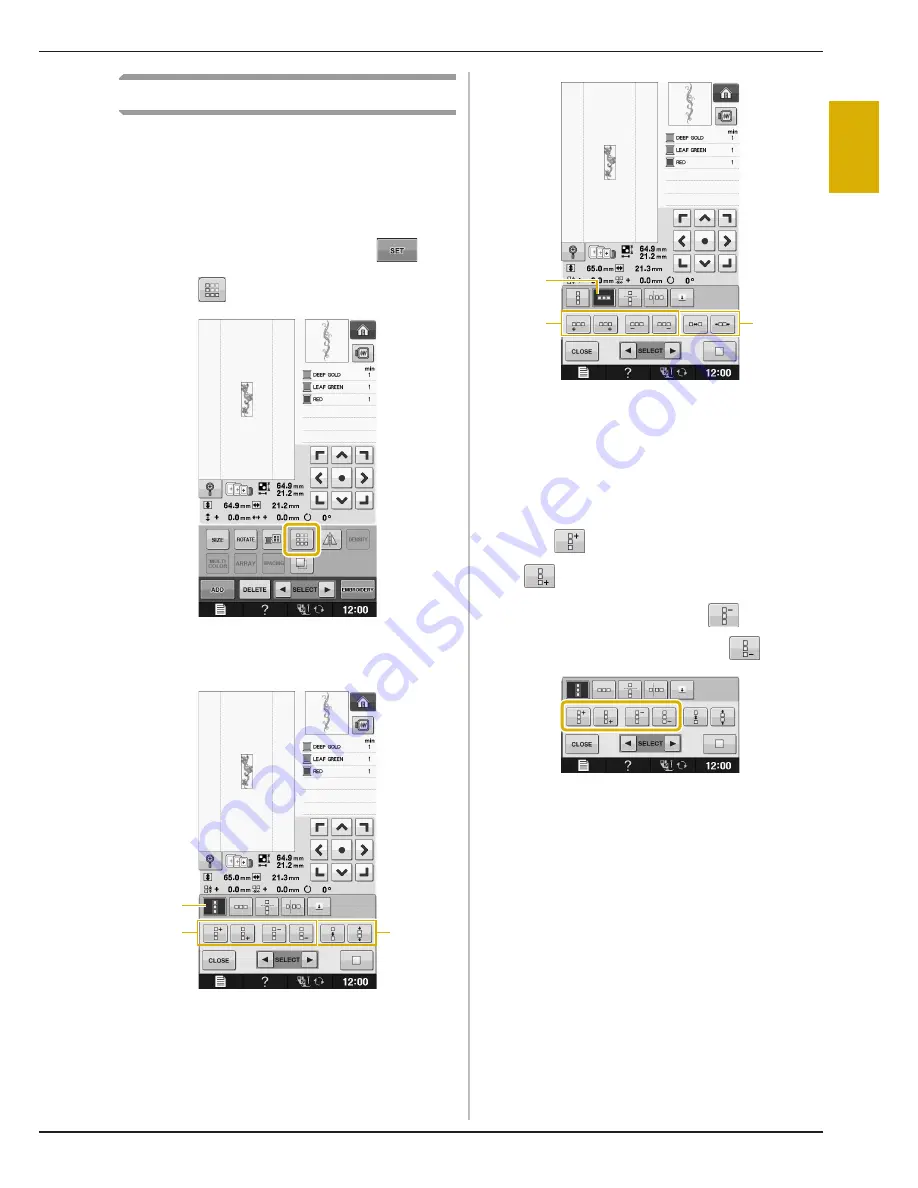
a
Select a pattern, and then press
.
b
Press .
c
Select the direction in which the pattern
will be repeated.
a
Vertical direction
b
Horizontal direction
c
Repeating and deleting vertical keys
d
Repeating and deleting horizontal keys
e
Spacing keys
→
The pattern direction indicator will change
depending on the direction selected.
d
Use
to repeat the pattern on top and
to repeat the pattern at the bottom.
*
To delete the top pattern, press
.
*
To delete the bottom pattern, press
.
a
c
e
b
d
e
Содержание Urity BLTY
Страница 1: ......
Страница 73: ...USING FUNCTIONS BY CONNECTING THE ACCESSORY TO THE MACHINE Getting Ready Basic operations B 71 B 1...
Страница 109: ...USEFUL FUNCTIONS Sewing Basics Sewing S 19 S 1...
Страница 184: ...COMBINING STITCH PATTERNS S 94 e Press The entered pattern is repeated More Examples Press Press Press Press...
Страница 193: ...USING THE MEMORY FUNCTION Character Decorative Stitches Sewing S 103 S 3...
Страница 206: ...TROUBLESHOOTING S 116...
Страница 224: ...ATTACHING THE EMBROIDERY FRAME E 18 b Pull the embroidery frame toward you...
Страница 304: ...TROUBLESHOOTING E 98...
Страница 331: ......
Страница 332: ...English 882 C41 Printed in Taiwan XF3648 001...


