


10
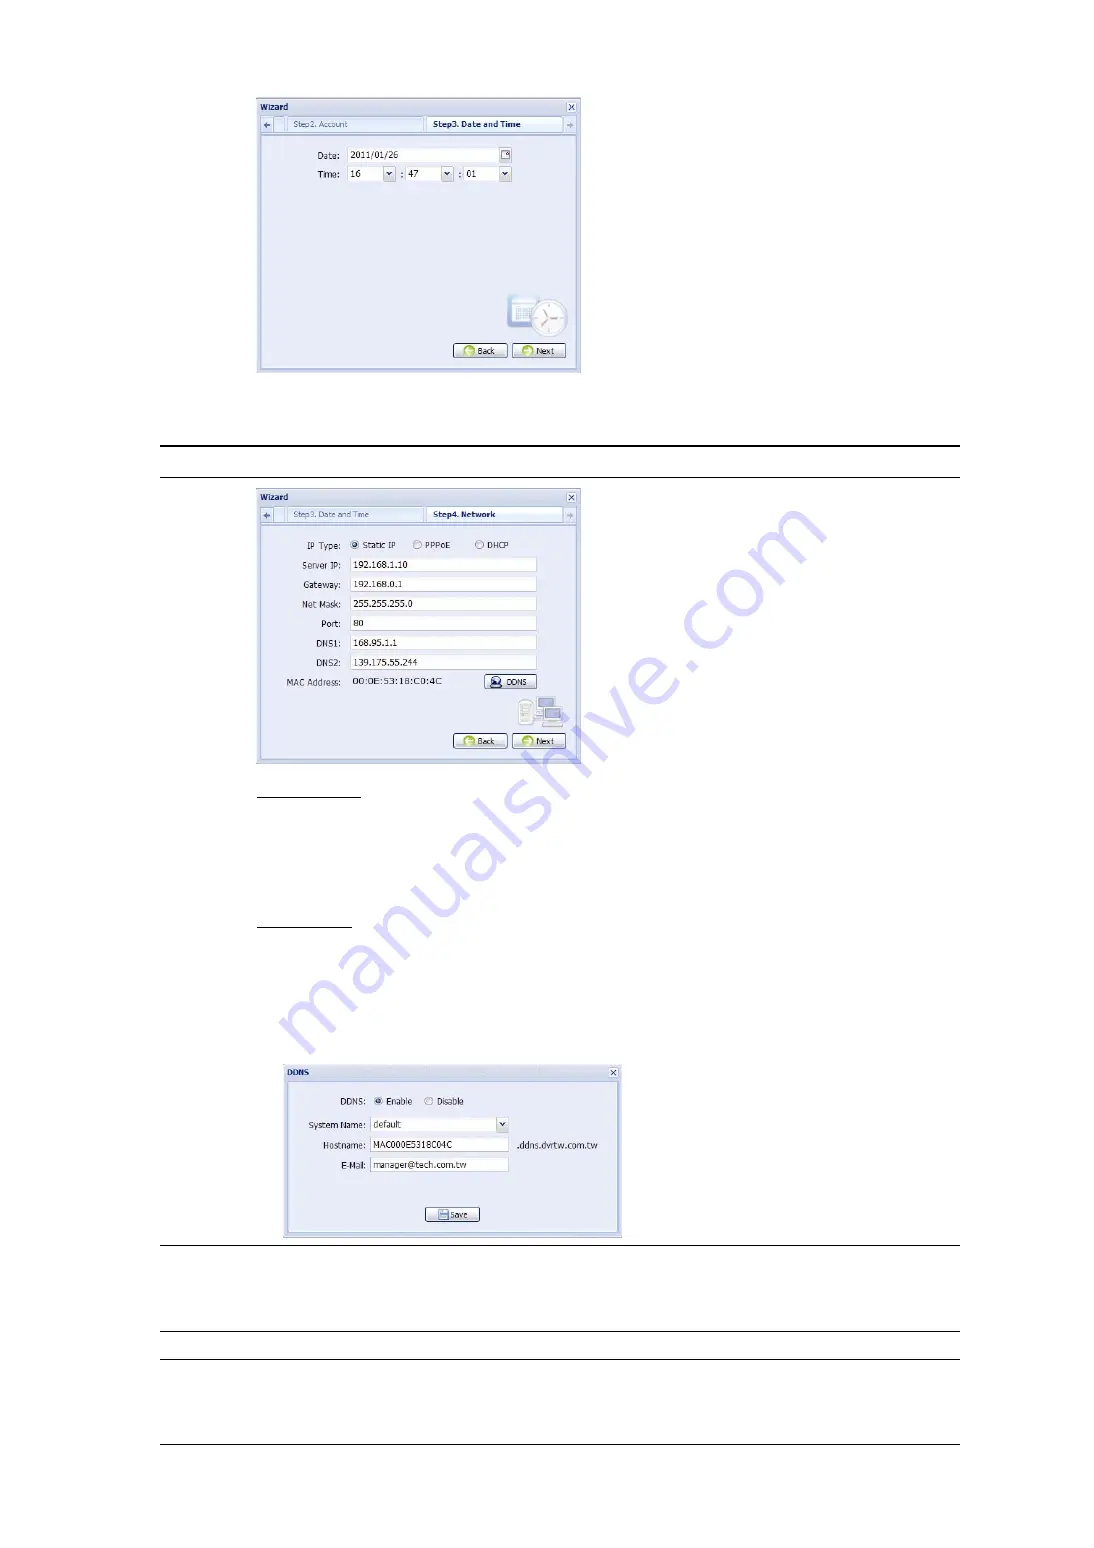
Step6: In “Network”, select the network type based on your network environment (Static IP /
PPPoE / DHCP), and key in the information needed.
Note:
This camera doesn’t support POE router or hub.
For Static IP:
a) Enter the information of “Server IP”, “Gateway” and “Net Mask” obtained from your ISP (Internet
Service Provider).
b) Enter the port number. The valid number ranges from 1 to 9999. The default value is 80. Typically, the
TCP port used by HTTP is 80. However in some cases, it is better to change this port number for
added flexibility or security.
For PPPoE:
a)
Enter the user name and password obtained from your ISP.
b)
Continue the DDNS setting by clicking the “DDNS” button, as reminded in this page.
- Select “default” in “System Name”.
- In “Hostname”, keep the default value, i.e. the MAC address of this camera. Then, note down the
whole address of the camera, for example, MAC000E5318C04C.ddns.dvrtw.com.tw.
- (Optional) Enter your email address to receive messages from the DDNS server.
Note:
Please at least use the default address to access your DVR remotely once. This is
to ensure our DDNS server has your DVR registered. Then, you may change the
host name to a more meaningful name to memorize later here.
Note:
You can also create a DDNS account from a website which provides free DDNS
service. For details, please refer to “APPENDIX 1 CREATING AN ACCOUNT FOR
DDNS SERVICE” at page 12.
c)
Select “Save” and return to the wizard.


