6
3. CAMERA CONNECTION TO INTERNET
Before using this network camera, please follow the instructions below to finish the network
connection settings based on your installation environment:
To configure the network settings, you must connect the camera to your PC by LAN. For
details, please refer to “3.1 Camera Access via LAN” at page 6.
To configure the network settings via Wizard, please refer to “3.2 Network Configurations
via Wizard” at page 9.
3.1 Camera Access via LAN
For Windows XP users:
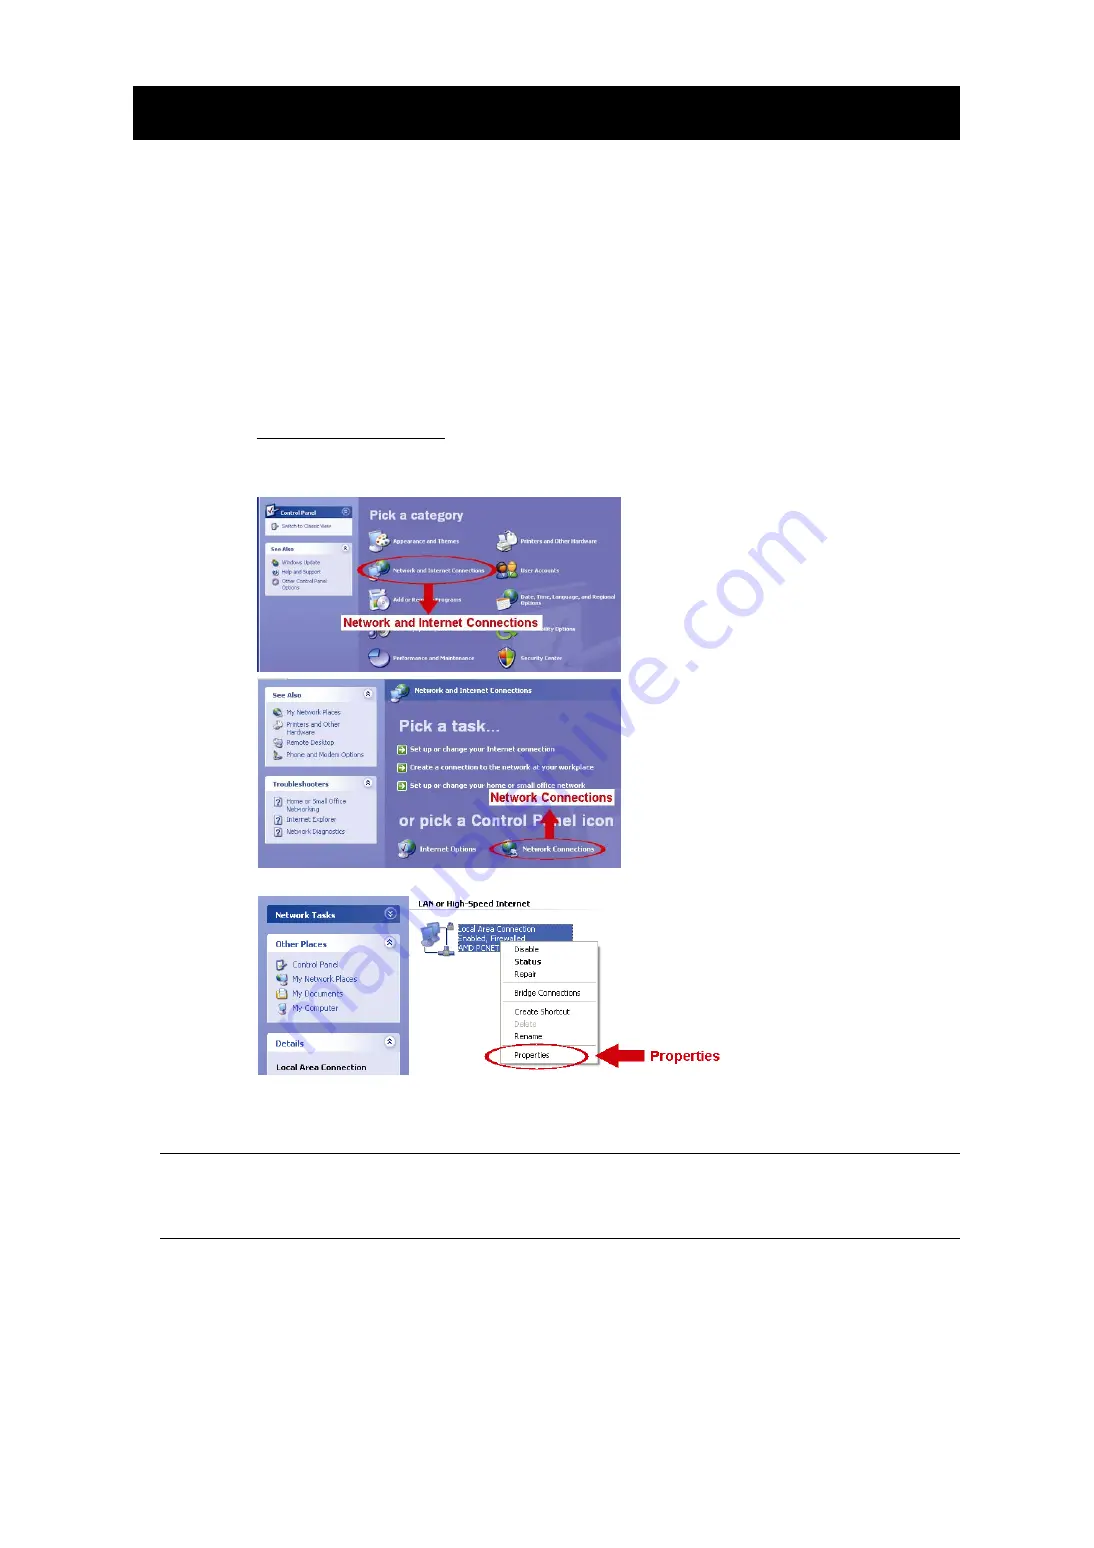
a) Select
“start”
“All Programs”
“Control Panel”
“Network and Internet Connections”
“Network
Connections” (If you’re in “Category View”).
b) In “LAN or High-Speed Internet”, right-click on “Local Area Connection”, and select “Properties”.
c) In the “General” tab, select “Internet Protocol (TCP/IP)”, and select “Properties”.
d) In the “General” tab, select “Use the following IP address”, and set the IP address to “192.168.1.
XXX
”
(
XXX
can be any value from 1~255 except 10).
Note:
It’s recommended to note down the current settings first and then change as
instructed. It’s helpful when you need to restore the PC network settings for
connecting to Internet later.
e) Click “OK” to close the “Internet Protocol (TCP/IP) Properties” dialog box. Then, click “Close” to close
the “Local Area Connection Properties” dialog box.


