


33
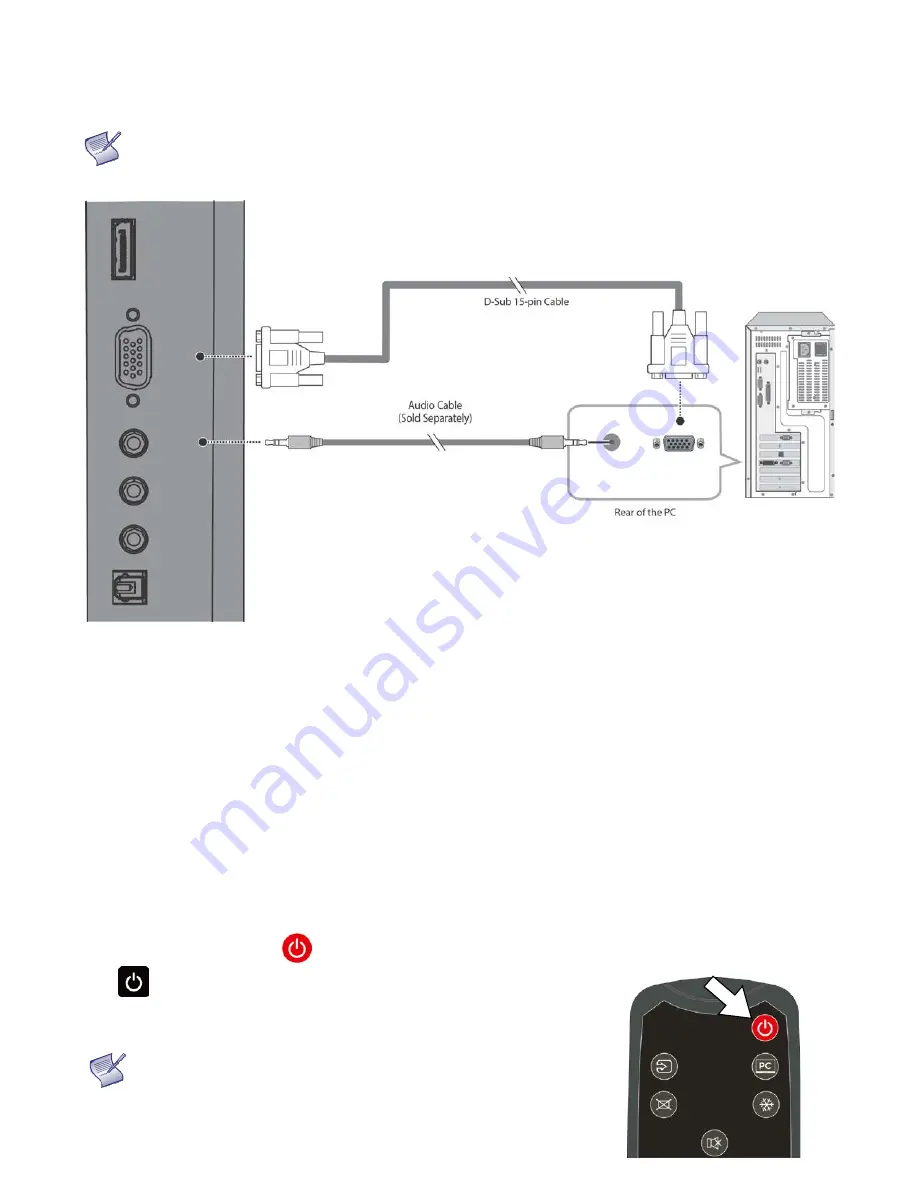
VGA Source Connection:
Connect a personal computer or other RGB source to the VGA input as shown in
NOTE
Refer to Supported Timings on page 69 for a list of compatible input signals.
Figure 3-6. VGA Source Connections
Turning on the Power
1.
Turn on your source components.
2.
Plug the female end of the supplied power cord into the AC receptacle on the side of the display (AC
100V ~ 240V). See Figure 2-2.
3.
Connect the other end to your AC power source.
4.
Turn on the main power switch at the side of the display (see Figure 2-1). The power indicator lights
orange to indicate that the display is in “standby” mode.
5.
Press the power button (
) on the remote control to turn on the display or press the power button
(
) on the keypad.
6.
After a brief warm-up period, the display will display an image.
NOTE If there's no input signal for a period of time, the display will
automatically go into power saving (sleep) mode.
Содержание AVF-7510
Страница 1: ...Model AVF 7510 Installation Operation Manual AVF 7510 Super slim UHD LED Display...
Страница 10: ...10 Notes...
Страница 14: ...14 Notes...
Страница 21: ...21 Input Panel Figure 2 2 shows the display input panel Figure 2 2 Display Input Panel Side Front View...
Страница 66: ...66 Notes...
Страница 73: ...73 Notes...
Страница 77: ...77 Appendix IV Wall Mount Safety Notes...
Страница 78: ...78...
Страница 81: ...81 System IP Configuration Network Status Load Default Setting...
Страница 82: ...82 Firmware Update Boot Loader Upgrade...
Страница 87: ...87 Reset Device Reset NET2UART module...


