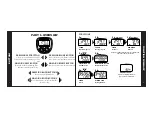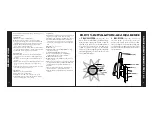
3. CADENCE MAGNET AND PICKUP.
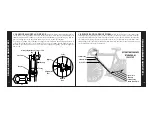
Attach the cadence magnet with a cable tie
on the inside of the left crank arm about 3 inches from the pedal. Align the crank with the left
chainstay and mount the pickup on the bottom of the left chainstay opposite the magnet. Run the
wide tie through the slot in the pickup and wrap its loosely around the chainstay.
To position the pickup, slide it backward or forward on the chainstay until its alignment notch is
opposite the alignment ridge on the magnet. Then rotate the pickup upward until the gap be-
tween the magnet and pickup is 1.5 mm to 5 mm. After aligning the pickup, pull the tie tight and
trim its end.
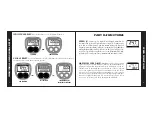
3. RECEIVER AND CADENCE WIRES.
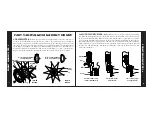
Attach the receiver wire to the inside of the
chainstay with ties gathering any excess under one of the ties. Run the cadence wire from under the
bottom bracket shell and up the underside of the down tube. Secure the wire with ties, then run it up
the brake cable wrapping excess wire around the cable. Leave enough slack in the wire between the
frame and the brake cable that the handlebars turn all the way in both directions. Install the mount
on the handlebars as described on page 22.
Cadence Wire
Down Tube
Cable Housing
Bottom bracket shell
Chain stay
Receiver wire
Cadence pickup
GEAR/C
ADENCE MOUNT
-STEP 4
18
Rotate pickup until gap is 1.5 mm to 5 mm
Magnet
Gap
Crank arm
Chainstay
Pickup
Magnet
Alignment
ridge
Pickup
Alignment
notch
GEAR/C
ADENCE MOUNT
-STEP 3
17
BE SURE THAT CADENCE
IS TURNED ON–
SEE SETUP


