Page 2-2
LOOM SET-UP
1.)
Remove the loom from the shipping box by opening the flaps at
either end of the box. Slide the entire loom out of the box,
including the wooden packing base the loom is attached to.
2.)
Remove all tape and packing materials from the loom.
3.)
Remove accessory box(es) from the loom. If you received three
accessory boxes, one of them is a bench, which has assembly
instructions packed with it, the other is the Compu-Dobby III.
4.)
Remove the loom from the wooden packing base.
5.)
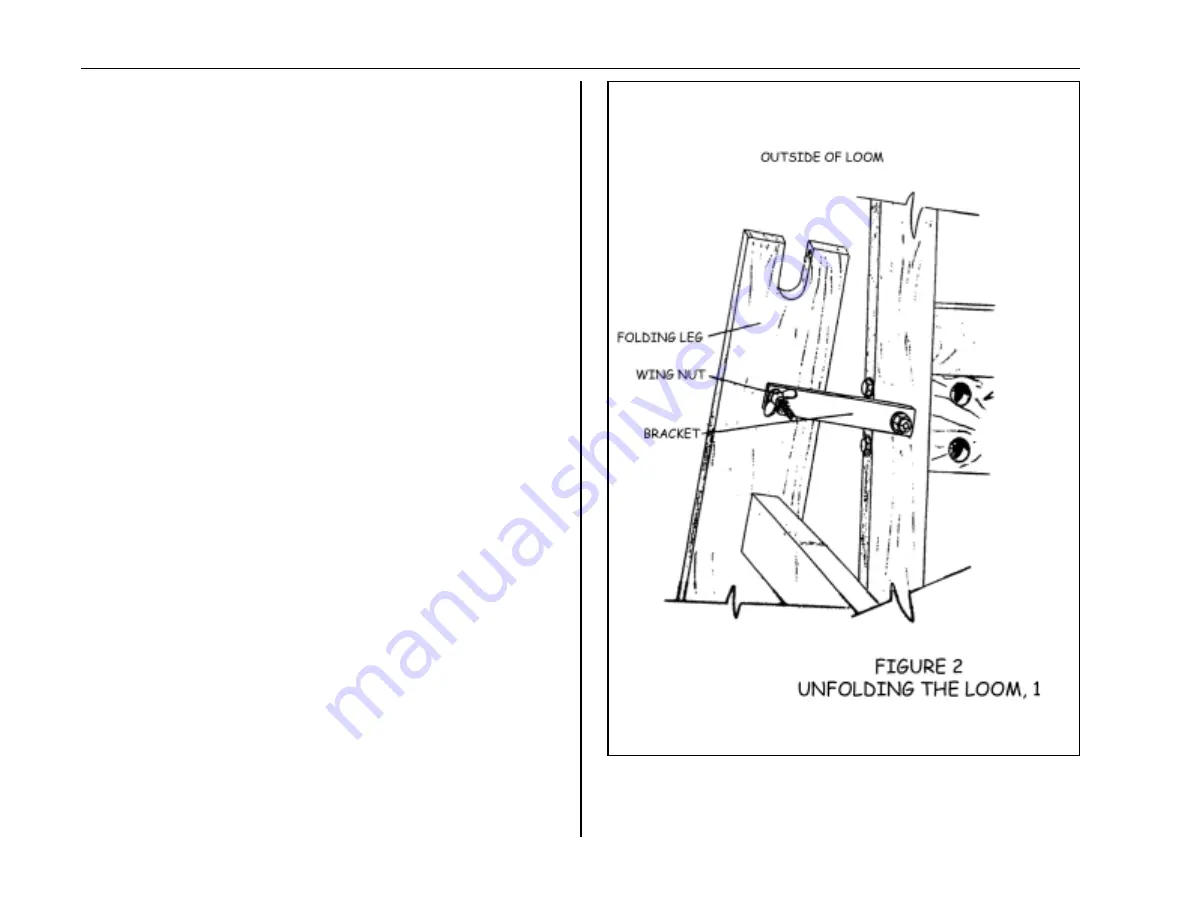
Release the folding legs at the rear of the loom (as shown in
Figure 2) by loosening the wing nut from the carriage bolt on
each side of the loom. Unfold the loom, holding the rear portion
in place by swinging up the wooden support arms at either side of
the loom and attaching them to each folding leg, using the same
carriage bolts that held the loom in the folded position. Notice
that there are slots in three positions on each support arm (as
shown in Figure 3). Any of the three positions may be used to
attach the loom at this point. This is an adjustable feature which
allows the loom to accommodate a large amount of warp build
up. With very long warps, weaving should start in the furthest
back position, gradually moving to the next two settings as the
warp is woven off. If you plan on using a raddle while warping
the loom, use the position shown in Figure 3.


