


05/09 Rev. 5.02-01
USER MANUAL
Setup & Operation
AP4.4 – AP5.4
23
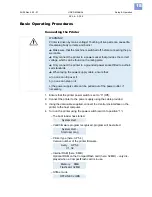
•
Standalone operation: Selecting a print job stored on a CF card (e.g.,
Test-
dat.FOR
):
Creating a Print job
Essentially, there are two ways of creating a print job: Either by using the
AP 4.4/5.4 printer driver for Windows or by creating a text file with print com-
mands.
Windows Printer Driver
AP 4.4/5.4 printer drivers are available for different versions of Windows. You
can print from nearly every Windows application using the printer drivers.
However, functionality is strongly dependent on the choice of software. Spe-
cial label layout programs are best suited, e.g. Jetmark 2000 or WinLabel.
You can download printer drivers from the
Avery Dennison internet site
How to use the printer driver is explained by the driver’s help function. The help
function on your Windows operating system will tell you how to install a driver.
File with Print
Commands
You can write a sequence of commands in a text file and send it to the printer.
To do this, you can use any text editor and the MS-DOS copy command. Easy
Plug provides a special command language to formulate print jobs. However,
writing a print job in text file format does require some programming knowl-
edge. Furthermore, you will not be able to preview the resulting printout on the
screen. Instead, you have to run a test print to see a copy of the finished result.
You can find a practice example of a print job together with instructions in the
Easy Plug Manual
in the section “Program Example” under “General, Defini-
tions Commands Overview”.
Transferring a Print Job
The printer can only complete a print job once this job has been transferred
into the printer’s RAM. This can be accomplished in two ways: using direct
transfer from your PC via a
data cable
or by saving to a
CompactFlash (CF)
card
.
Data Cable
The print job can be transferred via parallel or serial communication. To do
this, connect the PC and the printer via the serial or parallel interface. Send
the print job file – from the DOS window – to the interface (e.g. “copy testjob.txt
lpt1” to send the print job to the parallel interface).
To send the print job from a text program, you need to ensure that the driver
for the relevant printer is installed.
Special label layout programs, such as Jetmark, make this much easier.
These programs also require a driver to be installed.
Card
You require the following to load a print job from a CF card:
•
a CF card, onto which you can copy the print job,
•
a PC with a card reader
ONLINE x JOBS
Choose a file
Testdat.FOR
Prog
Online


