


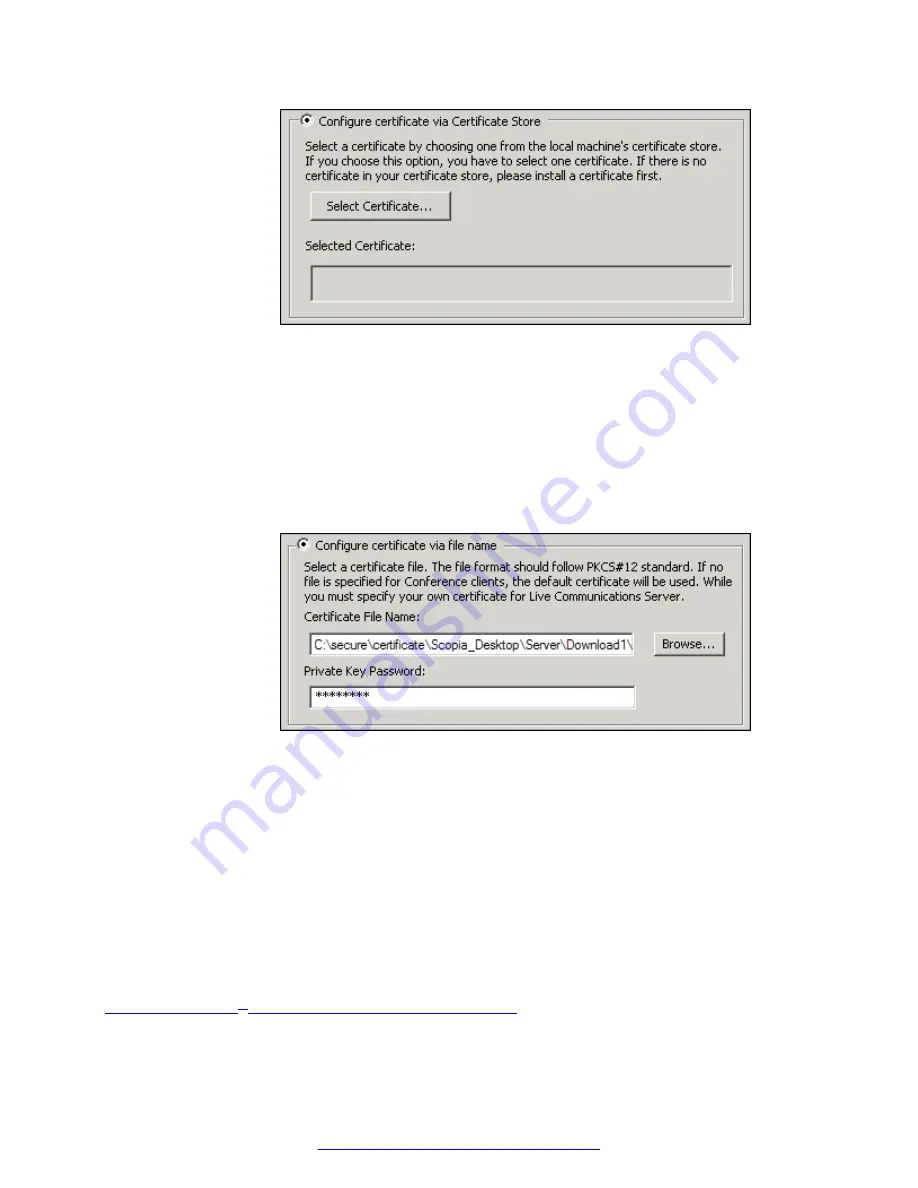
Figure 30: Configuring certificate using installed on the local machine
b. Select
Select Certificate
to browse the WCS.
c. Select the certificate from the list of certificates in the WCS.
7. To locate a certificate by its filename:
a. Select
Configure Certificate via File Name
.
Verify the certificate is not in the Scopia
®
XT Desktop installation directory or any of its
sub-directories, to avoid its accidental deletion during an upgrade.
Figure 31: Configuring certificate using the file name
b. Browse to the PKCS12 certificate and select it.
c. Enter the private key password for the certificate.
8. Select
OK
.
9. Verify that the certificate information is listed in the
Selected Certificate
pane.
10. Select
Apply
.
11. Select
OK
, and then select
OK
again.
12. Select
Restart Services
.
Related Links
XT Desktop server Communications
Encrypting Scopia
®
XT Desktop server Communications
August 2015
Avaya Scopia
®
XT Desktop Server Installation Guide
43
Содержание Scopia XT Camera Switch
Страница 1: ...Avaya Scopia XT Desktop Server Installation Guide Release 8 3 3 Issue 1 August 2015...
Страница 2: ......