


UPS Startup
24
Avaya
t
RS9 UPS (9–18 kVA, 9-Slot Models) Site Preparation, Installation and Operator’s Manual
S
164201543 Rev A
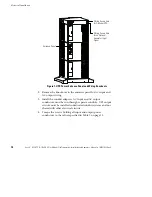
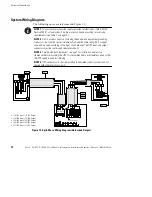
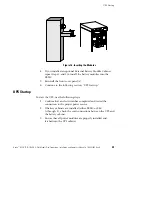
Power and Battery Module Installation
Use the following procedure to install the power and battery modules
and the optional battery charger module into the Avaya RS9 cabinet:
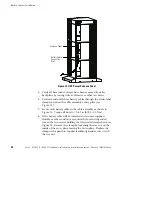
1.
Remove the front cover panel(s) of the cabinet.
The panels have spring latches on the left and right sides that
hold them in place.
NOTE
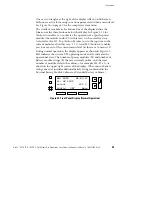
Place battery modules below all power and/or battery charger modules in the
UPS cabinet. Two battery modules (side-by-side) are required to complete each battery
string.
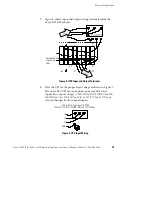
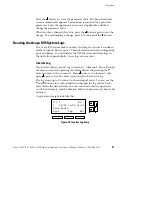
2.
Insert the battery modules into the cabinet.
Push each module firmly until the front latch snaps to secure
the battery module (see Figure 16). Repeat for each additional
battery module.
NOTE
A maximum of seven power and/or battery charger modules can be installed in
the system.
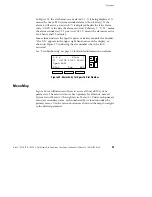
3.
Insert the power modules into the upper slots of the cabinet.
When required, insert the battery charger module above the
battery modules in the UPS cabinet. To install the power
module or battery charger module:
Lower the front down slightly and lift the rear edge over the
safety stop on the center support rail. Keep the module handle
extended until the module is fully inserted (see Figure 16).
Raise the module handle to secure the module into the cabinet.
Be sure the handle latch snaps into place. Tighten the
thumbscrew on the handle.