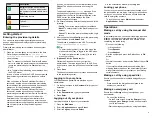
Icon
Description
Indicates that you have missed a
call. The + in the icon indicates that
the number of missed calls is more
than 9.
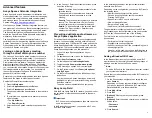
Autodialing feature.
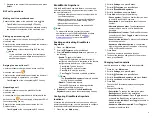
Toll call.
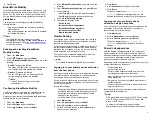
Toll free call.
Getting started
Entering the provisioning details
You can enter the provisioning server address on the
phones when the phone displays the Enter provisioning
details screen.
Obtain the provisioning server address from the system
administrator.
1. When you boot the phone for the first time, the Auto
Provisioning screen displays
Do you want to
activate Auto Provisioning now?
, press one
of the following:
•
Yes
: To connect to the Device Enrollment Services
server to obtain the provisioning server address and
ignore the provisioning server address from the
DHCP.
•
No
: To obtain the provisioning server address from
the DHCP server.
In case of a time out, and the DHCP does not provide
the provisioning server address, the phone selects
Yes
.
If the connection to Device Enrollment Services is
successful, and the phone receives the provisioning
server address, the phone continues to boot and not
prompt you for the provisioning server address.
If the connection to Device Enrollment Services is
successful, and the phone does not receive the
provisioning server address from Device Enrollment
Services, the phone prompts you for a Numeric
Enrollment code. Contact your administrator for a
numeric enrollment code. When you enter the valid
numeric enrollment code, the phone continues to boot
and not prompt you for the provisioning server
address.
If you do not have a numeric enrollment code, press
Cancel
. The phone continues to boot using the
DHCP.
The phone displays the
Starting
message. If the
phone does not receive the provisioning server
address from the Device Enrollment Services or the
DHCP server, the phone displays the Enter
provisioning details screen.
2. On Enter provisioning details screen, press one of the
following:
•
Config
: To enter the provisioning server address.
•
Never
: To never prompt for the provisioning server
address.
•
Cancel
: To cancel the prompt and display the Login
screen.
3. After you have pressed
Config
, enter the provisioning
server address in the
Address
field.
The address is an alphanumeric URL. For example,
http://myfileserver.com/j100/
.
Tip:
To enter the dot symbol (.) in the field, press the
alphanumeric soft key to toggle to the ABC mode.
To enter the forward slash symbol (/) in the field,
press the / soft key.
4.
(Optional)
Enter the
Group
number.
Obtain the Group number from your system
administrator. The value ranges from 0 to 999. If you
do not enter a value, the phone uses the default value
of 0.
5. Press
Save
.
The phone continues the boot process and connects
to the provisioning server.
Logging in to your phone
Your extension and password are provided by your
administrator.
1. On the Login screen in the
Username
field, type your
extension.
2. Press
Enter
.
3. In the
Password
field, type your password.
4. Press
Enter
.
Logging out of your phone
Use this procedure to log out of your extension.
1. Press the
Main menu
.
2. Scroll to
Applications
and press
Select
.
3. Scroll to
Log out
, and press
Select
.
4. In the confirmation window, press
Log out
.
Locking your phone
You can lock your phone to prevent unauthorized use of
the phone when you are away. Locking your phone does
not log you out, you can still receive all calls and make
calls to emergency numbers.
To lock the phone, press
Main menu
, and select
Applications
>
Lock
.
Operations
Making a call by using the manual dial
mode
In a manual dial mode, you can edit the dialed input and
initiate a call using the current dialed string. When you
initiate a call, there is no dial tone, and no time out for
completing the dialed string.
• Do one of the following:
- Lift the handset.
- Press
Speaker
.
- Press
Headset
.
• Dial the number, and press the
Call
soft key or
OK
button.
Or
• Just dial the number, and press the
Call
soft key or
OK
button.
If your system administrator has enabled the digit
mapping feature the phone can automatically correct
wrongly dialed numbers or prevent you from dialing
certain numbers.
Making a call by using speed dial
Ensure you have speed dial numbers assigned to your
contacts.
Press and hold the dial pad key assigned to the
number you want to call.
Making an emergency call
Ensure that the
Emerg
soft key is assigned by your
administrator.
Do one of the following:
• On the Phone screen, press the
Emerg
soft key,
and again press
Emerg
when the phone prompts
you for confirmation.
• Dial the emergency number by using the dial pad.
2


