background image

20

A

d

va

n

ce

d

 S

et

ti

n

g

s

21

A

d

va

n

ce

d

 S

e

tt

in

g

s

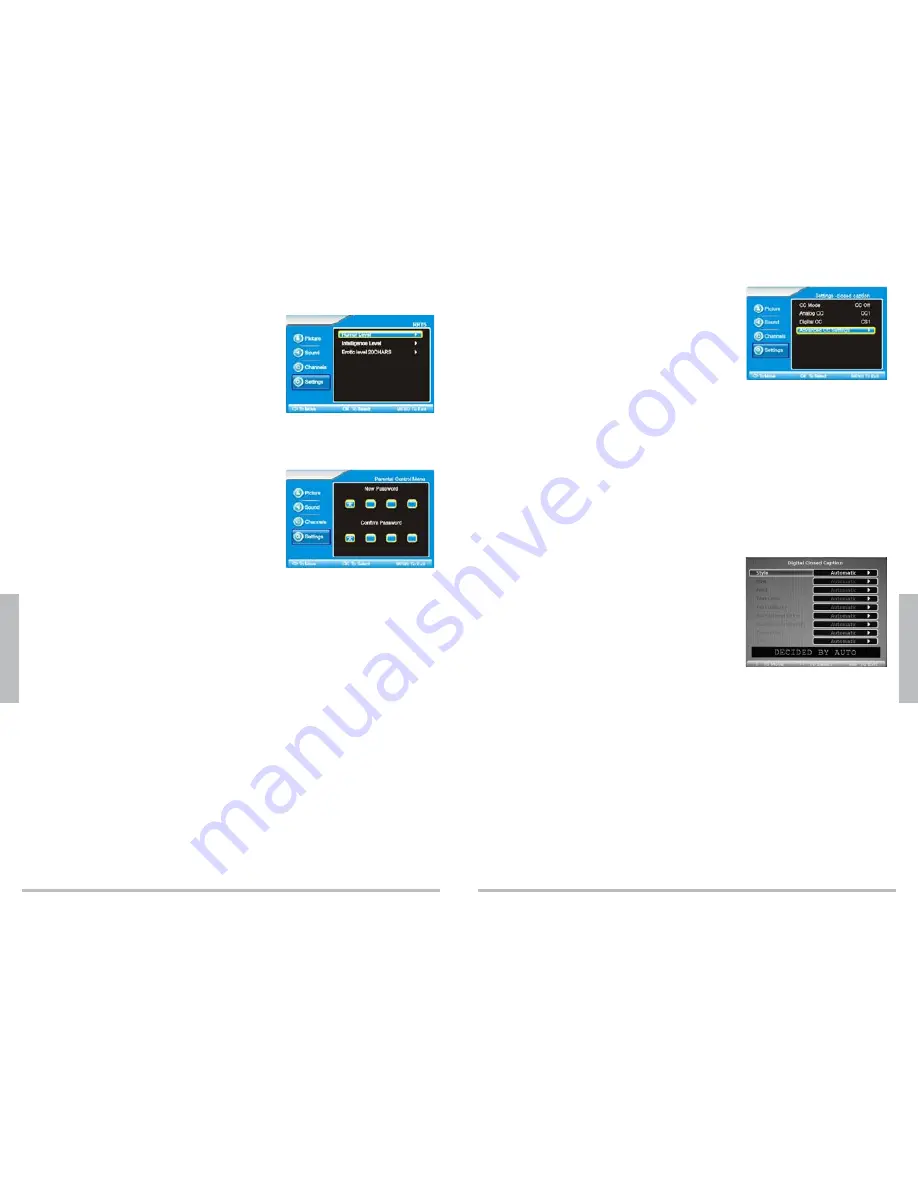
Set Advanced Parental Lock Ratings

1.

  Follow Steps 1 through 4 under “

Parental Control Options.

2.

  Press 

 or 

 to select 

Advanced Rating

, then 

press 

OK

 or 

. Select 

ON

 and press 

.

3.

  Press 

 or 

 to select 

Advanced Parental Lock

then press 

OK

 or 

.

4.

  Use 

 or 

 to choose 

Humor Level

Intelligence 

Level

, or 

Erotic Level 20CHARS

. Press 

OK

 or 

.

5.

  Use 

 or 

 to choose the level you want to block, 

then press 

OK

. Press 

OK

 again to unblock.

6.

  Repeat steps 4 and 5 for each level you wish to block or unblock.

7.

  Press 

MENU

 to accept changes and go back to the previous menu.

n


Note

: Advanced Parental Lock Ratings will not appear if the TV is not receiving a signal.

Set the Password

Your TV comes with a default password of 0000. Follow 

these steps to change it.

1.

  Follow Steps 1 through 4 under “

Parental Control 

Options.

2.

  Press 

 or 

 to select 

Password Set

, then press 

.

3.

  Use the number keys to enter 4 digits in 

New Password

.

4.

  After you enter the last digit, enter the same 4 digits in the 

Confirm Password

 boxes.

5.

  Press 

MENU

 to accept changes and go back to the previous menu.

n


Note

: If you have changed and forgotten your password, enter 8899. Then, set a new password.

Set the Time and Date

1.

  Press 

MENU


on the TV or remote control. The main menu displays.

2.

  Press 

 or 

 to select 

Settings

, then press 

OK

 or 

.

3.

  Press 

 or 

 to select 

Time Set

, then press 

OK

 or 

.

Automatically Set the Date and Time

1.

  Follow steps 1 through 3 under 

“Set the Time and Date

.

2.

  Press 

 or 

 to select 

Time Set Menu

, then press 

3.

  Choose 

Auto

, and press 

OK

 or 

. The time and date automatically update based on the 

Time Zone

 selected.

4.

  Press 

 or 

 to select 

Time Zone

, then press 

 or 

. Choose 

Eastern

Central

Mountain

Pacific

Alaska

, or 

Hawaii

, and press 

OK

5.

  Wait a few moments, then press 

OK

 or 

MENU

 to exit.

Manually Set the Date and Time

1.

  Follow steps 1 through 3 under 

“Set the Time and Date.”

2.

  Press 

 or 

 to select 

Time Set Menu

, then press 

.

3.

  Navigate to 

Manual

, and press 

.

4.

  Press 

 or 

 to select 

Time Zone

Year

Date

, and 

Time

, then press 

.

5.

  Repeat steps 2 and 3 to set the time. Press 

MENU


when finished.

Set Closed Captions

Closed Captions (CC) are subtitles that display the 

dialogue, narration, and sound effects of a TV program. You 

can select whether or not to display them and whether 

or not to mute the sound while they’re displayed. Closed 

Captions are not available for all channels.


„

Press 

CC

 on the remote to choose 

CC Off

 to hide captions, 

CC On

 to display captions, 

or 

CC On Mute

 to show captions and mute audio. TV defaults to 

CC Off

.

To set specific CC channels:

1.

  Press 

MENU


on the TV or remote control. The main menu displays.

2.

  Press 

 or 

 to select 

Settings

, then press 

OK

 or 

.

3.

  Press 

 or 

 to select 

Closed Caption

, then press 

.

4.

  Press 

 or 

 to choose 

CC Mode

Analog CC

, or 

Digital CC

, then press 

 to enter 

settings. Press 

 or 

 to navigate.


CC Mode

: CC Off, CC On, and CC On Mute


Analog CC

: CC1, CC2, CC3, CC4, TEXT1, TEXT2, TEXT3, and TEXT4


Digital CC

: CS1, CS2, CS 3, CS4, CS5, and CS6

5.

  Press 

 to choose an option and return to the menu.

To change the way digital closed captions display:

1.

  Follow steps 1 through 3 under “

To set specific CC 

channels

.”

2.

  Press 

 or 

 to choose 

Advanced CC Settings

then press 

.

3.

  Press 

 or 

 to choose 

Style

Size

Font

Text Color

Text Opacity

Background Color

Background Opacity

Edge Effect

, or 

Edge Color


and press 

 or 

 to cycle through options. A preview 

appears at the bottom of the screen each time you change an option.

4.

  Press 

MENU

 to save changes and return to the previous menu.

Change Menu Settings

1.

  Press 

MENU

. The main menu displays.

2.

  Press 

 or 

 to select 

Settings

, then press 

OK

 or 

 to select 

Menu Setting

.

3.

  Press 

 or 

 to select 

Language

Transparency

, or 

Sleep Timer

, then press 

.


  Language

: English, Spanish, French.


  Transparency

: choose how translucent or opaque the on-screen menu appears


Sleep Timer

: choose to have the TV automatically turn off in 5 to 240 minutes. Press 

OK

 to change settings.

4.

  Press 

 or 

 to highlight options, then press 

OK

 or 

MENU

 to accept and go back to 

the previous menu.

Содержание 16-911

Страница 1: ...THE PERFORMANCE YOU NEED TM 15 4 LCD HDTV User s Guide 16 911 Please read this user s guide before using your new TV ...

Страница 2: ...ced Settings 15 Picture Settings 15 Use Preset Picture Settings 15 Customize Picture Settings 15 Advanced Video Settings 15 Audio Settings 16 Use Preset Audio Settings 16 Customize Audio Settings 16 Advanced Audio Settings 17 Channel Settings 17 Set theTuning Band 17 Search for Channels Automatically 17 Search for Channels Manually 18 View the Channel List 18 Add or Delete Favorites 18 Edit a Chan...

Страница 3: ...ly or has been dropped 15 Please keep the unit in a good ventilation environment 16 WARNING To reduce the risk of fire or electric shock do not expose this apparatus to rain or moisture The apparatus shall not be exposed to dripping or splashing and that no objects filled with liquids such as vases shall be placed on apparatus 17 WARNING The mains plug appliance coupler is used as disconnect devic...

Страница 4: ... through channels On the main menu and source screens press to go and VOL VOL Increase or decrease volume On the main menu and source screens press to go and SOURCE Toggle between all available input sources On the main menu press to confirm selections IR Receiver HDMI Connect to HDMI devices via HDMI cables to transmit audio and video PC AUDIO Connect to the audio output of a computer PC RGB Conn...

Страница 5: ...thin of 20 ft 6 m of the TV POWER Turn the TV on or to standby SOURCE Select an available video input source f Return to the previous channel EXIT Exit the menu MENU Access the TV menu VOL Decrease or increase the volume CH Select next previous channel SLEEP Set the sleep timer ASPECT Select the screen size S MODE Select an audio preset P MODE Select a video preset CC Turn closed captions on off I...

Страница 6: ...ion supports HD video signal up to 720p Connecting a Component Video Device 1 Connect the device s component outputs Y Pb Pr to the COMPONENT jacks on the back of the TV Match the colors on the connection cables with the colors on the jacks For component cables and jacks Green Y blue Pb and red Pr 2 Use an audio cable not supplied to connect a device s audio output jacks to the AV IN audio jacks o...

Страница 7: ...ome Theater Connect audio and video through your A V receiver amplifier 1 Connect audio and video cables from your DVD player or other device to your A V receiver amplifier then connect the receiver amplifier to the TV 2 Refer to the instructions from your A V receiver amplifier or speaker system to make speaker connections nNote For best results use the highest quality of audio video cables that ...

Страница 8: ...the entire screen and eliminates black bars May cut off parts of images but will not distort or stretch the picture Full Screen Stretch some 4 3 or 16 9 content Stretch the image to full screen but may distort image Basic Operation Initial Setup Menu 1 Plug the TV s power cord into a standard AC outlet then press POWER The Initial Setup Menu appears when you first turn on the TV 2 Press or to sele...

Страница 9: ... Audio Channel Audio Language 1 Audio Language 2 or Advanced Audio 3 Press OK or to change settings explained below and use or to navigate 4 Press MENU to accept changes and go back to the previous menu Balance Use to move the sound to the right speaker and to move sound to the left speaker Defaults to 0 Audio Channel Mono Stereo default SAP second audio program Audio Language 1 and 2 Set up to tw...

Страница 10: ...changes and go back to the previous menu 6 To view the channel label you set press INFO while on that channel Settings Parental Control Options To prevent children from viewing adult programs you can block specific shows or age ratings 1 Press MENU on the TV or remote control The main menu displays 2 Press or to select Settings then press OK or 3 Press or to select Parental Control Menu then press...

Страница 11: ... Time Set Menu then press 3 Navigate to Manual and press 4 Press or to select Time Zone Year Date and Time then press 5 Repeat steps 2 and 3 to set the time Press MENU when finished Set Closed Captions Closed Captions CC are subtitles that display the dialogue narration and sound effects of a TV program You can select whether or not to display them and whether or not to mute the sound while they r...

Страница 12: ...ENU to return Press to begin auto adjustment The message Auto Adjustment in progress Please wait appears Once the message is gone press MENU to return Troubleshooting Problem Possible Solution No picture Make sure the power cord is plugged in The batteries in the remote may be dead Replace the batteries and try again The power outlet may be faulty Plug in another device If it does not work have an...

Страница 13: ...one 1 year after the date of purchase from an authorized retailer THERE ARE NO OTHER WARRANTIES This warranty does not cover a damage or failure caused by or attributable to abuse misuse failure to follow instructions improper installation or maintenance alteration accident or excess voltage or current b improper or incorrectly performed repairs by non authorized service facilities c consumables s...

Страница 14: ... With Auvio you control the experience Auvio was established by a group of technophiles to provide high quality audio and video products without the high sticker price The Auvio philosophy is for you to experience audio and video as it was intended to be pure and distortion free We know electronics can be intimidating Auvio simpli fies your experience by providing the right products with the right...

Отзывы: