FIRST TEST
We strongly recommend that you test your headset out of the helmet (before installation)
to
make it easier for you to experience how even small movements in microphone and speaker positioning
can reduce or improve the sound quality and ease of use.
With this knowledge you will have a
benchmark to work to during final helmet installation later and be sure you are getting the very best
out of your system.
Please do not use earplugs during this first test as they will hide and/or disguise
much of what we are trying to listen for.
Avoid pressure directly to the front and back covers of the microphones as this could cause damage.
The microphone is floating in an acoustically dampening material to help prevent any helmet vibration
being transmitted through the boom to the microphone as part of the noise cancelling measures.
To
move or adjust the microphone please hold it by the outer edges or rubber neck, making sure that the
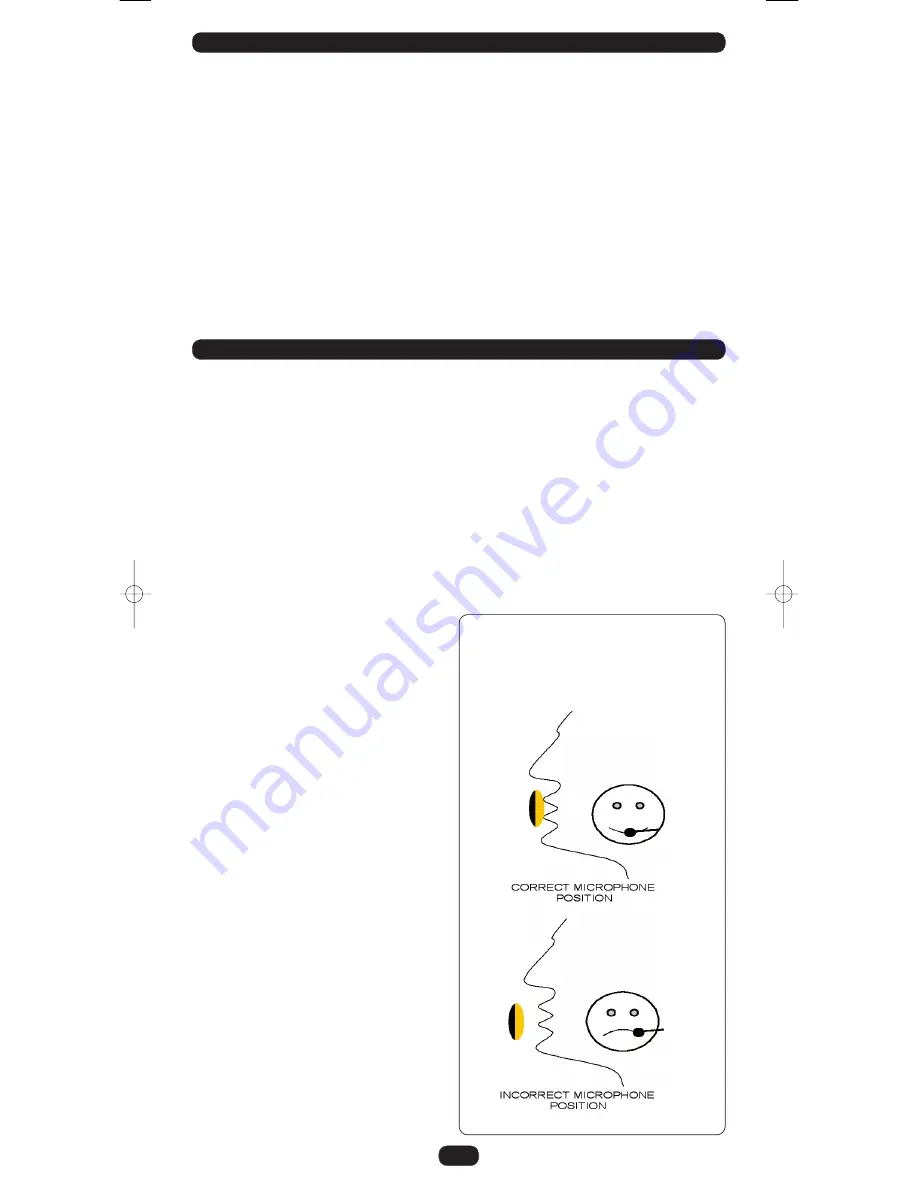
beige side of the fabric sits flat against and central to your lips.
Try to avoid the microphone covers
touching the Velcro on the back of the speakers.
Connect the boom microphone to the headset loom, noting the red connectors will only connect
together if aligned the right way round, making sure that it clicks right in. Connect the headsets black
7 pin plug into the hubs black 7 pin headset lead socket, which automatically turns the hubs power on.
MICROPHONE LOUD SPOT POSITIONING AND USE
The microphone has a critical loud-spot which is the point where it produces the maximum energy from
your speech into the system with the least amount of effort. The system has been carefully designed
and tuned around using this loud-spot (as part of its superior noise cancellation design) and so it is very
important that you understand and use this loud-spot correctly.
While holding one of your own speakers over your ear place the beige side of your microphone against
your lips and project your voice positively through it, as if to someone 5 metres (15’) away. Try gently
moving the microphone around (with it still touching your lips) while making a continuous positive tone
noise to find the microphone LOUD SPOT.
You will know when you have found and used the microphone loud spot correctly because your voice
will reliably activate the VOX, and you know when you have reliably activated the VOX because the
system has
SIDE-TONE
which amplifies your own voice through your own speakers, but only when
activating the VOX, thus providing you with audio confirmation of correct microphone and VOX use.
Remember; if you can hear your own voice amplified through your own speakers then you are operating
the VOX and so you know that others will be hearing what you hear.
If during this test you hear your voice cutting in
and out while trying to speak, don’t worry as
this is quite normal for first time users until you
have practiced getting used to the system.
It is a natural reaction when in a quiet
environment to speak quietly; it is also natural
to speak even quieter if you hear your own voice
amplified to your own ears louder than you
normally hear yourself, and this, combined with
not being used to using the microphone loud
spot, is why you may have not operated the VOX
correctly.
If the VOX cuts in and out while speaking it is a
natural reaction to want to turn the VOX level
down to make it easier to use, but if you do this
you may turn the VOX lower than necessary
which could cause it to false activate when riding
at higher speeds, so instead of reducing the VOX
level you must ignore the fact that you can hear
yourself through you own speakers, find and
keep using the microphone loud spot, projecting
your voice positively through it, and if required
reduce the master volume slightly which
reduces your side-tone level and so will help you
to naturally speak louder and make it easier to
operate the VOX. Please practise this for a while
to get used to it. Please also remember that
when riding your bike you will be in far more
noise and so will naturally raise your voice and
find using the VOX much easier.
You must speak into
the beige side of the
microphone
6
Kit LIW Instructions.qxd 5/6/09 2:03 pm Page 6


