English
-22-
4.Go to
Upgrade File
, then use ◄ and
► to select the file.
5.Select
Start
, then press
OK
.
6.Select
Yes
to update or select
No
to
return.
Once updated, the Installation Guide
will appear. Please refer to section
6.1 for further instructions.
7.4.4 Remove USB Device Safely
Path
: MENU > Tools > Remove
USB Device Safely
Press
MENU
, select
System Setup
and press
OK
. Then, select
Remove
USB device safely
and press
OK
.
Next, press
▼
, then press
OK
and
remove the USB device.
7.5 Network
Path
: MENU > Network
Press
MENU
, select
Network
and
press
OK
.
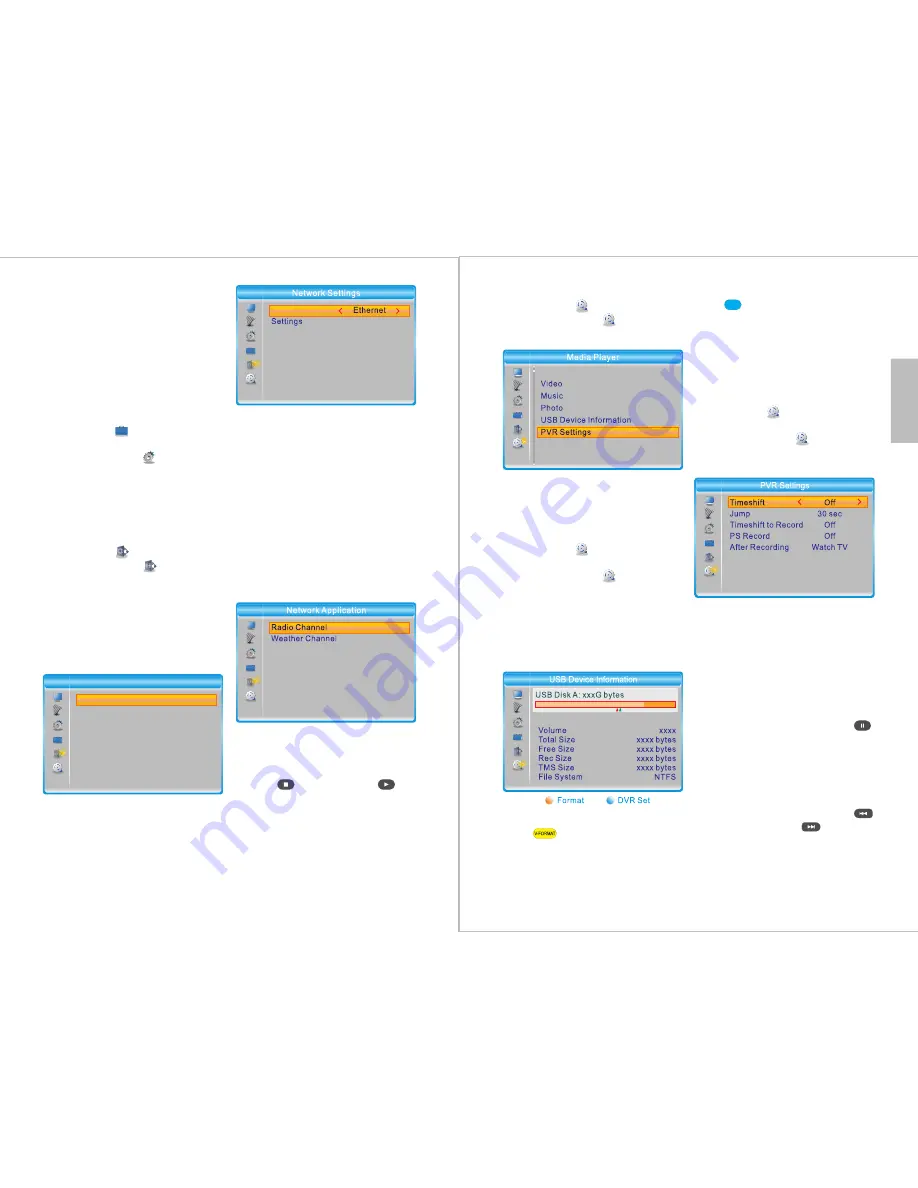
From here, you can set the network
options, listen to online radio or
check the weather forecast. In order
to use these functions, please ensure
that the DVB425 is connected to the
internet via an Ethernet cable.
- Network Settings:
Network:
Select between
Ethernet
and
None
to enable or disable the
network function.
Settings
: Select between
On
and
Off
for DHCP.
Selecting
On
allows the DVB425 to
set DHCP information automatically.
Selecting
Off
allows you to set DHCP
information such as
IP Address
or
DNS
manually.
To input the settings manually, use
◄ and ► to select the digit to change
and use the keypad to enter the new
number.
Select
Apply
and press
OK
to save
the settings or press
EXIT
to return.
- Network Applications:
Radio Channel:
1. Press
OK
to enter.
2. Select a country.
3. Select a radio station.
4. Press to stop or press
to play.
Weather Channel:
1. Press
OK
to enter.
2. Select a country.
3. Select a city to see its weather.
Press
Pg Dn
and
Pg Up
for faster
navigation.
Network Setting
Network Application
Network
Network
-23-
7.6 Media Player
Path
: MENU > Media Player
Press
MENU
, select
Media Player
and press
OK
.
For instructions concerning the PVR,
Video, Music and Photo functions,
please refer to section 6.4.
7.6.1 USB Device Information
Path
: MENU > Media Player >
USB Device Information
Press
MENU
, select
Media Player
and press
OK
. Select
USB Device
Information
and press
OK
.
From here, you can see information
about the USB storage device, format
the device or change its DVR
settings.
-Formatting your USB Device
Press to format the USB
device.
Choose either
FAT
or
NTFS
format,
then select
OK
to confirm or
Cancel
to
return.
- USB Usage
Press
to adjust whether the USB
device will be used for recording only,
timeshifting only or both recording
and timeshifting.
Select
OK
to confirm or select
Cancel
to return.
7.6.2 PVR Settings:
Path
: MENU > Media Player >
PVR Settings
Press
MENU
, select
Media Player
and press
OK
. Then, select
PVR
Settings
and press
OK
.
- Timeshift:
◄ / ► : Choose between
Off, Auto
and
Pause.
Select
Off
to disable the Timeshift
function.
Select
Auto
to enable the Timeshift
function all the time.
Select
Pause
so that the Timeshift
function can be used by pressing
while watching live TV.
- Jump:
◄ / ► : Change duration between
30
seconds, 1 minute, 5 min, 10min,
15min, 20min
and
30 minutes.
While watching a recording, press
to jump backwards or to jump
forwards by the selected amount.
Record
MP


