7b: Setting Up the 8000AP - 2
•
Press
to
jump up to the
front page
•
Press the
keys to select
•
Press
Press the
keys to select
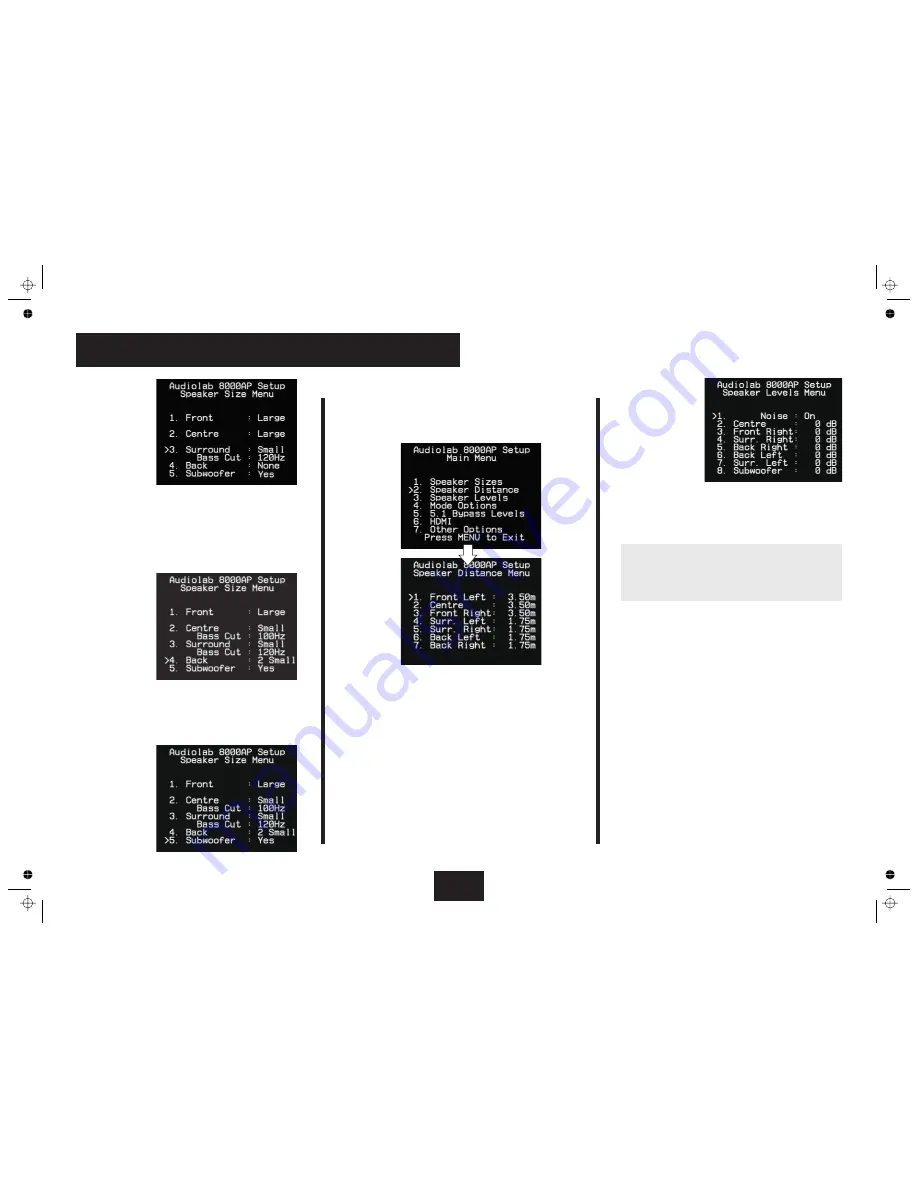
You will hear a burst of white noise from the Left Front speaker.
The volume at the Left Front speaker sets the reference level
for the calibration. All levels must be set to this reference.
Individual levels can be varied by up to +/- 10dB.
When the noise generator Is turned on, the volume
automatically goes to -30dB. This master level may be
adjusted to suit your system with the volume control on the
front panel or via the handset.
Set the meter to ‘C’ weighting
with ‘slow’ response and to read 75dB SPL at centre scale.
Place the meter at ear level at your
listening position.
Point the microphone at the ceiling.
Adjust the Volume level so the sound level meter reads75dB.
Select each speaker in turn. Adjust the relative channel levels
on-screen using the
keys on the handset until the sound
level meter reads 75dB on all channels.
Sit in your normal
listening
position. With the Volume
keys, set the Left Front speaker
to the equivalent to normal conversation. Now select each
speaker in turn and adjust the on-screen level using the
keys on the handset to sound the same as the Left Front
speaker. During this process you may have to re-visit some
loudspeakers to reset the level.
Leave the subwoofer level on the screen at 0dB. Adjust the
subwoofer’s volume control to sound as close to the reference
Left Front speaker as you can. Now trim the on-screen
subwoofer level with the
keys on the handset. The object
is to get the subwoofer level as close to 0dB as possible.
BACK
Speaker Levels.
ENTER
•
Noise On
Setting up the Subwoofer input level:
Do not adjust the volume
during calibration after the level is established.
Using a Sound Level Meter:
seated
Set Up By Listening-
seated
Do not adjust the volume control during the calibration.
Loudspeaker Distances
Speaker Calibration
•
Press
to jump back up to the front page
•
Press the
keys to select
•
Press
These measurements are used by the 8000AP in surround
modes to correct for delays in sound reaching your ears due
to differences in the distance between each speaker and the
listening position.
Use the
keys to select the loudspeaker and the
keys
to vary the distance. The distance can be set from 0 to 10
metres in units of 25cm. A speaker entered as
will have
no distance shown on the screen.
Speaker calibration is essential to achieve a correctly centred
sound image; follow it carefully. We suggest you use a sound
level (SPL) meter; otherwise you can set up the levels by ear- you
will have to be careful to match the output levels for each
speaker to sound equally loud.
BACK
“Speaker Distance”.
ENTER
none
Page 10
•
Press the
keys to select
•
Press
: you will be
able to select
or
for the surrounds.
: you will be
able to select
or
for the surrounds.
•
Press the
keys to select
•
Press
By default the Back speakers are fixed at
with
predetermined bass cut-off at 100 Hz. You can select
(for 6.1) or
(for 7.1).
•
Press the
keys to select
•
Press
•
Select
“Surround”.
ENTER
If you have set the front speakers to Large
Large, Small
None
If you have set the front speakers to Small
Small
None
After setting up the size and bass parameters of the
surround speakers:
“Back”
ENTER
Small
None,
One
,
Two
After setting up the size and bass parameters of the
back speakers:
“Subwoofer”
ENTER
Yes/ No
Содержание 8000AP
Страница 1: ...User Instructions audiolab 8000AP RS232 ...
Страница 23: ......


