ADVANCED MANUAL / bit Ten /
22
4.
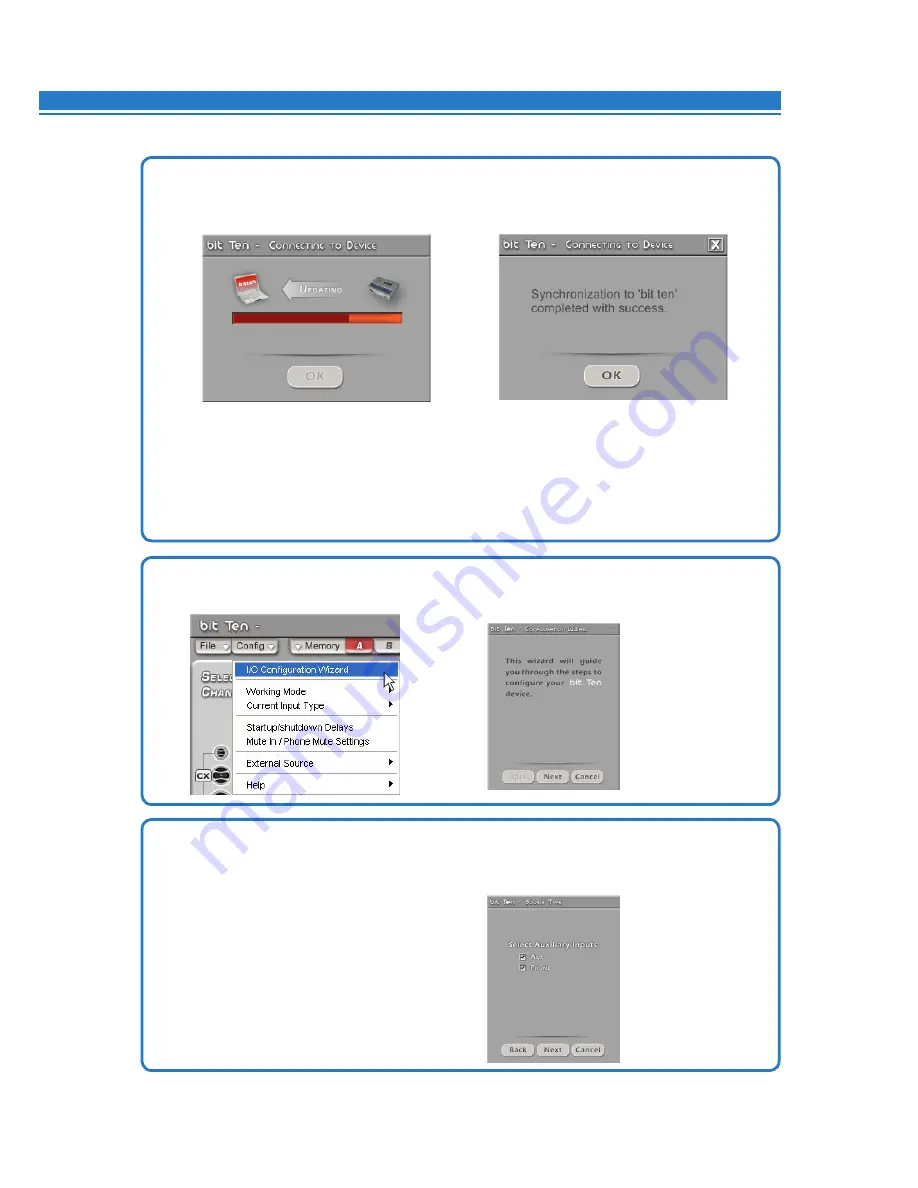
If synchronization is successful, a dialog box will show the data exchange between processor and software.
Wait a few seconds and, finally, confirm by clicking the
OK
button.
At this point you need to have in mind the system you want to realize beforehand, since from this moment if you
want to change any of the settings you will have to go through the guided procedure all over again.
More specifically the guided procedure will ask for:
- Which auxiliary inputs will be used (e.g. AUX PHONE).
- Which kind of signals will be allocated to the main inputs (e.g. Front Left or Front Right etc.).
- Which speakers you are using for your system (e.g. 2-way Front + Sub etc.).
- If the system features passive crossovers managing speaker groups (e.g. 2-way system with active mid-low).
6.
Select the inputs.
Select among the auxiliary inputs,
AUX, PHONE
, those that will be used.
You can change this setting later on by selecting
Config / External Source
on the software main menu.
Press
BACK
to go back to the previous step.
Press
NEXT
to go ahead with the setup procedure.
Press
CANCEL
to exit the procedure.
5.
Click the
Config
menu and select
I/O Configuration Wizard
.
Press
NEXT
to continue configuration.
Press
CANCEL
to exit.
8


