


10
At the end of the installation the install program will
ask you to disconnect and reconnect your DSPre to
the computer via the USB port and turn it on. On
Vista and Windows 7, Windows will detect the new
DSPre hardware and load on the new drivers
automatically; on XP, Windows will pop-up with a
NEW HARDWARE FOUND panel; follow the Windows
prompt instructions and your new DSPre HD audio
device drivers will install. The install prompts will
occur twice before the install is complete. Now you
can press FINISH and the installation will be
complete. Normally restarting your PC at this point
is not required but If you do not see the “DSPre OUT
1/2" listed in the SOUND panel after installation you
should do a restart of your PC; see page 14 for
details.
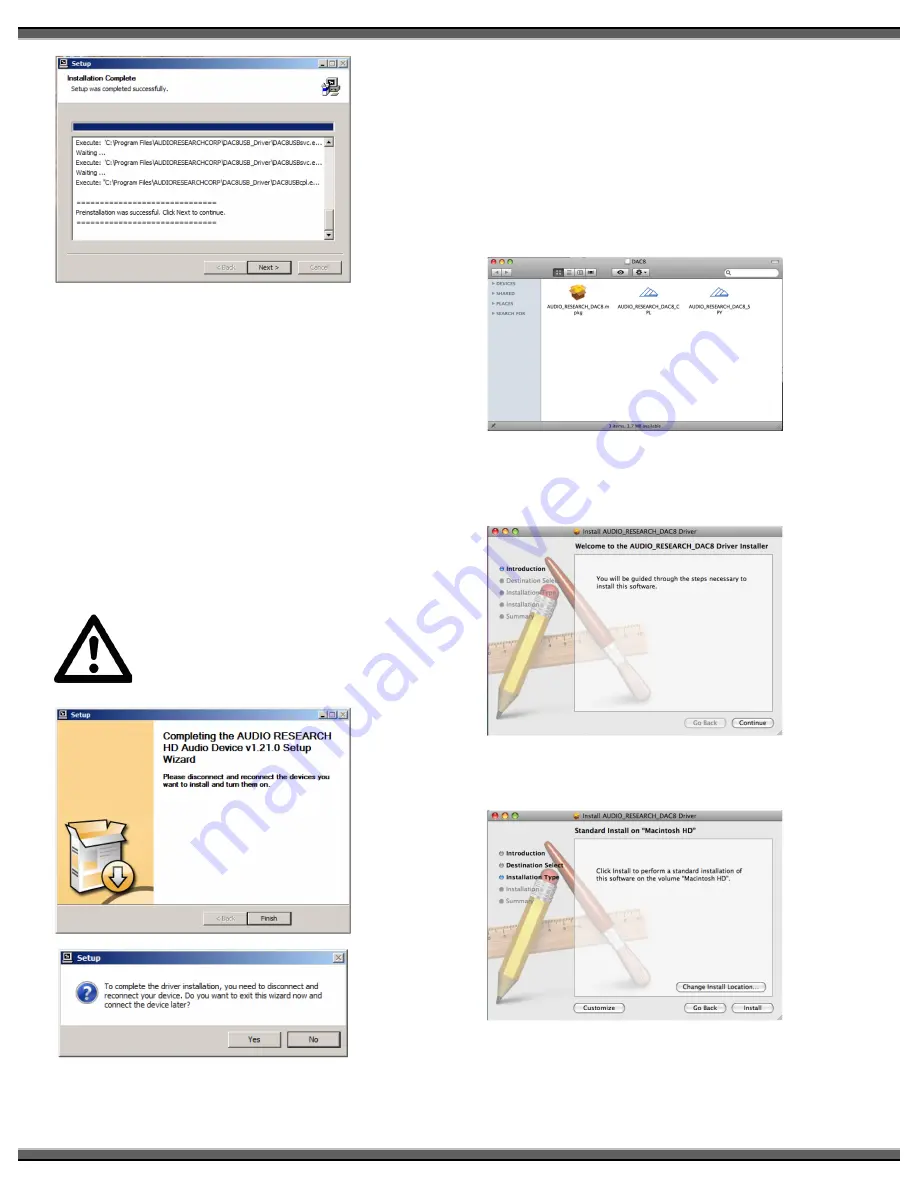
The DAC8 USB drivers are used in the
DSPre. All of the software during the
installation process will be labeled
DAC8.
MAC SOFTWARE INSTALLATION INSTRUCTIONS:
Installation of the DSPre HD Audio Device drivers is
only necessary if you intend to use the USB 2.0 HS
input on your DSPre. Software installation is not
necessary if you only intend to use the S/PDIF or
AES/EBU inputs.
Place the installation disk you received with the
DSPRE into your Mac computer and open the install
file on your desk top. Click on the
“AUDIO_RESEARCH_DSPRE.mpkg” icon in the folder.
Follow the on screen prompts as you install the
DAC8 HD Audio device drivers. Press the CONTINUE
button when you see the Welcome panel.
When the installer asks you if you want to do a
Standard install, press the INSTALL button.
At the completion of the install you should see the
INSTALL SUCCEEDED panel. Press the CLOSE button
and the installation will be complete. Restart your
Содержание DSPre
Страница 1: ...Owner s Manual DSPre Stereo Preamplifier DAC...
Страница 2: ......


