


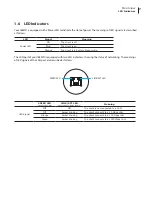


Setting Up Your t68WD
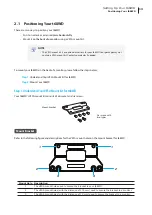
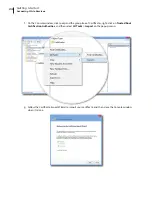
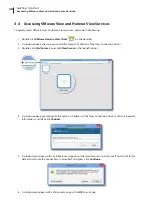
Positioning Your t68WD
14
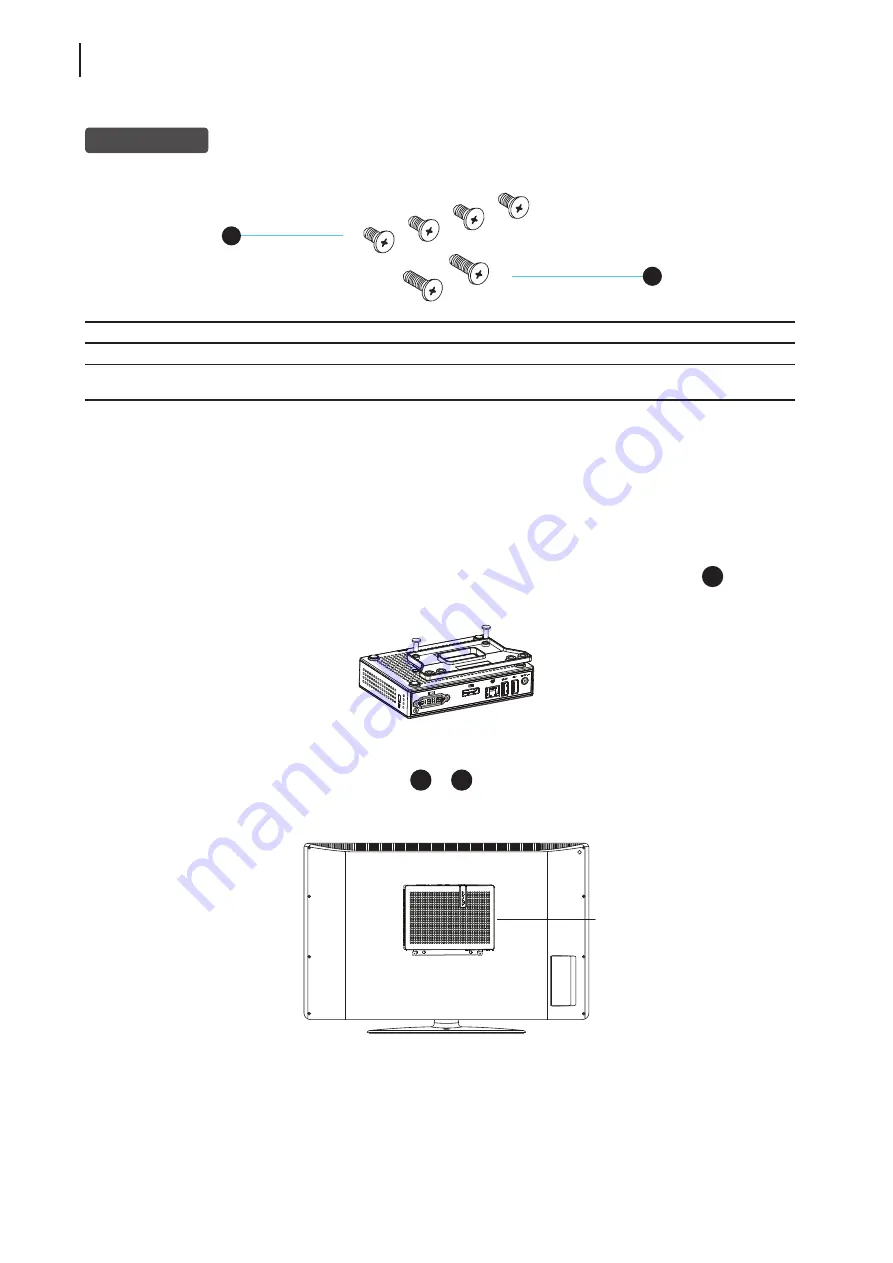
Mount Screws
Screw Type
Number
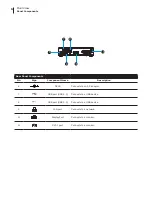
Description
1
4
The screws used to secure the bracket to your t68WD and to a monitor.
2
2
The longer screws used to secure the bracket to a monitor if the screws of type 1
cannot firmly secure the bracket and your t68WD to the monitor.
Step 2: Mount Your t68WD
To mount your t68WD on the back of the monitor, please do the following:
1. Place your t68WD on a flat surface with the VESA mount hole side upward.
2. With the bracket side marked with
Atrust
facing downward, align two mount holes on the bracket with two
mount holes on your t68WD such that the bracket projects out and is closer to the rear panel than the front
one as shown below, and then secure the bracket to your t68WD with two (2) screws of type
1
.
3. Align the mount holes on the bracket with the mount holes on the back of the monitor, and then secure the
bracket to the monitor with two (2) screws of
1
or
2
. Ensure that the rear panel of your t68WD
is
facing downward
as shown below.
2
1
Have t68WD’s rear panel
facing downward.
Содержание t68WD
Страница 1: ...Atrust t68WD Thin Client User s Manual Internal Draft 0 01 2015 Atrust Computer Corp...
Страница 2: ...UM t68WD EN 15110915...
Страница 8: ...vi...
Страница 12: ......
Страница 20: ...Overview 10...
Страница 22: ......
Страница 26: ...Setting Up Your t68WD 16...
Страница 28: ......
Страница 40: ...Getting Started 30...
Страница 42: ......
Страница 130: ...Configuring Client Settings 120...
Страница 132: ......
Страница 136: ...126...
Страница 138: ...128...
Страница 139: ...UM t68WD EN 15110915...
Страница 140: ......