AT-UHD-SW-510W
18
Basic Operation
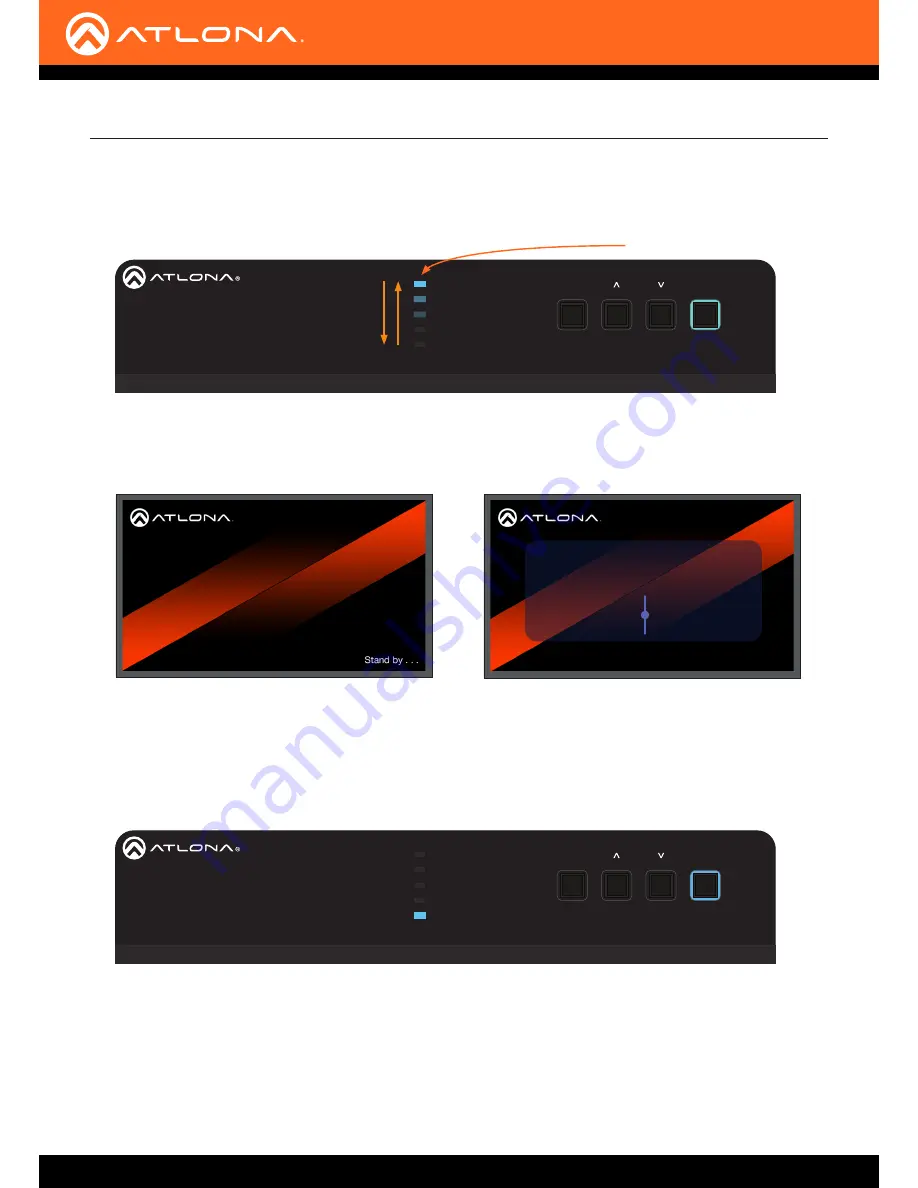
1. After the power supply has been connected to the AT-UHD-SW-510W, the input indicators on the front panel will
begin to flash, in an up-and-down pattern, as shown by the arrows.
2. After about 45 seconds, the standby screen will be displayed.
3. Once the boot sequence is complete, the splash screen will be displayed and the
BYOD
input indicator will be
illuminated.
The splash screen will show the OSD (On-Screen Display). The splash screen will display instructions on
connecting devices wirelessly or by connecting directly to the AT-UHD-SW-510W, using cables. The SSID or the
AT-UHD-SW-510W will be displayed at the bottom of the screen.
4. The unit is now ready for use. The entire boot process takes approximately two minutes to complete.
Boot Sequence
USB-C
DP
HDMI 3
HDMI 4
BYOD
DISPLAY
INPUT
AT-UHD-SW-510W
LAN
DC 24V
HDBaseT OUT
HDMI OUT
HDMI IN
DP IN
USB-C IN
2
3
4
1
RELAY
RS-232
TRIGGER I/O
WiFi
WiFi
AUX
AUDIO
OUT
L
R
IN
USB
+
+
C1 COM C2
RX
P
TX
+
+
USB
USB
USB
Standby Screen
Input indicators
USB-C
DP
HDMI 3
HDMI 4
BYOD
DISPLAY
INPUT
AT-UHD-SW-510W
LAN
DC 24V
HDBaseT OUT
HDMI OUT
HDMI IN
DP IN
USB-C IN
2
3
4
1
RELAY
RS-232
TRIGGER I/O
WiFi
WiFi
AUX
AUDIO
OUT
L
R
IN
USB
+
+
C1 COM C2
RX
P
TX
+
+
USB
USB
USB
Ready state
Splash Screen
Welcome
SW510-E753
To being your presentation:
Connect wired:
Connect the HDMI, USB-C,
or DisplayPort cable
at the table to your
device
Connect wirelessly:
Connect the Wi-Fi network
”, entercode,
and enable AirPlay, GoogleCast,
or Miracast
or


