


Chapter 2. Hardware Setup
8
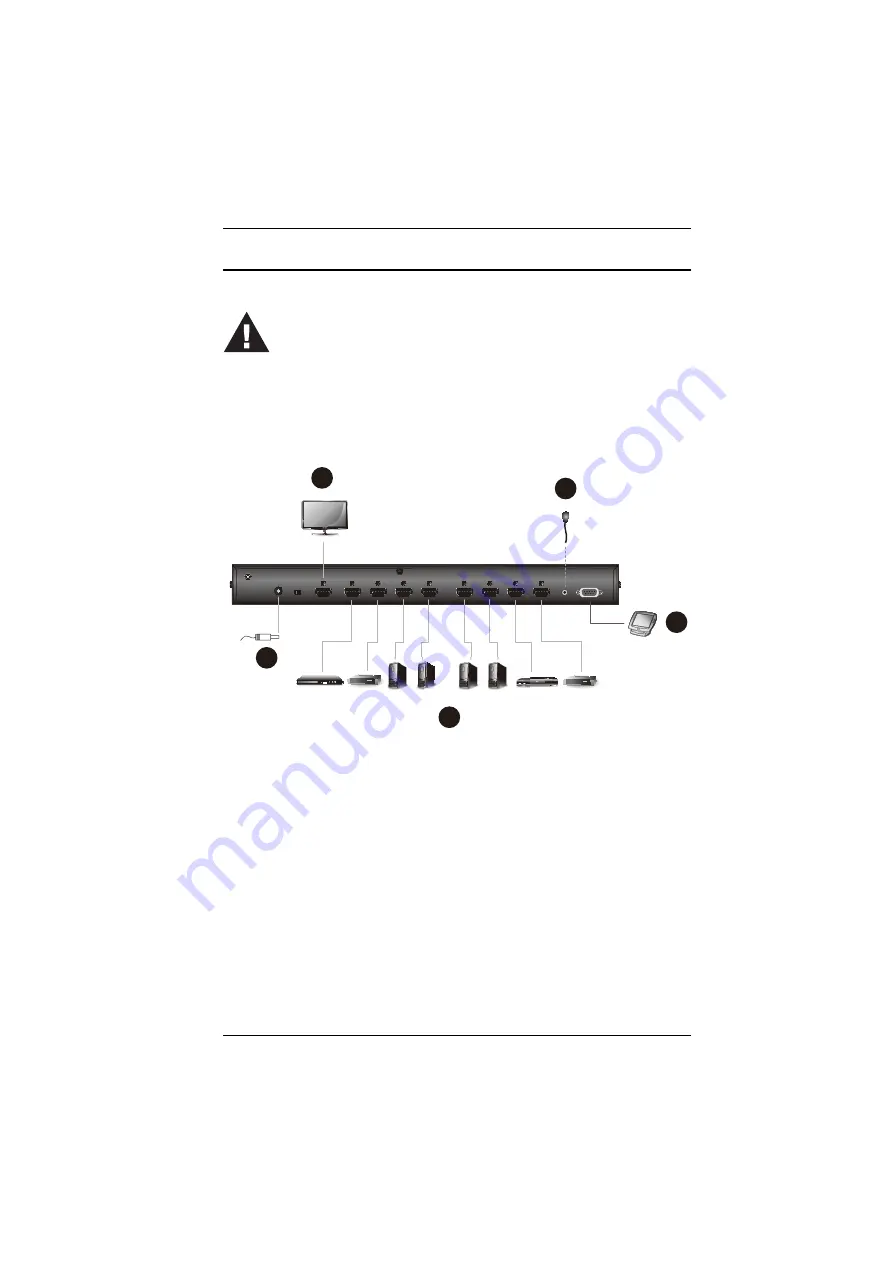
Installation
Follow the steps below to safely connect the required devices to the VS0801HB.
1. Connect the HDMI In port of your display device to the HDMI Out port on
the VS0801HB using an HDMI cable.*
2. Connect the HDMI Out port(s) of your source device(s) to the HDMI In
port(s) on the VS0801HB using HDMI cables.*
3. Plug the provided power adapter into the an appropriate AC power source,
and then plug the power adapter cable into the power jack on the
VS0801HB.
4. For remote control using the IR remote control unit, plug the IR receiver
cable to the IR Extend port.
1. Please review the safety information regarding the placement of
2. Do not power on the VS0801HB and the connected devices until
all the necessary hardware is connected.
Set-top Box
Set-top Box
Blu-ray Player
DVD Player
Computer Computer
Computer Computer
1
2
3
4
5
Содержание VS0801HB
Страница 1: ...8 Port True 4K HDMI Switch VS0801HB User Manual www aten com...
Страница 12: ...Chapter 1 Introduction 4 This Page Intentionally Left Blank...
Страница 18: ...Chapter 2 Hardware Setup 10 This Page Intentionally Left Blank...
Страница 24: ...Chapter 3 Operation 16 This Page Intentionally Left Blank...


