


Chapter 2. Hardware Setup
11
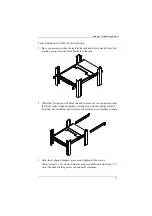
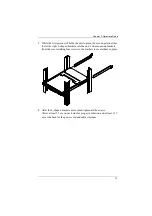
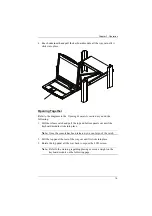
To rack mount the CL5800, do the following:
1. Have one person position the unit in the rack and hold it steady. Have the
second person screw the front brackets to the rack.
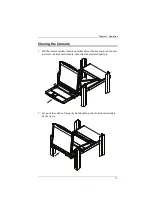
2. While the first person still holds the unit in place, the second person slides
the left & right L-shaped brackets into the unit’s side mounting brackets
from the rear, installing four screws in the brackets to secure them in place.
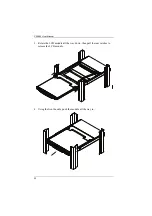
3. After the L-shaped brackets are secured, tighten all the screws.
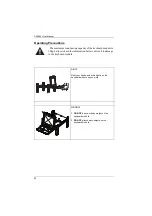
Allow at least 5.1 cm on each side for proper ventilation, and at least 12.7
cm at the back for the power cord and cable clearance.
Содержание CL5800
Страница 1: ...CL5800 LCD Console User Manual...
Страница 10: ...CL5800 User Manual x This Page Intentionally Left Blank...
Страница 26: ...CL5800 User Manual 16 This Page Intentionally Left Blank...
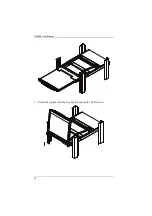
Страница 28: ...CL5800 User Manual 18 3 Rotate the top panel all the way back to expose the LCD screen...
Страница 44: ...CL5800 User Manual 34 This Page Intentionally Left Blank...
Страница 58: ...CL5800 User Manual 48 This Page Intentionally Left Blank...
Страница 60: ...CL5800 User Manual 50 U User Notice vii W Warranty 47...