background image

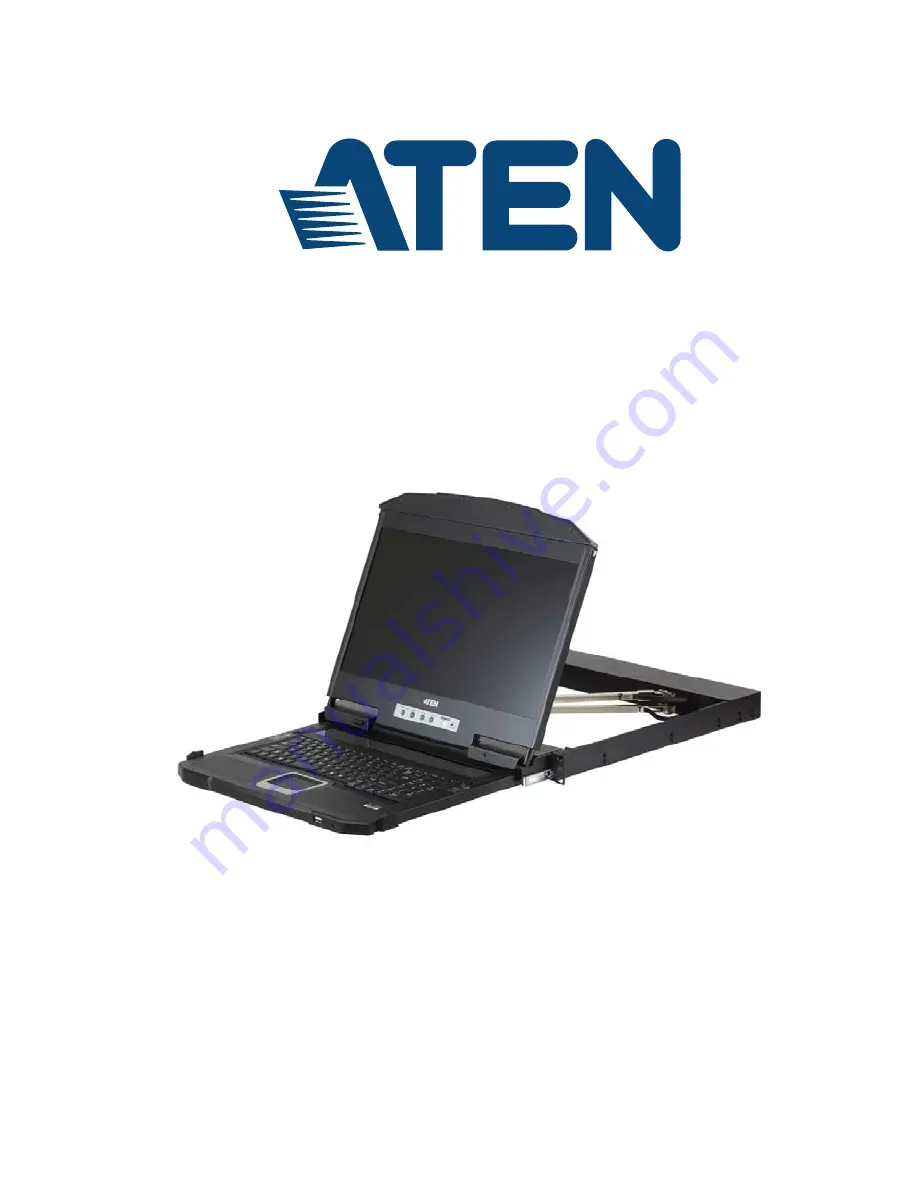
Dual Rail USB HDMI DVI VGA LCD Console

CL3800

User Manual

www.aten.com

Содержание CL3800

Страница 1: ...Dual Rail USB HDMI DVI VGA LCD Console CL3800 User Manual www aten com ...

Страница 2: ... a residential area is likely to cause harmful interference in which case the user will be required to correct the interference at his own expense The device complies with Part 15 of the FCC Rules Operation is subject to the following two conditions 1 this device may not cause harmful interference and 2 this device must accept any interference received including interference that may cause undesir...

Страница 3: ...duct at our online support center Telephone Support For telephone support call this number International http eservice aten com International 886 2 8692 6959 China 86 400 810 0 810 Japan 81 3 5615 5811 Korea 82 2 467 6789 North America 1 888 999 ATEN ext 4988 United Kingdom 44 8 4481 58923 ...

Страница 4: ... of the user to correct such interference The manufacturer is not responsible for any damage incurred in the operation of this system if the correct operational voltage setting was not selected prior to operation PLEASE VERIFY THAT THE VOLTAGE SETTING IS CORRECT BEFORE USE A typical LCD Liquid Crystal Display monitor has millions of pixels A dead pixel refers to a pixel with a defect in its abilit...

Страница 5: ...o make sure that all of the components are present and in good order If anything is missing or was damaged in shipping contact your dealer Read this manual thoroughly and follow the installation and operation procedures carefully to prevent any damage to the console or to any other devices on the CL3800 installation Changes may have been made to the manual since it was published Please visit our w...

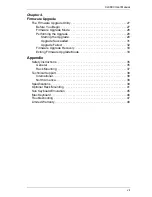
Страница 6: ...apter 1 Introduction Overview 1 Features 2 Requirements 3 LCD Console 3 External Console 3 Cables 3 Operating Systems 4 Components 5 Front View 5 Rear View 7 Chapter 2 Hardware Setup Before you Begin 9 Standard Rack Mounting 10 Connecting Up 12 Chapter 3 Operation Opening the Console 15 Opening Separately 15 Opening Together 19 Operating Precautions 20 LCD OSD Configuration 21 LCD Buttons 21 Adjus...

Страница 7: ...ing the Upgrade 29 Upgrade Succeeded 31 Upgrade Failed 32 Firmware Upgrade Recovery 33 Exiting Firmware Upgrade Mode 33 Appendix Safety Instructions 35 General 35 Rack Mounting 37 Technical Support 38 International 38 North America 38 Specifications 39 Optional Rack Mounting 41 Sun Keyboard Emulation 45 Mac Keyboard 46 Troubleshooting 47 Limited Warranty 48 ...

Страница 8: ...CL3800 Its purpose features and benefits are presented and its components are described Chapter 2 Hardware Setup provides step by step instructions for setting up your installation and explains some basic operation procedures Chapter 3 Operation describes the fundamental concepts involved in operating the CL3800 Chapter 4 Firmware Upgrade explains how to upgrade the CL3800 s firmware with the late...

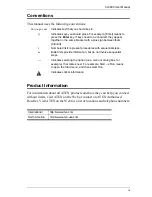
Страница 9: ...ndicates keys you should press For example Enter means to press the Enter key If keys need to be chorded they appear together in the same bracket with a plus sign between them Ctrl Alt 1 Numbered lists represent procedures with sequential steps Bullet lists provide information but do not involve sequential steps Indicates selecting the option on a menu or dialog box for example that comes next For...

Страница 10: ...CL3800 User Manual x This Page Intentionally Left Blank ...

Страница 11: ...ee video options for both the external console and KVM switch connection The CL3800 also includes two mini stereo ports for connecting audio speakers The short depth design fits all 19 cabinets and is especially suitable for shallow racks In addition to saving valuable space on the rack the CL3800 also provides a space saving solution for special environments such as outside broadcast vans OB vans...

Страница 12: ... HDMI DVI and VGA 18 5 LCD screen with Full HD resolution of 1920 x 1080 external console supports 1920 x 1200 Audio support for connecting speakers Supports an external console with USB HDMI VGA DVI connectors Additional hot pluggable USB mouse port on front panel also functions as a USB peripheral port Console selection via hotkey Standard 105 key keyboard Keyboard Language support English US En...

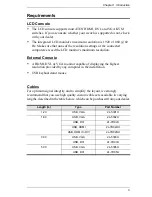
Страница 13: ...rnal Console A HDMI DVI or VGA monitor capable of displaying the highest resolution provided by any computer in the installation USB keyboard and mouse Cables For optimum signal integrity and to simplify the layout we strongly recommend that you use high quality custom cable sets available in varying lengths described in the table below which can be purchased from your dealer Length m Type Part Nu...

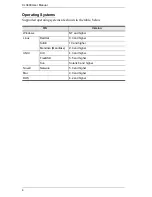
Страница 14: ...own in the table below OS Version Windows NT and higher Linux RedHat 9 0 and higher SuSE 10 and higher Mandriva Mandrake 9 0 and higher UNIX AIX 4 3 and higher FreeBSD 5 5 and higher Sun Solaris 8 and higher Novell Netware 5 0 and higher Mac 9 0 and higher DOS 6 2 and higher ...

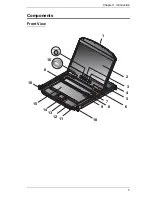
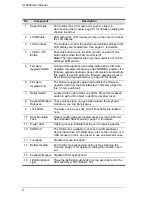
Страница 15: ...Chapter 1 Introduction 5 Components Front View 1 2 3 4 5 8 9 6 7 13 14 10 11 16 15 12 8 10 ...

Страница 16: ...e firmware upgrade cable that transfers the firmware upgrade data from the administrator s computer plugs into this 3 5 mm audio jack 7 Reset Switch Located to the right of the Lock LEDs Press this recessed switch in with a thin object to perform a system reset 8 Keyboard Module Releases These catches one on each side release the keyboard module so you can slide it away 9 Lock LEDs The Num Lock Ca...

Страница 17: ...ction For flexibility and convenience the CL3800 supports an independent external KVM console The external console s USB keyboard and mouse HDMI DVI or VGA monitor and speaker cable plug in here 4 KVM Port Section The custom USB HDMI KVM cable supplied with the package for linking the CL3800 to a computer or switch plugs in here Additional DVI and VGA ports are provided 5 Grounding Terminal The gr...

Страница 18: ...CL3800 User Manual 8 This Page Intentionally Left Blank ...

Страница 19: ... the devices you will be connecting up has been turned off You must unplug the power cords of any computers that have the Keyboard Power On function 3 Packing material has been inserted to protect the CL3800 during shipping Slide the LCD module out see Opening the Console page 13 until the packing material is visible Remove the packing material before installing the unit as shown in the diagram be...

Страница 20: ...o hold it in place the other to screw it in 2 The standard rack mounting kit does not include screws or cage nuts If you need additional screws or cage nuts contact your rack dealer 3 Optional mounting kits including single person Easy Installation kits are available with a separate purchase See Optional Rack Mounting page 41 in the Appendix for details L Bracket L Bracket R Bracket R Bracket ...

Страница 21: ...re them in place 2 While one person inserts the CL3800 into place by sliding its left and right side bars into the mounting brackets on the rack have a second person install four screws in the front tabs to secure the module to the front of the rack Note Allow at least 5 1 cm on each side for proper ventilation and at least 12 7 cm at the back for the power cord and cable clearance ...

Страница 22: ... audio port 2 Plug the keyboard monitor mouse and audio connectors of the KVM cable into their respective ports in the Console Section of a KVM switch or computer 3 If you are installing an external console plug your keyboard monitor mouse and speakers into their respective ports in the Console Section of the CL3800 Note The CL3800 supports an HDMI DVI D or VGA external console monitor but only on...

Страница 23: ...Chapter 2 Hardware Setup 13 Installation Diagram ...

Страница 24: ...CL3800 User Manual 14 This Page Intentionally Left Blank ...

Страница 25: ...w the LCD module The modules can either slide together or independently This allows you to have the LCD display available for viewing while the keyboard touch pad module is conveniently out of the way when not in use Opening Separately 1 Use the Upper and Lower Release Bar handles to pull the console module straight out Continues on next page Upper Release Bar Lower Release Bar ...

Страница 26: ...CL3800 User Manual 16 2 Pulling slide the console module out until it clicks in place 3 Raise the top panel all the way back to expose the LCD screen ...

Страница 27: ...4 To independently retract the keyboard into the rack slide both Keyboard Module Releases and push the keyboard module all the way in 5 Slide the keyboard in until it s completely inserted into the rack Continues on next page ...

Страница 28: ...CL3800 User Manual 18 6 To close the LCD screen lower the panel module until it lies flat and slide it back in ...

Страница 29: ...ttom panels out until the keyboard module clicks into place Note Once the console has been released you can let go of the catch 2 Pull the top panel the rest of the way out until it clicks into place 3 Rotate the top panel all the way back to expose the LCD screen Note Refer to the warning regarding placing excessive weight on the keyboard module on the following page ...

Страница 30: ...the keyboard module as you work Wrong DO NOT lean your body weight on the keyboard module DO NOT place heavy objects on the keyboard module The maximum load bearing capacity of the keyboard module is 30 kg Failure to heed the information below can result in damage to the keyboard module ...

Страница 31: ...gh the menus this button moves you Right or Up When making an adjustment it increases the value When navigating through the menus this button moves you Left or Down When making an adjustment it decreases the value EXIT When you have not entered the LCD OSD Menu function pressing this button performs an auto adjustment An auto adjustment automatically configures all the settings for the LCD panel t...

Страница 32: ... right V Position Positions the display area on the LED panel vertically moves the display area up or down Color Temperature Adjusts the color quality of the display You can adjust the warmth value color balance etc The Adjust Color selection has a further submenu that lets you fine tune the RGB values Language Selects the language that the OSD displays its menus in OSD Duration Lets you set the a...

Страница 33: ...and Restarting If it becomes necessary to Power Off the CL3800 to upgrade the firmware for example simply turn off the power to the unit using the rear panel power switch To restart the CL3800 turn the rear panel power switch back on Port ID Numbering Port Selection Port ID numbering and Port Selection follow the method used by the KVM switch connected to the CL3800 Consult your KVM switch s User ...

Страница 34: ...his Hotkey sequence only works when the Firmware Upgrade Recovery Switch see page 28 is in the Normal position None 3 Flashing when upgrade is in process Ctrl Alt Shift L Enter Enable Local LCD console Disable 2nd console or external console video 2 None Ctrl Alt Shift R Enter Enable 2nd console or external console video Disable Local LCD console 2 None Ctrl Alt Shift L R Enter or Ctrl Alt Shift R...

Страница 35: ... invoke Shift Ctrl Alt hotkeys 4 If the KVM switch connected to the CL3800 uses the Ctrl Alt Shift combination to invoke its hotkey mode you won t be able to access any of its hotkey operations because the CL3800 will capture the combination for console selection first ...

Страница 36: ...CL3800 User Manual 26 This Page Intentionally Left Blank ...

Страница 37: ...ages and information relating to them Before You Begin To prepare for the firmware upgrade do the following 1 From a computer that is not part of your CL3800 installation go to ATEN s Internet support site and choose the model name that relates to your device to get a list of available Firmware Upgrade Packages 2 Choose the Firmware Upgrade Package you want to install usually the most recent and d...

Страница 38: ...ence the Firmware Upgrade Recovery Switch see page 6 must be set to the Normal position 1 Turn off the power to the CL3800 using the power switch located on the back side of the console 2 Slide the firmware switch to RECOVER see page 6 3 Turn on the power to the CL3800 using the power switch located on the back side of the console When the CL3800 is in Firmware Upgrade Mode the Num Lock Caps Lock ...

Страница 39: ...the downloaded Firmware Upgrade Package file from your computer either by double clicking the file icon or by opening a command line and keying in the full path and filename The Firmware Upgrade Utility Welcome screen appears 2 Read and Agree to the License Agreement enable the I Agree radio button Continues on next page ...

Страница 40: ...ity compares the device s firmware level with that of the upgrade files If it finds that the device s version is higher than the upgrade version it brings up a dialog box informing you of the situation and gives you the option to continue the upgrade If you didn t enable Check Firmware Version the Utility installs the upgrade files without checking whether they are a higher level or not As the Upg...

Страница 41: ...Chapter 4 Firmware Upgrade 31 Upgrade Succeeded After the upgrade has completed a screen appears to inform you that the procedure was successful Click Finish to close the Firmware Upgrade Utility ...

Страница 42: ...al 32 Upgrade Failed If the upgrade failed to complete successfully the Upgrade Failed screen appears Click Cancel to close the Firmware Upgrade Utility See the next section Firmware Upgrade Recovery for how to proceed ...

Страница 43: ... Cable to its Firmware Upgrade Port 3 Slide the Firmware Upgrade Recovery Switch to the Recover position 4 Power the CL3800 back on and repeat the upgrade procedure 5 After the CL3800 has been successfully upgraded power it off and slide the Firmware Upgrade Recovery Switch back to the Normal position 6 Power the CL3800 back on Exiting Firmware Upgrade Mode To exit the Firmware Upgrade Mode do the...

Страница 44: ...CL3800 User Manual 34 This Page Intentionally Left Blank ...

Страница 45: ...entilation has been provided Never spill liquid of any kind on the device Unplug the device from the wall outlet before cleaning Do not use liquid or aerosol cleaners Use a damp cloth for cleaning The device should be operated from the type of power source indicated on the marking label If you are not sure of the type of power available consult your dealer or local power company The device is desi...

Страница 46: ...the device from the wall outlet and bring it to qualified service personnel for repair The power cord or plug has become damaged or frayed Liquid has been spilled into the device The device has been exposed to rain or water The device has been dropped or the cabinet has been damaged The device exhibits a distinct change in performance indicating a need for service The device does not operate norma...

Страница 47: ...r fingers After a device is inserted into the rack carefully extend the rail into a locking position and then slide the device into the rack Do not overload the AC supply branch circuit that provides power to the rack The total rack load should not exceed 80 percent of the branch circuit rating Make sure that all equipment used on the rack including power strips and other electrical connectors is ...

Страница 48: ...forehand Product model number serial number and date of purchase Your computer configuration including operating system revision level expansion cards and software Any error messages displayed at the time the error occurred The sequence of operations that led up to the error Any other information you feel may be of help Email Support support aten usa com Online Technical Support Troubleshooting Do...

Страница 49: ...x USB Type B Female 1 x 3 5 mm Audio Jack Female Green USB Port 1 x USB Type A Female Firmware Upgrade 1 x RJ 11 Female Power 1 x 3 prong AC Socket Switches Reset 1 x Semi recessed Pushbutton Firmware Upgrade 1 x Slide Power 1 x Rocker LCD Power 1 x Pushbutton LCD Adjustment 4 x Pushbutton LEDs Power 1 x KVM Console Dark Green 1 x LCD Orange Lock 1 x Num Lock Green 1 x Caps Lock Green 1 x Scroll L...

Страница 50: ...minance 350 cd m Emulation Keyboard Mouse USB Maximum Input Power Rating 100 240V AC 50 60Hz 1A Power Consumption 110V 26 6W 220V 26 8W Environmental Operating Temperature 0 40o C Storage Temperature 20 60o C Humidity 0 80 RH Non condensing Physical Properties Housing Metal Weight 9 61 kg Dimensions L x W x H 48 06 x 51 42 x 4 28 cm Function CL3800NW ...

Страница 51: ...structions given for Standard Rack Mounting page 10 While it takes two people to perform a standard installation with an Easy Installation kit one person can mount the CL3800 To install the Easy Installation kit do the following 1 Remove the right and left standard sliding brackets from both sides of the CL3800 Continues on next page Bracket Type Size cm Standard Installation Long 2X 040G 70 0 100...

Страница 52: ...s the CL3800 will be to the inside a Screw the front flanges to the rack first b Slide the bars with the rear flanges toward the rack until the flanges make contact with the rack then screw the rear flanges to the rack Front Flang Slide bar Rear Flang Rear Attachment Rear Attachment Support Flang Sliding Bracket Left Rail Right Rail ...

Страница 53: ...t of the CL3800 to the front of the rack only tighten the screws part way 4 Slide the rear attachment sliding brackets along the slide bars until they contact the rear of the CL3800 then use the screws supplied with this package to attach the bars to the rear of the CL3800 tighten the screws all the way Phillips I Head M4L6 ...

Страница 54: ... to be sure that it is properly aligned and operating smoothly See Opening the Console page 15 for opening and closing procedures 6 After determining that the CL3800 is lined up and operating correctly finish by fully tightening the front attachment screws inserted in Step 3 ...

Страница 55: ... keys The corresponding functions are shown in the table below Note When using key combinations press and release the first key Ctrl then press and release the activation key PC Keyboard Sun Keyboard Ctrl T Stop Ctrl F2 Again Ctrl F3 Props Ctrl F4 Undo Ctrl F5 Front Ctrl F6 Copy Ctrl F7 Open Ctrl F8 Paste Ctrl F9 Find Ctrl F10 Cut Ctrl 1 Ctrl 2 Ctrl 3 Ctrl 4 Ctrl H Help Compose ...

Страница 56: ...mulation mappings are listed in the table below Note When using key combinations press and release the first key Ctrl then press and release the activation key PC Keyboard Mac Keyboard Shift Shift Ctrl Ctrl Ctrl 1 Ctrl 2 Ctrl 3 Ctrl 4 Alt Alt Print Screen F13 Scroll Lock F14 Enter Return Backspace Delete Insert Help Ctrl F15 ...

Страница 57: ...le with one of an appropriately short length Some characters I enter from the keyboard do not display correctly The keyboard layout setting for the port does not match the keyboard you are using On your switch change the keyboard layout setting for the port to match the layout of the keyboard you are using I can t use the special keys on the Sun external keyboard to control Sun computers Use Sun k...

Страница 58: ... provide a repair service without charge during the Warranty Period If a product is detective ATEN will at its discretion have the option to 1 repair said product with new or repaired components or 2 replace the entire product with an identical product or with a similar product which fulfills the same function as the defective product Replaced products assume the warranty of the original product f...

Страница 59: ...w DC Power 8 L LCD Buttons 21 OSD configuration 21 O Online Registration iii Opening the Console 15 Operating Precautions 20 P Port ID Numbering Selection 23 Powering Off 23 Precautions 20 R Rack Mounting Optional 41 Standard 10 Reset Switch 6 Restarting 23 RoHS ii S Safety Instructions General 35 Rack Mounting 37 Specifications 39 AC Power Models 39 Sun Keyboard Emulation 45 System Requirements C...

Страница 60: ...42 Troubleshooting 46 U User Notice iv ...

Отзывы: