


2-17
ASUS RS700-E8-RS8 Series
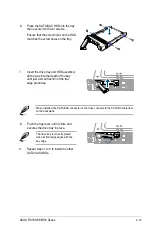
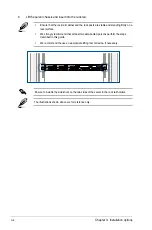
5.
Install the riser card bracket and the PCIE expansion card assembly into the PCIE
connector on the motherboard. Ensure that the golden connectors of the riser card
bracket is firmly seated in place.
To install a PCI-E x8 (Gen3 x8 link), proprietary card to the PCIE x8 slot:
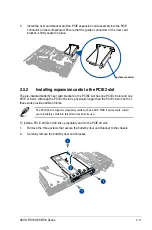
2.5.2
Installing expansion cards to the PCIE2 slot
The pre-installed butterfly riser card bracket on the PCIE2 slot has one PCIE x8 slot and one
PCIE x16 slot. Although the PCIE x16 slot is physically longer than the PCIE x8 slot, both of
these slots provides x8 Gen3 links.
1.
Remove the three screws that secure the butterfly riser card bracket to the chassis.
2.
Carefully remove the butterfly riser card bracket.
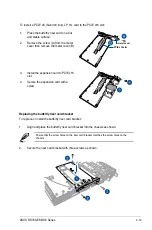
golden connector
The PCIE x8 slot supports proprietary cards such as ASUS PIKE II series cards. Install
your proprietary cards into this slot to maximize its use.
Содержание RS700-E8-RS8 Series
Страница 1: ...1U Rackmount Server RS700 E8 RS8 Series User Guide ...
Страница 10: ...x ...
Страница 27: ...2 9 ASUS RS700 E8 RS8 Series 18 Replace the air duct CPU1 CPU2 ...
Страница 52: ...Chapter 4 Motherboard information 4 2 4 1 Motherboard layout ...
Страница 76: ...Chapter 4 Motherboard information 4 26 ...
Страница 164: ...6 38 Chapter 6 RAID configuration ...
Страница 192: ...A 2 Appendix A Reference information Z10PP D24 block diagram ...
Страница 198: ...A 8 Appendix A Reference information ...