ROG RAMPAGE IV GENE
4-23
Chapter 4
4.3.12
ROG Connect
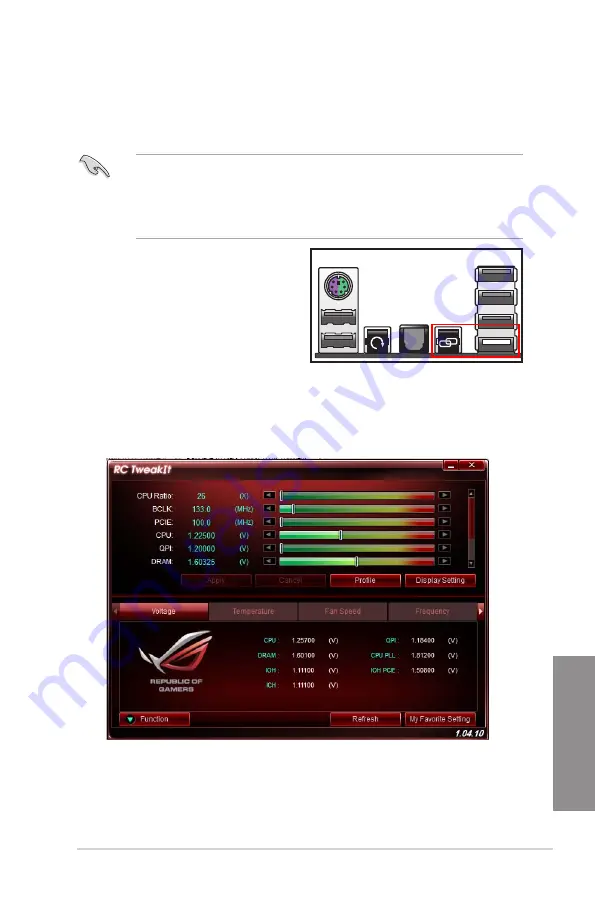
ROG Connect allows you to monitor and adjust the local PC through your remote PC.
Setting up USB connection between your local and remote PC
•
Install
ROG Connect
on the remote PC from the provided Support DVD before using
ROG Connect.
•
ROG Connect
must work with
ROG Connect Plus
to avail full function. Ensure that
you install
ROG Connect Plus
on your local PC from the provided Support DVD
before using
ROG Connect
.
1.
Connect the provided ROG Connect
cable to the local PC and the remote PC.
2.
Press the ROG Connect Button and it will
light up into a stable glow.
3.
Double-click the
RC TweakIt
shortcut on
the remote PC to activate the function
Using RC TweakIt
Use the sliders and buttons to monitor or adjust your local PC.
Содержание Rampage IV GENE
Страница 1: ...Motherboard RAMPAGE IV GENE ...
Страница 18: ...xviii ...
Страница 60: ...2 34 Chapter 2 Hardware information Chapter 2 B A 9 B A 7 8 Triangle mark 5 6 ...
Страница 62: ...2 36 Chapter 2 Hardware information Chapter 2 To replace the LGA2011 CPU pad X Socket 1 2 3 4 5 ...
Страница 63: ...ROG RAMPAGE IV GENE 2 37 Chapter 2 1 2 3 To remove a DIMM 2 3 4 DIMM installation B A ...
Страница 65: ...ROG RAMPAGE IV GENE 2 39 Chapter 2 DO NOT overtighten the screws Doing so can damage the motherboard 3 ...
Страница 66: ...2 40 Chapter 2 Hardware information Chapter 2 2 3 6 ATX Power connection 1 2 OR OR ...
Страница 67: ...ROG RAMPAGE IV GENE 2 41 Chapter 2 2 3 7 SATA device connection OR 2 OR 1 ...
Страница 69: ...ROG RAMPAGE IV GENE 2 43 Chapter 2 2 3 9 Expansion Card installation To install PCIe x16 cards ...
Страница 111: ...ROG RAMPAGE IV GENE 3 37 Chapter 3 3 8 2 ASUS SPD Information Allows you to get DRAM SPD information ...
Страница 170: ...5 8 Chapter 5 Multiple GPU technology support Chapter 5 ...


