


8
ASUS PhysX
TM
Installation Guide
English
9. Put back the chassis cover.
10. Reconnect all cables.
11. Plug the power cord to the computer and to a wall socket & power strip.
12. Power ON the computer.
After installing the PhysX card on your computer, you need to install the device
driver that enables the PhysX card to work with Windows operating system.
I
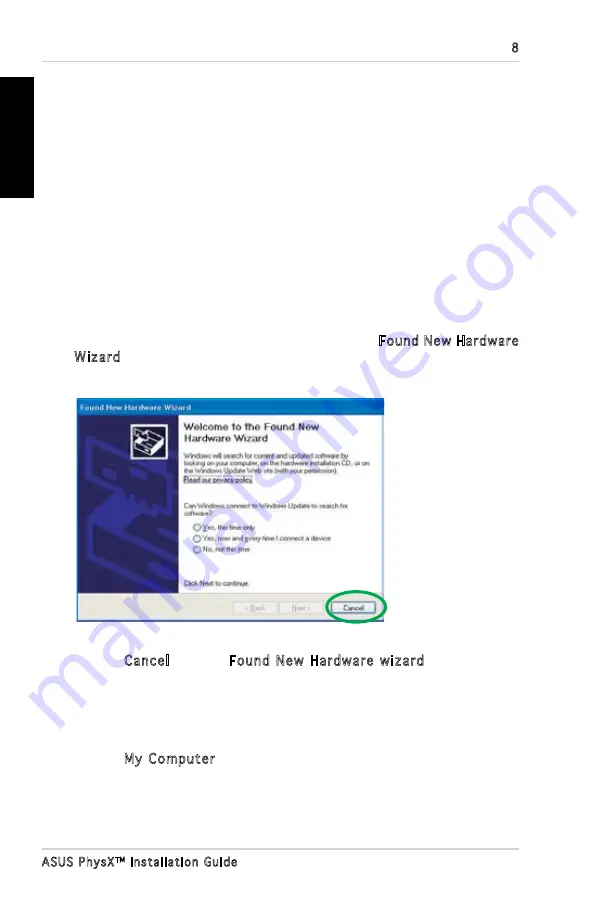
f you have already installed the ASUS PhysX card, the Found New Hardware
Wizard
window may pop up before or during driver installation. See figure
below.
1.3 Driver installation
To install the device driver:
1. Click
Cancel from the Found New Hardware wizard
window.
2. Insert the ASUS PhysX support CD into your optical drive.
If autorun is enabled, the ASUS PhysX Card Driver screen appears
automatically. Go to step 5.
If Autorun is not enabled in your computer, perform step 3.
3. Click
My Computer
on your desktop.
(Note: The version and content of the driver CD are subject to change without
notice.)
Содержание PhysX P1
Страница 1: ......
Страница 2: ...Content English 1 Deutsch 18 Français 35 한국어 52 日本語 69 简体中文 86 繁體中文 102 ...
Страница 3: ... ASUS PhysXTM Installation Guide English ...
Страница 20: ...ASUS PhysXTM Installationshilfe 18 Deutsch ...
Страница 37: ...ASUS PhysXTM Manuel d installation 35 Français ...
Страница 54: ...ASUS PhysXTM 설치 가이드 52 한 국 어 ...
Страница 71: ...ASUS PhysXTM インストールガイ ド 69 日本語 ...
Страница 88: ...华硕 PhysXTM 安装指南 86 简体中文 ...
Страница 98: ...96 华硕 PhysXTM 安装指南 简体中文 2 2 信息 信息窗口显示了 PhysXTM 驱动和硬件的信息 2 3 演示 在演示窗口 点击 AGEIA PhysX boxes Demo 图标启动已安装的演示 ...
Страница 104: ...華碩 PhysXTM 安裝指南 102 繁體中文 ...
Страница 114: ...112 華碩 PhysXTM 安裝指南 繁體中文 2 2 訊息 訊息視窗顯示了華碩 PhysXTM 驅動程式和硬體的訊息 2 3 示範 在示範視窗中 按 ASUS PhysX boxes Demo 圖示啟動已安裝的示範 ...
Страница 120: ......


