
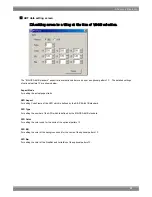
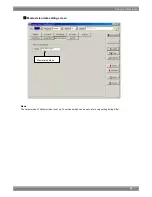

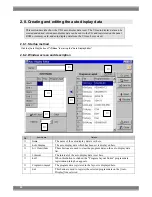


(5)Sending the characters
1) Click the [Send] button. The "Send to VG" code selection dialog box appears.
2) Set the character code (0xE0 to OxEF in hexadecimal format).
3) Click the [OK] button. The character is now sent to the VG and registered. (The code shown at [Code] now
changes to that of the sent character.)
(6)Receiving the characters
1) Click the [Receive] button. The "Receive from VG" code selection dialog box appears.
2) Set the character code (0xE0 to OxEF in hexadecimal format).
3) Click the [OK] button. The reception of the character is now started.
4) The received character is displayed in the editing area. (The code shown at [Code] now changes to that of the
received character.)
Characters can be received from old VG model but they cannot be sent to one.
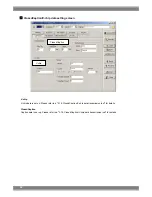
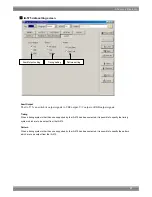
(7)Printing the characters
1) Click the [Print] button to print the characters which have been created.
2) The "Print" dialog box appears. Set the margins here.
3) Click the [OK] button. The displayed character is now printed.
4) To change the printer which has been set, click the [Set Printer...] button.
5) The printer setting dialog box appears. Proceed with the printer settings. For details on how the items on this dialog
box are set, refer to the instruction manual for Windows or for the printer which will be used.
60
Содержание SP-8848
Страница 1: ...Portable signal generator programming software SP 8848 Instruction Manual Ver 2 6...
Страница 2: ......
Страница 4: ......
Страница 16: ...8...
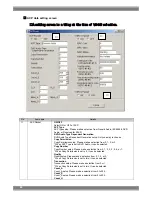
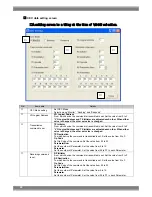
Страница 51: ...Chapter 2 Operation 43 HDMI data setting screen A setting screen is a thing at the time of VG 849 selection...
Страница 117: ...Chapter 2 Operation 109 Text data setting screen...
Страница 119: ...Chapter 2 Operation 111 V chip setting screen...
Страница 122: ...114...
Страница 124: ...116...


