


SECTION 3
FUNCTIONAL OPERATION
16
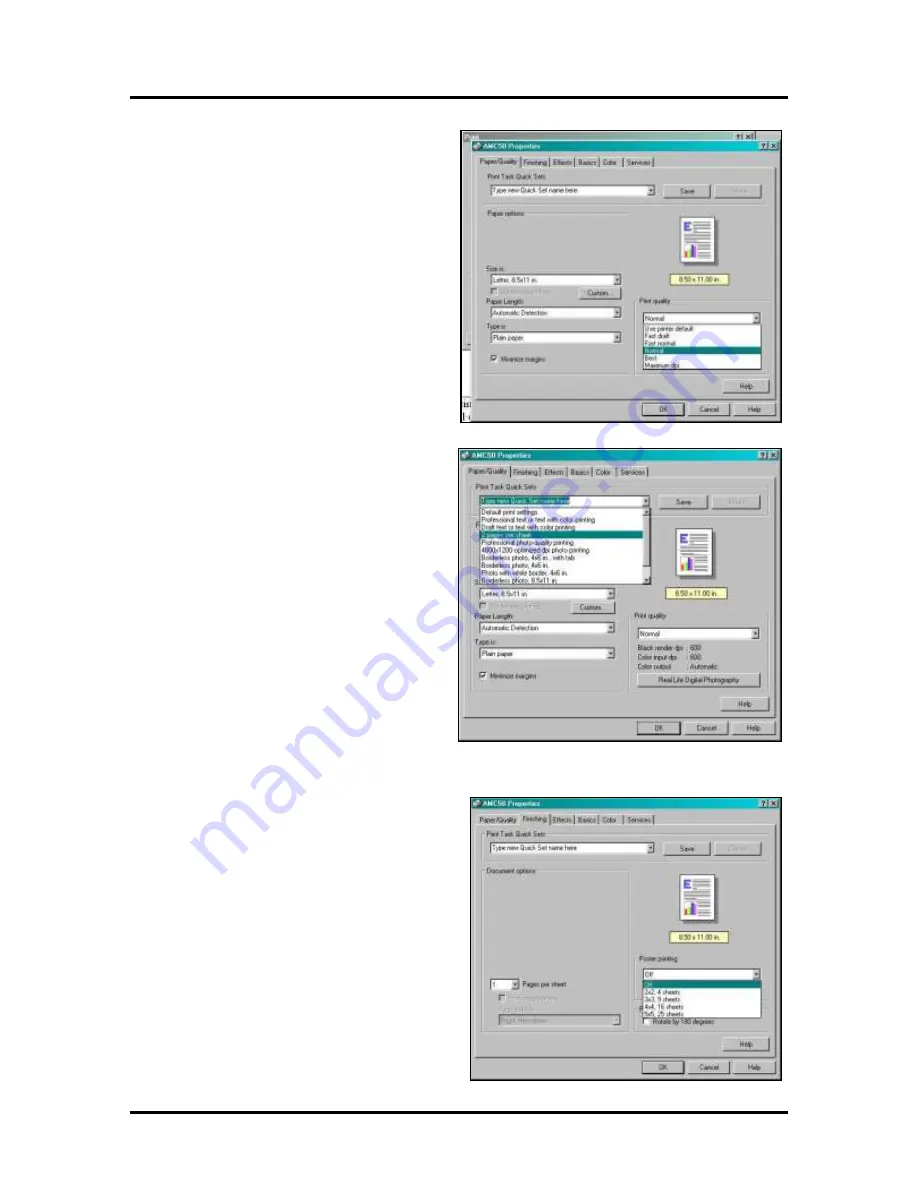
“Print Quality”
refers to the amount of ink and the
resolution of the image the Printer will print.
Fast Draft
uses least amount of ink, has lowest
resolution and prints fastest.
Equivalent to 300 dpi (
dots per inch
).
Fast Normal
and
Normal
are approximately
600 dpi and print slower, but at a higher quality.
Best
is approximately 1200 dpi and is used where
high quality images are required.
Maximum DPI
is used when printing photos and
has a correction routine available under the
“Real
Life Digital Photography”
button to help
improve the quality of photos you print.
On this and subsequent pages in the
Properties
window notice the
“Print Task Quick Sets”
menu. This menu contains some standard setups
for printing different types of jobs. You may also
add job setups to this menu by typing in a
description or name for a job and clicking on the
Save
button. This is particularly useful if you have
some standard jobs you run all the time.
Highlighting the job and clicking the
Delete
button
cancels any of the jobs in the menu.
Finishing Tab
“Finishing”
tab gives you the option of printing
more than one page on a single page or printing a
large single page over several sheets of paper to
make a sign or poster. To print more than one page
on a single page, click the
Pages per sheet
menu and
select the number of pages you wish to print. This
option works with multiple page documents.
Default is one.
Poster printing
option works the opposite way. To
make a document larger, use this option to select the
size of the printed document. Default is OFF.
Содержание astrojet 5000
Страница 5: ...TABLE OF CONTENTS iii NOTES...
Страница 6: ......
Страница 28: ...SECTION 4 ADJUSTMENTS 22 NOTES...
Страница 44: ...SECTION 5 DISASSEMBLY ASSEMBLY 38 NOTES...
Страница 50: ...APPENDIX 44 APPENDIX C Wiring Diagram...
Страница 54: ......
Страница 55: ...Copyright 2014 ASTRO MACHINE CORP Elk Grove Village IL 60007 12 16 2014 Part Number 300 AJ5000 Rev D...


