50
EN
Configuration
Step 4: Adjust LEDs according to the LED pattern (=address).
You set each individual address value when the status of the corresponding LED
has just changed.
The cycle begins again for LED 1 after each selection. You have several attempts to
select or deselect the LEDs. If you do not select or de-select anything, the process
cycles up to LED 64 and an audible signal sounds. The process starts again with
LED 1.
32
16
4
64
8
1
2
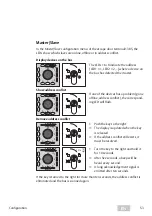
3 Briefly press the key to the right:
· Select
address value
:
press immediately if the corre-
sponding LED lights up:
· Deselect
address value
:
press immediately if the corre-
sponding LED goes out:
The address 11 is set in this example.
The LED pattern is 1 + 2 + 8.
3.1 Example:
press to the right if:
· LED 1 lights up
· LED 2 lights up
· LED 4 goes out
· LED 8 lights up
· LED 16 goes out
· LED 32 goes out
· LED 64 goes out
Step 5: Save LED pattern (= address)
When the LED pattern matches the
desired address.
4 Wait until the process has cycled
through completely.
An audible signal sounds.
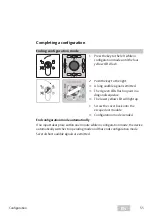
5 Briefly press right once.
You will hear a long audible signal.
The green LEDs blink in succession.
Step 6: Switch off configuration mode
6 Exit into configuration mode
(“Ending configuration mode”,
page 55).
Содержание 1384
Страница 13: ...13 EN Assembly and connection ...
Страница 17: ...17 EN Assembly and connection Fig 4 Replacing the profile half cylinder 3 0 5 180 2 3 3 0 5 5 4 1 ...
Страница 62: ...62 EN ...
Страница 63: ...63 EN ...


