51
Preparation for Work - 4
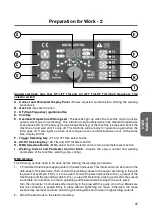
6- Select the desired TIG welding mode with “AC/DC selecting key” (G); trigger mode with “trigger
selecting key” (F). The welding machine can operate in the 2 trigger and 4 trigger TIG modes.
In the TIG welding mode, Lift-TIG and High Frequency TIG operations are available. Press HF
(High Frequency) ignition button to select high frequency, led will light up. When it is pressed
again Led will turn off, Lift TIG will be activated. In the Lift-TIG mode, a low-current short circuit
is made by touching the TIG torch to the work piece, then the TIG arc is formed while lifting the
torch. In the HF mode, the welding machine is ready for high frequency welding, hence the arc
forms without touching the TIG torch to the work piece.
TIG welding in 4T mode is as follows:
The start current and crater current can be pre-set. This function can compensate the possible
crater that appears at the beginning and end of the welding. Thus, 4T is suitable for the welding of
medium thickness plates.
a- Press and hold the gun switch, electromagnetic gas valve is turned on. The shielding gas starts to flow.
b- The shielding gas continues to flow during the pre-gas time set for 0.1 - 10 seconds
c- Welding arc is formed, start current ( adjustment range 5-200 A) starts the welding.
d- Loosen the gun switch, the output current slopes up from start current; if the output pulse
function is turned on, the output current is pulsed
e- Output current slopes up to the setting current value; adjustment range of up slope time is
between 0-10.0S ;
f- During welding process, the gun switch is loosen. If the output pulse function is turned on,
the output current is pulsed. If the output pulse function is turned off, the output current is DC
current;
g- Repress down the gun switch, the output current slopes down to crater current; if the output
pulse function is turned on, the slope down current is pulsed. Adjustment range of down slope
time is between 0-10.0S.
Note: In 4T mode, press and hold the trigger during the set
crater time
, the machine reaches
the set
crater current
. Otherwise, the welding current ends without reaching to the set crater
current.
h- Crater current holds time. Adjustment range of crater current is between 5- 200A.
i- Loosen the gun switch, stop arc, and keep on argon flowing. The shielding gas contunies to
flow during post flow time. Adjustment range of post flow time is between 1.0-10.0 S.
j- Electromagnetic valve is closed and stop argon flowing. Welding is finished.
TIG welding in 2T mode is as follows:
This function without the adjustment of start current and crater current is suitable for the Re-tack
welding transient welding thin plate welding and so on.
a- Press and hold the gun switch, electromagnetic gas valve is turned on. The shielding gas
starts to flow.
b- The shielding gas continues to flow during the pre-gas time set for 0.1 - 10 seconds
c- Welding arc is formed, the output current slopes up to the setting current from minimum
current (5A); if the output pulse function is turned on, the slope up current is pulsed.
d- During the whole welding process, the gun switch is pressed and held without releasing. If the
output pulse function is turned on, the output current is pulsed. If the output pulse function is
turned off, the output current is DC current.
e- Loosen the gun switch, the output current slopes down; if the output pulse function is turned
on, the slope down current is pulsed.
f- The output current slopes down to minimum current (5A), stop arc. Adjustment range of down
slope time is between 0-10 S.
g- The shielding gas contunies to flow during post flow time. Adjustment range of post flow time
is between 1.0-10.0 S.
h- Electromagnetic valve is closed and stop argon flowing. Welding is finished.
U
S
E
R
MAN
U
AL
Содержание Inverter 205-TIG AC/DC
Страница 2: ......
Страница 38: ...36 KULLANIM KILAVUZU ...


