3. Maintenance and Service
The Stereo-Microscope SMT 4 and the Stereo-
Zoom Microscope SMC 4 and its supplemen-
tal equipment are service-free over a long pe-
riod of time, assuming normal use. In the case
of continual use (shift operation) and especially
in the case of unfavourable environment condi-
tions (dust, etc.), the unit should be serviced
when needed in the following ways.
Before any servicing of the equipment, the
power supply should be disconnected.
Please be carefully with all optical parts. A
damage of theese part will cause aberrations
or not sharpen images.
All loose parts, e.g. preparations, filter or so
on have to be removed from the microscope.
3.1.
Changing the illumination
3.1.1. You can’t change the light emitting
diode (LED) by yourself at the
LED illuminations
.
LED illuminations have a longer livespan than
normal halogen bulbs. Only the manufacturer
of the LED illumination is able to change the
LED.
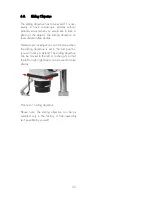
3.1.2. A change of the illumination at the
base for transmitted and incident light
will be
done over the bottom of the base. Tip the
base on the side to change the lamps. Loosen
the screw in the flap of the lamp case, snap
out the flap with the lamp mount and change
the lamp. Subsequently shut the flap again.
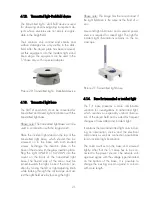
3.1.3. At the
transmitted light – dark-field
devise
the screws underneath the equipment
has to be loosen to change the lamps. Remove
and rotate the ground plate and exchange the
old halogen lamp against a new halogen
lamp 6V/10W. Subsequently mount the
transmitted light – dark-field device in the re-
verse order.
Before you use the microscope the first time
and after each change of the illumination the
bulb has to be recentered again. To do that,
you have to take a sheet of paper or a frosted
glass. Put it on the dark field device. By chang-
ing the screws you can adjust a uniform of the
illumination.
3.1.4. Please read the user manual of the
cold light device
how has to change the bulb.
3.2.
Changing the fuse
Warning: Do not adjust inadvertently the mark
of the main voltage!
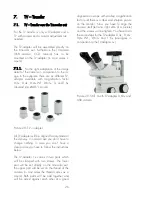
3.2.1. It is possible to change the fuse on
the
transformer
when the unit is closed. The
fuse box is located directly above the connec-
tion jack for the power cable on the backside
of the unit. Press the clamps right and left of the
box towards the center and remove the cover-
ing with the fuses. A fuse with the blow-power
250mA 250V is required for the setting
220/240V and the blow-power 500mA
250V is required for the setting 115V.
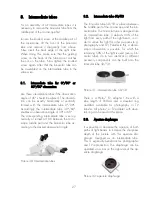
3.2.2.
The base for transmitted or incident
light (T/I base)
can be opened. A box whose
upper part can be removed after both screws
are loosened is located in the lower plate.
Remove the fuse and insert a new one (for
voltage 220/240V – blow-power 250mA
and for 110/127V – blow-power 500mA).
Then close the base again in the reverse order.
3.2.3 Please read the user manual of the
cold
light device
how has to change the fuse.
13


