Rack Mounting the Switch
3.2.2
To remove the mounting bracket from the chassis, lift the front edge of the mounting bracket
clip with a flathead screwdriver and slide the bracket away from the front flange (opposite from the
installation direction).
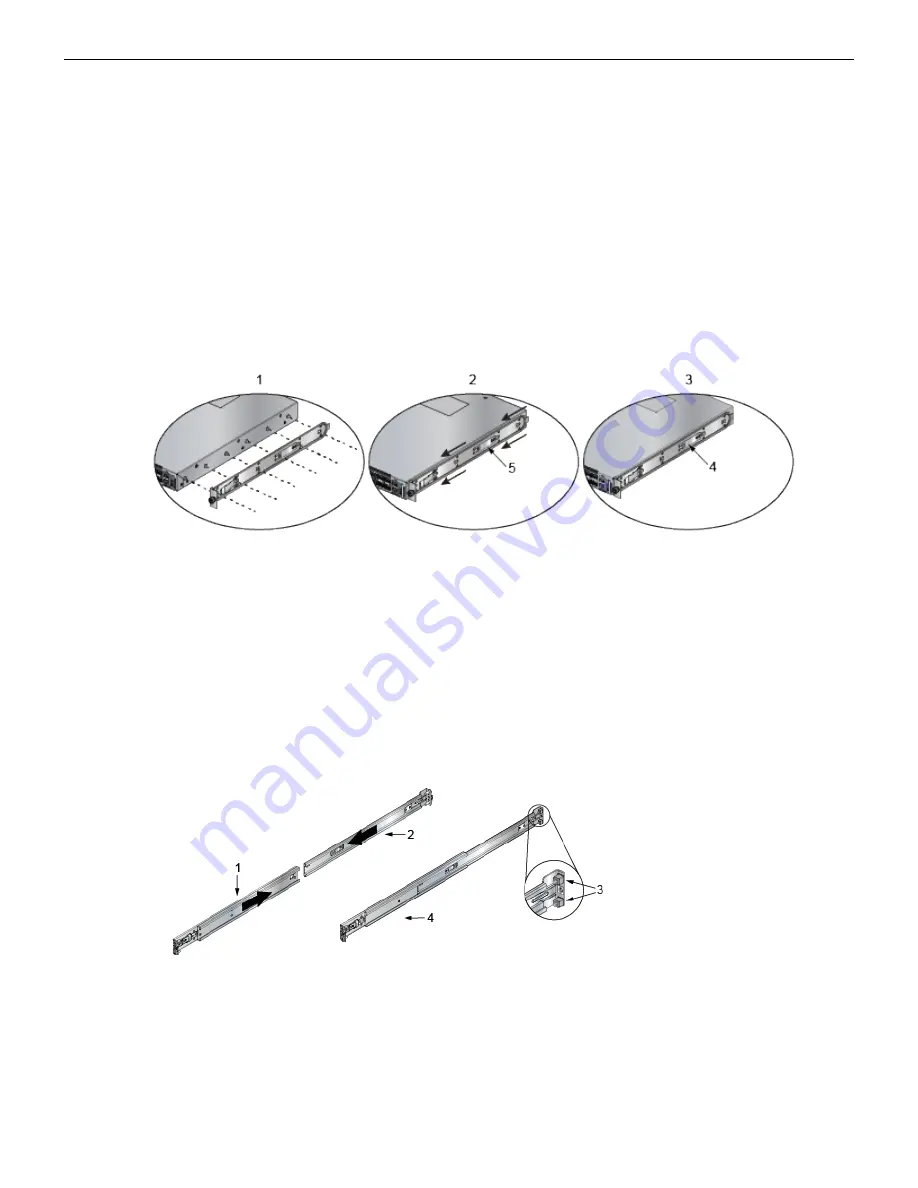
Rail-rods and rail-slides assemble into two identical rails. Each rail connects a front post to a rear post.
When the rails are installed, the switch slides on the rails into the rack. Each bracket includes a screw
that attaches the switch to the rail.
Each end of an assembled rail contains two rack plugs (
Figure 9: Attaching the Mounting Brackets
). The rails are installed into a rack by inserting the plugs into rack slots. When
installing rails into posts with threaded or rounded holes, remove all plugs located on both sides of the
assembled rails, then install the rails with bolts that fit the rack.
Figure 9: Attaching the Mounting Brackets to the Switch Chassis
1 Step 1
4 Bracket clip (attached)
2 Step 2
5 Bracket clip (aligned)
3 Step 3
This procedure attaches the rails to a four post rack:
1.
Slide a rail-rod into a rail-slide (
Figure 10: Assembling the Rails
) until the rail clip makes an audible
click.
The rail clip prevents the extension of the rail beyond the maximum supported distance between the
front and rear rack posts.
Figure 10: Assembling the Rails
1 Rail-slide
4 Rail (assembled)
2 Rail-rod
3 Rack plugs
13
Assembling the Rails onto the Equipment Rack


