Chapter 2
Preparation
This section covers the following topics:
•
•
Tools and Parts Required for Installation
•
Electrostatic Discharge (ESD) Precautions
2.1
Site Selection
The following criteria should be considered when selecting a site to install the switch:
•
Temperature and Ventilation: For proper ventilation, install the switch where there is ample
airflow
to the front and back of the switch. The ambient temperature should not go below 0° or
exceed
40°C.
Important:
To prevent the switch from overheating, do not operate it in an area where the ambient
temperature exceeds 40°C (104°F).
Pour empêcher l’interrupteur de surchauffe, ne pas utiliser il dans une zone où la
température ambiante est supérieure à 40°C (104°F).
•
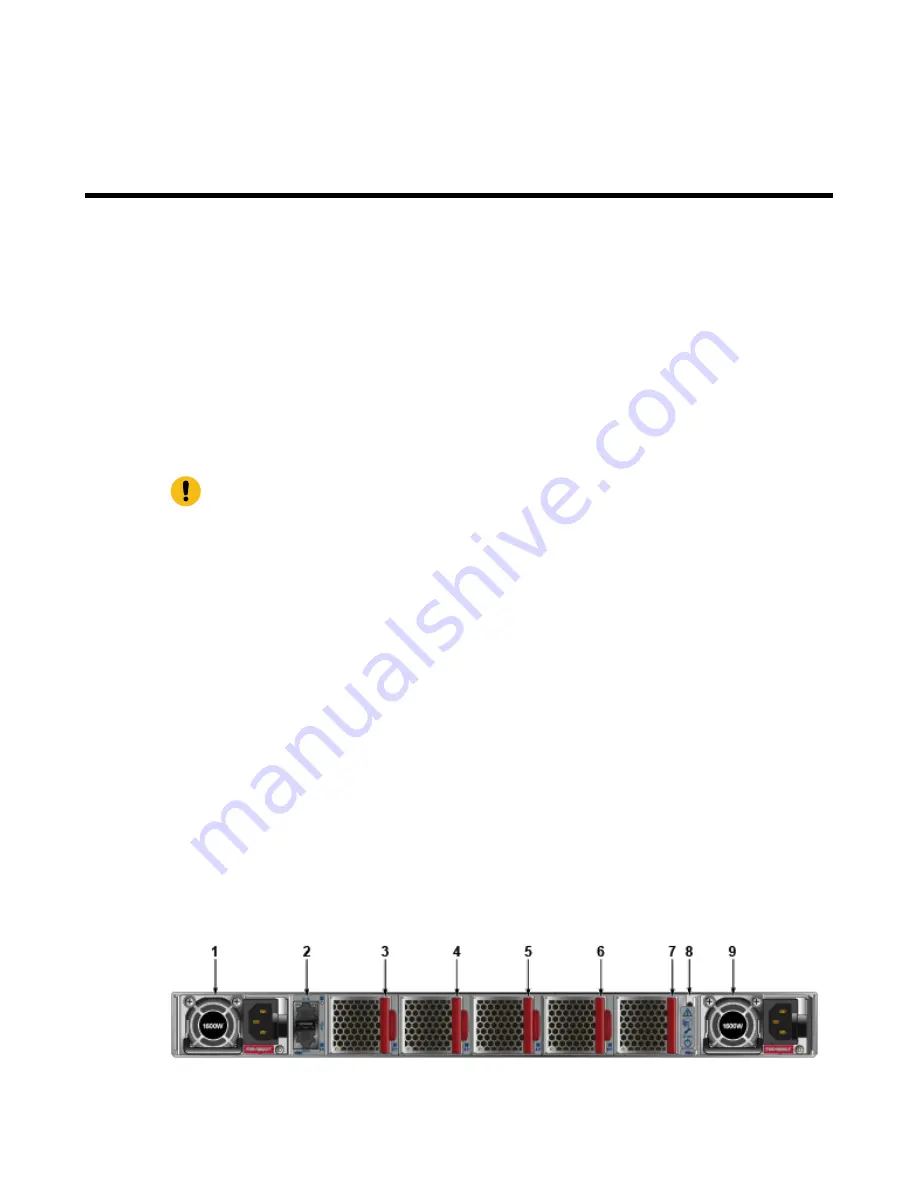
Airflow Orientation: The power supply module supports forward airflow and so does the fan
module.
Figure 1: Airflow Direction Labels
displays fan and power supply module locations on the
rear panel. Base the switch orientation on the airflow direction of the modules to assure the air inlet
is always oriented toward the cool aisle:
•
Air Exit modules: orient the rear panel toward the hot aisle.
If the airflow direction is not compatible with the installation site, contact your sales representative.
•
Rack Space: Install the switch in a 19" rack or cabinet. The switch height is 1 RU. The accessory
kit provides mounting brackets for two-post and four-post racks.
When mounting the switch in a partially filled rack, load the rack from bottom to top, with the
heaviest equipment at the bottom. Load the switch at the bottom if it is the only item in the rack.
•
Power Requirements: Power requirements vary by switch and power supply model. Refer to
3: Switch Specifications (Power Supply Units)
and
Table 4: Switch Specifications (Power Draw)
information regarding your specific system.
Two circuits provide redundancy protection.
describes power cable
requirements.
Figure 1: Airflow Direction Labels
1 Power Supply Module 1
4 Fan Module 2
7 Fan Module 5
5


