background image

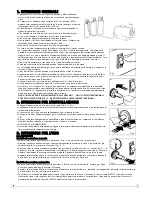
scriptions of the previous paragraph about  installation have been obser-
ved. Wait one minute , then unlock the heater by pressing the RESET but-
ton and repeat the starting operations.

• Contact your supplier should any problem continue.

CAUTION
• If ignition is difficult or irregular before repeating the ignition

operations make sure that the fan is not locked and that air inlet
and outlet are unobstructed.

3.2 SWITCHING OFF

• To stop the heater, shut off the gas cylinder tap. Let the fan run until the flame shuts down and then turn the fan switch to posi-

tion O.

3.3 AIR CONDITIONING

• The heater can also be used as a ventilator.
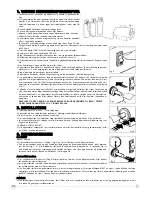
• In this case remove the gas supply hose and connect the plug of the heater to a suitable electrical supply.
• Set the fan switch to position I.

4. MAINTENANCE 

• The repairs or maintenance operations must only be carried out by qualified personnel.
• The unit must be checked by  a qualified technician at least once a year.
• Regularly check the conditions of gas hose, and gas regulator if it must be replaced only use original spare parts.
• Before starting any maintenance operation on the heater disconnect from both gas and electrical supplies.
• If the unit has not been used for a long period we advise that a technician carries out a general check up before using. It is

important to control the following:

• Periodically check the gas supply hose conditions and, should it be changed, use only original spare parts.
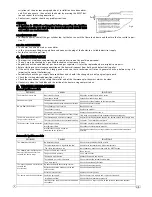
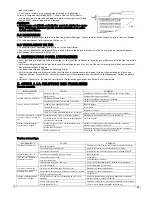
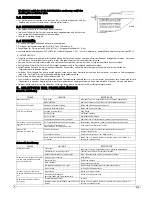
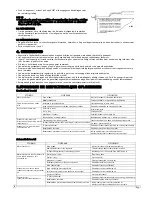
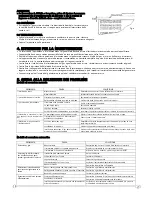
• Check the starting electrode position (see Fig. 6).
• Check the connections of the safety thermostat and of the thermocouple: they must always be clean.
• If necessary clean the fan blade and the inside of the heater using compressed air.

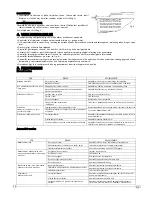
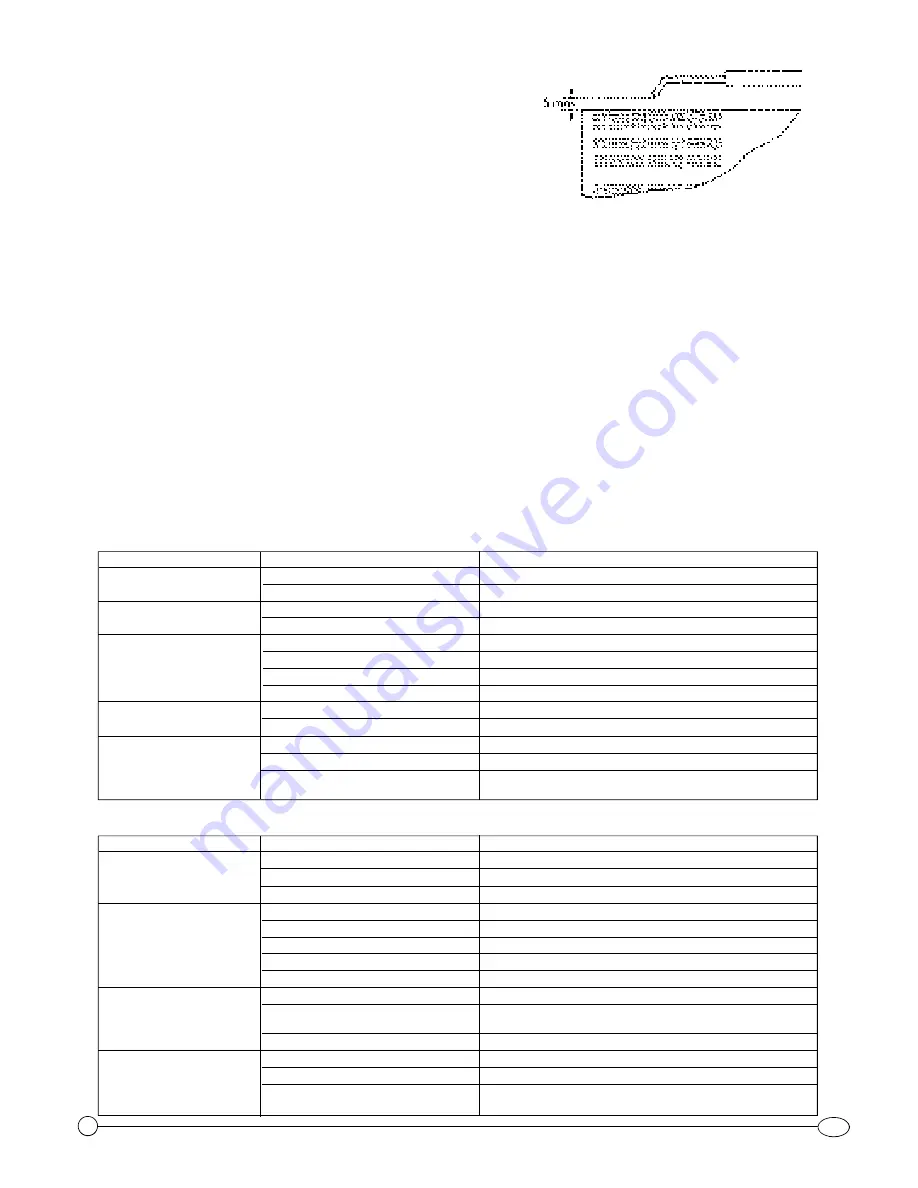
5. TROUBLESHOOTING

Manual ignition models

Automatic ignition models

2

GB

Fig. 6

The motor does not work

The motor works, but the burner

does not light up and after few

seconds the heater stops

The burner lights up but after few

seconds the 

heater stops

The heater stops during operation

No electricity supply
The room thermostat is regulated too low

The safety thermostat is on

The gas cylinder tap is closed
The gas cylinder is empty 
The nozzle is obstructed
The solenoid gas valve is not open
There is no spark
No connection with the earthing system 
Defective connection between sensor and

safety device
Defective safety device
Excessive gas supply

Insufficient air flow

Insufficient gas supply due to ice formation on

the cylinder

Check the terminal board with a tester
Regulate the thermostat on a higher temperature
Wait about one minute and then push the RESET button
Open the tap
Use a new cylinder
Remove the nozzle and clean it
Check that that the solenoid valve works
Check the position of electrode
Check and connect properly

Replace the safety device
Check the pressure reducer and  replace it if required.
Check that the motor works properly 
Check and use a larger cylinder or two cylinders connected together.

PROBLEM

CAUSES

SOLUTIONS

The motor does not  work

Piezo does not spark

No gas flow to the burner

The burner starts but it stops as

the gas valve is released 

The heater stops during operation

No electricity supply
The motor is locked
Electrode in a wrong position
Faulty connection between piezo and electrode
The cylinder gas tap is closed
The cylinder is empty
The nozzle is obstructed
Gas leaks from the supply hose or from the tap 
The thermocouple is not warm enough
The safety device works due to lack of cooling
Excessive gas supply
Insufficient air flow
Insufficient gas supply due to ice 

formation on the cylinder

Check the terminal board with a tester
Unlock the motor using a tool
Check and set the electrode to the right position
Check and connect properly
Open the gas tap
Replace the cylinder
Remove the nozzle and clean it
Find leaks using approved leak detector and connect properly
Repeat the starting operation keeping the button pushed for a longer time
See point  “The motor does not work”
Check the pressure reducer and if required replace it
Check that the motor works properly
Check and eventually use a larger cylinder or two cylinders connected

parallely.

PROBLEM

CAUSES

SOLUTIONS

Содержание 100

Страница 1: ......

Страница 2: ......

Страница 3: ...arks or free flames If in any doubt contact your supplier DO NOT USE FOR HEA TING OF LIVING AREAS OF RESIDENTIAL BUILDINGS FOR USE IN PUBLIC BUILDINGS PLEASE REFER TO NA TIONAL REGULA TIONS 2 INSTALLATION Connect the heater to a suitable electric socket 230 V 50 Hz or 110 V 50 Hz for dual volta ge U K units Make sure that the machine is properly earthed Connect the gas supply hose to the pressure ...

Страница 4: ... supply The room thermostat is regulated too low The safety thermostat is on The gas cylinder tap is closed The gas cylinder is empty The nozzle is obstructed The solenoid gas valve is not open There is no spark No connection with the earthing system Defective connection between sensor and safety device Defective safety device Excessive gas supply Insufficient air flow Insufficient gas supply due ...

Страница 5: ... appareil et ne le réutiliser qu après l avoir fait contrôler par un centre d assistance autorisé Si l appareil est installé à l intérieur d un local aérer en ouvrant les portes et fenêtres Ne pas produire d étincelles ou de flammes libres NE PAS UTILISER POUR LE CHAUFF AGE DES ZONES HABITÉES DANS LES BÂTIMENTS RÉSIDENTIELS POUR L UTILISA TION DANS LES BÂTIMENTS PUBLICS CONSUL TEZ LES RÉGLEMENT AT...

Страница 6: ... vide Le gicleur est obstrué Fuites sur le tuyau d alimentation ou sur les raccords Le thermocouple n etait pas suffisamment chaud Le thermostat de sécurité est entré en fonction pour un manque de ventilation Arrivée reduite du gaz due à la formation de givre sur la bouteille Arrivée excessive du gaz Arrivée reduite de l air Contrôler par l aide d un testeur l arrivée du courant aux bornes Débloqu...

Страница 7: ...OHNRÄUMEN DER WOHNGEBÄUDE FÜR DEN EINSA TZ IN ÖFFENTLICHEN GEBÄUDEN BITTE DIE NA TIONALEN VORSCHRIFTEN BEACHTEN 2 INSTALLATIONSANWEISUNGEN Beim Aufstellen des Geräts sind die technischen Regeln Flüssiggas TRF 1988 sowie die einschlägigen Unfallverhütungsvorschriften VBG 43 und ZH 1 455 zu beachten Gerät an eine Steckdose anschliessen 230 V 50 Hz Das Gerät darf nur an einen Stecker angeschlossen we...

Страница 8: ...ührung Automatik Ausführung 6 DE Abb 6 FEHLER GRÜNDE BESEITIGUNG Motor läuft nicht Der Piezo zündet nicht Kein Gas am Brenner Der Brenner springt an geht aber aus sobald man das Gasventil los lässt Brenner fällt während der Arbeit aus Kein Strom Motor blockiert Elektrode in falscher Stellung Piezo und Elektrode defekt Gashahn ist geschlossen Gasflasche leer Düse verstopft Speisungsrohr oder Anschl...

Страница 9: ... kan raken Indien het toestel langdurig met maximaal vermogen wordt gebruikt is het raadzaam dereservoirs parallel op te stellen Afb 1 In geval van gaslek of enige verdenking daartoe de gasfles onmiddellijk sluiten apparatuur uitscha kelen en niet weer in gebruik nemen Voordat u het opnieuw in bedrijf stelt eerst een controle laten uitvoeren door de servicedienst Wanneer de apparatuur in een geslo...

Страница 10: ...kt maar valt meteen nadat de gasklep wordt losgelaten uit Brander valt tij dens normaal funk tioneren uit Geen stroom Motor geblokkeerd Elektrode in verkeerde positie Piezo elektrische knop en elektrode verkeerd verbonden Fleskraan is dicht Fles is leeg Mondstuk is verstopt Toevoerleiding of fittings lekken Thermokoppel is niet heet genoeg Veiligheidsthermostaat treedt in werking bij gebrek aan ve...

Страница 11: ...l apparecchio è installato all interno di un locale aerare aprendo completamente porte e finestre Non produrre scintille o fiamme libere NON UTILIZZARE PER IL RISCALDAMENTO DELLE AREE ABIT ABILI DI EDIFICI RESIDENZIALI PER L USO IN EDIFICI PUBBLICI F ARE RIFERIMENTO AI REGOLAMENTI NAZIONALI 2 ISTRUZIONI PER L INSTALLAZIONE Collegare l apparecchio ad una presa di corrente 230 V 50 Hz L apparecchio ...

Страница 12: ...ola del gas è vuota L ugello è otturato L elettrovalvola del gas non si apre Manca la scintilla Manca il collegamento con l impianto di terra Collegamento difettoso tra sonda e quadro di sicurezza Quadro di sicurezza difettoso Eccessiva adduzione di gas Ventilazione insufficiente Insufficiente adduzione di gas dovuta alla formazione di brina sulla bombola Controllare con un tester l arrivo della c...

Страница 13: ... førend alt er kontrolleret og problemet er løst ved hjælp fra en servicemand Hvis apparatet er installeret indendørs i et lokale sørg da for at luft kommer ind endten ved at åbne døren eller vinduet Der må ikke forefindes åben ild eller flammer i nærheden af apparatet BRUG IKKE TIL OPV ARMNING AF BOLIGAREALER AF BOLIGEJENDOMME TIL BRUG I OFFENT LIGE BYGNINGER HENVISES AF NA TIONALE REGLER 2 INSTA...

Страница 14: ... gastilførsel Utilstrækkelig ventilation For lav gastilførsel på grund af frostdannelse på flasken Kontrollér med en tester at klemmerne får spænding Justér rumtermostaten til en højere temperatur Vent cirka et minut og tryk på RESET knappen Sørg for at åbne hanen Skift flasken ud Demontér dysen og rengør den Kontrollér magnetventilens korrekte drift Kontrollér elektrodens stilling Kontrollér og f...

Страница 15: ...KKE BRUK FOR OPPV ARMING A V BOLIGER OMRÅDER A V BOLIGBYGG FOR BRUK I OFFENT LIGE BYGG HENVIS TIL NASJONALE BESTEMMELSER 2 INSTALLASJON Sett i stikkontakten i et 230V 50Hz vegguttak Forviss dem om at jordforbindelsen er korrekt På gassflasken skal det være montert en reduksjon sventil Kontroller om det er eventuelle lekkasjer BRUK ALDRI ÅPEN ILD FOR Å SJEKKE EVENTUELLE LEKASJER Hvis apparatet er a...

Страница 16: ...uster romtermostaten til en høyere temperatur Vent 1 min og trykk på RESET knappen Åpne ventilen Skift ut flasken Demonter dysen og rengjør den Kontroller magnetventilen Kontroller elektrodens stilling Kontroller og utbedre feil Kontroller og utbedre feil Skift ut sikkerhetspanelet Kontroller trykk reguleringsventilen Kontroller motorens korrekte drift Kontroller tilstanden og om nødvendig bruk en...

Страница 17: ...ma potencia se aconseja montar las bombonas en paralelo Fig 1 En caso de que se compruebe o se sospeche una pérdida de gas cerrar inmediatamente la bomba apa gar el aparato y no utilizarlo más hasta no haber sido inspeccionado por un centro de asistencia auto rizado Si el aparato ha sido instalado en el interior de una habitación airear abriendo completamente puer tas y ventanas No encender luces ...

Страница 18: ...rriente El termostato ambiente está regulado demasiado bajo El termostato de seguridad ha intervenido La llave de la bombona del gas está cerrada La bombona del gas está vacía La boquilla está obstruida La electrov lvula del gas no se abre Falta la chispa Falta la conexión con la instalación de tierra Conexión defectuosa entre sonda y cuadro de seguridad Cuadro de seguridad defectuoso Excesivo aba...

Страница 19: ......

Страница 20: ......

Страница 21: ......

Страница 22: ......

Страница 23: ......

Страница 24: ......

Страница 25: ......

Страница 26: ......

Страница 27: ......

Страница 28: ......

Страница 29: ... ja avotuli ÄLÄ KÄYTÄ LÄMMITYKSEEN ALUEET ASUINRAKENNUSTEN ASUTTU KÄYTTÖ JULKISISSA RAKENNUKSISSA KA TSO KANSALLISIA MÄÄRÄYKSIÄ 2 ASENNUS Kytke lämmitin pistorasiaan 230 VAC 50 Hz Varmista että laite on oikein maadoitettu Kytke kaasuletku paineensäätimeen ja kytke säädin sopivaan nestekaasupulloon Avaa kaasupullon venttiili ja tarkasta kaasuletkun ja liittimien tiiviys Tähän on suositeltavaa käytt...

Страница 30: ...iden pitää olla puhtaat Puhdista tarvittaessa puhaltimen siivet ja lämmittimen sisäpuoli paineilmalla 5 VIANETSINTÄ Fig 6 ONGELMA SYY KORJAUS Moottori ei toimi Pietsosytytin ei anna kipinää Kaasu ei virtaa polttimeen Poltin käynnistyy mutta sammuu kun kaasuventtiilin nuppi vapautetaan Lämmitin pysähtyy käytön aikana Ei sähkövirtaa Moottori on juuttunut Elektrodi väärässä asennossa Virheellinen kyt...

Страница 31: ...A USO EM EDIFÍCIOS PÚBLICOS CONSUL TE REGULAMENT AÇÕES NACIONAIS 2 INSTALACAO Ligar o aparelho numa tomada de corrente 230 V 50 Hz Verificar que o aparelho està correctamente ligado com mainstalaçao de posto em terra Ligar o tubo de alimentaçao do gàs ao reductor de pressao e este numa botija de gàs propano liquido Abrir a torneira da botija e controlar o tubo de alimentaçao e as junçoes para dete...

Страница 32: ...uido A electrovalvula do gàs nao se abre Ausencia de faicas Nao ha ligaçao com a tomada de terra Ligaçao defeituosa entre a sonda e o quadro de segurança Quadro de segurança defeituoso Chegada reduzida de gàs devida a formaçao de geada Chegada excessiva do gàs Chegada reduzida do ar Controlar com ajuda dum provador a chegada do corrente nos terminais Regular o termostato numa temperatura mais alta...

Страница 33: ...till ett lämpligt eluttag 230 V 50 Hz eller 110 V 50 Hz för enheter som fungerar med olika nätspänningar Storbritannien Se till att maskinen är ordentligt jordad Anslut gasslangen till tryckregulatorn och anslut regulatorn till en lämplig gasolbehållare Öppna behållarens kran och kontrollera att slangen och kopplingarna är täta För denna kontroll rekom menderas en godkänd läckagetestare ÖPPEN ELD ...

Страница 34: ...rdningen Defekt koppling mellan givare och säkerhetsanordning Defekt säkerhetsanordning För stort gasflöde Otillräckligt luftflöde Otillräckligt gasflöde p g a isbildning på behållaren Kontrollera kopplingspanelen med en testare Ställ termostaten på en högre temperatur Vänta en minut och tryck därefter på RESET knappen Öppna kranen Använd en ny behållare Ta bort och rengör munstycket Kontrollera a...

Страница 35: ...SANDLUSELE 2 PAIGALDAMINE Ühendage soojendi sobiliku elektripistikupesaga 230 V 50 Hz või 110 V 50 Hz kahe pingeseade ga Suurbritannia üksused Veenduge et masin on nõuetekohaselt maandatud Ühendage gaasi sisendvoolik rõhuregulaatoriga ning ühendage regulaator sobiva maagaasiballooniga Avage ballooni ventiil ning kontrollige sisendvoolikut ja abiseadmeid gaasilekete suhtes Käesoleva toi mingu puhul...

Страница 36: ...ane ühendus sensori ja ohutusseadme vahel Vigane ohutusseade Üleliigne gaasitoide Ebapiisav õhuvool Ebapiisav gaasitoide jää moodustumise tõttu balloonil Kontrollige klemmplaati testeriga Reguleerige termostaat kõrgemale temperatuurile Oodake umbes üks minut ja vajutage seejärel nuppu ALGOLEKU TAASTAMINE Avage ventiil Kasutage uut ballooni Eemaldage otsak ja puhastage seda Kontrollige solenoidklap...

Страница 37: ......

Страница 38: ......

Страница 39: ......

Страница 40: ......

Страница 41: ......

Страница 42: ......

Страница 43: ...41 GB FR DE NL IT DK NO ES GR PL RU CZ HU FI PT SE ET LT LV ...

Страница 44: ...42 GB FR DE NL IT DK NO ES GR PL RU CZ HU FI PT SE ET LT LV ...

Страница 45: ...43 GB FR DE NL IT DK NO ES GR PL RU CZ HU FI PT SE ET LT LV ...

Страница 46: ...44 GB FR DE NL IT DK NO ES GR PL RU CZ HU FI PT SE ET LT LV ...

Страница 47: ...45 GB ...

Страница 48: ...Cod Emiss date Rev nr Rev date 20380183 7 11 2011 01 13 06 2013 ...

Отзывы: