6
faster troubleshooting, eliminating unnecessary downtime.
7.
Back striking tip and electrode ensure the speed of striking and the quality of the arc, and therefore
extend the life of the consumables.
3 Installation
3.1 Unpacking
Use the packing lists to identify and account for each item.
1.
Inspect each item for possible shipping damage. If damage is evident, contact your distributor and / or
shipping company before proceeding with the installation.
2.
When using forklift, ensure to lift safely and with due care to support entire unit.
3.
Unplanned movement may cause potential danger or hazards, so please make sure that the machine
is in a safe position before utilisation.
3.2 Input Power Connections
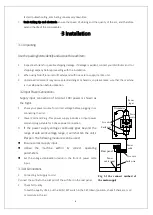
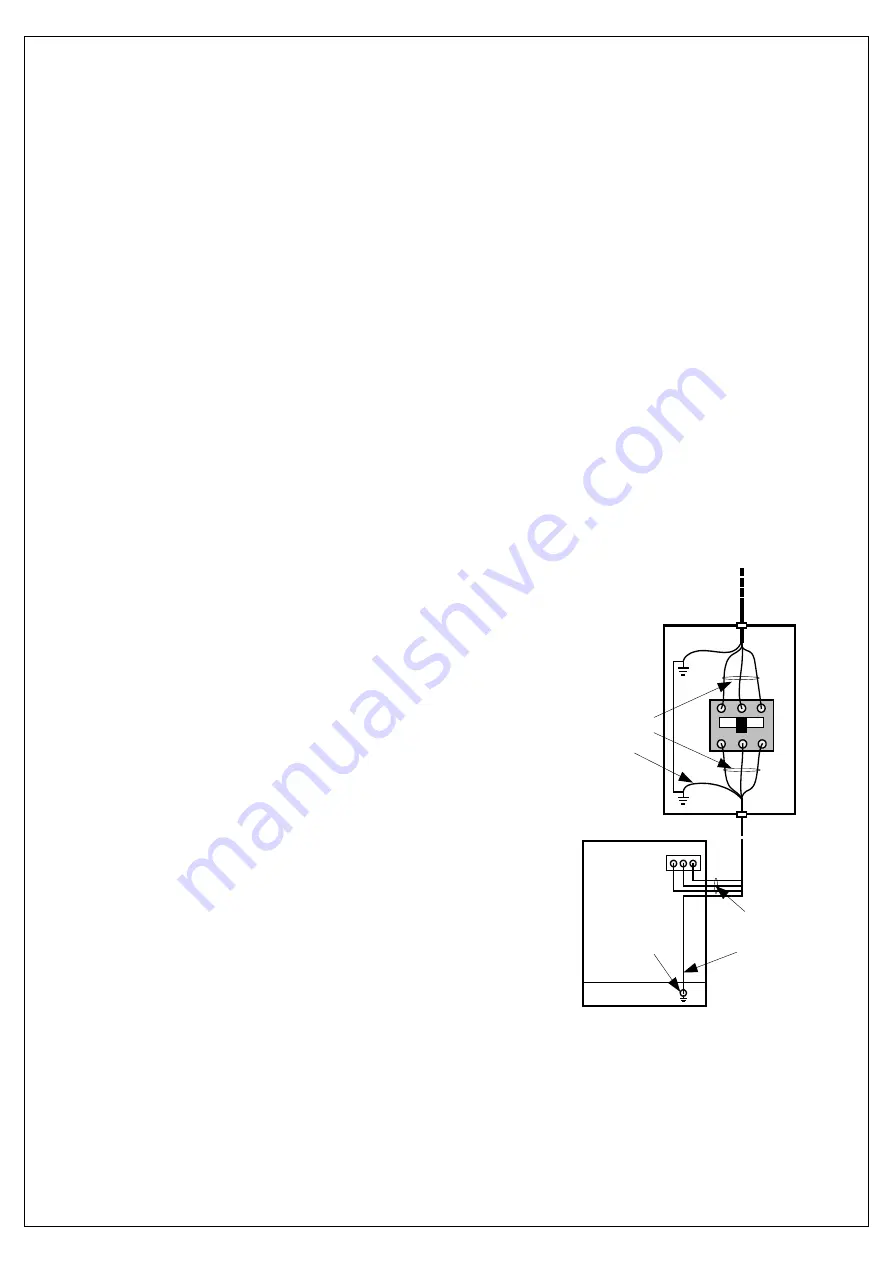
Supply input connection of ArcoCut 100i power is shown as
the Fig3.1.
1.
Check your power source for correct voltage before plugging in or
connecting the unit
2.
Power Cord and Plug -This power supply includes an input power
cord and plug suitable for 3 phase power connection.
3. If the power supply voltage continually goes beyond the
range of safe work voltage range, it will shorten the unit’s
lifespan. The following measures can be used:
Ensure correct supply input.
Utilise the machine within its correct operating
parameters.
Set the voltage stabilization device in the front of power cable
input.
3.3 Air Connections
1.
Connecting Air Supply to Unit
Connect the airline to the inlet port of the air filter on the rear panel.
2.
Check Air Quality
To test the quality of air, put the RUN / SET switch in the SET (down) position, check if there are is oil
or moisture in the air.
Live wire
Earth wire
3
~
380V
Power
cable
Rear panel
Distrubutor
Earth wire
Live wire
Power
input
Power
switch
Power
cable input
Fig 3.1 the connect method of
the main supply
Содержание ARCOCUT G-100i
Страница 1: ......


