background image

-

10

-

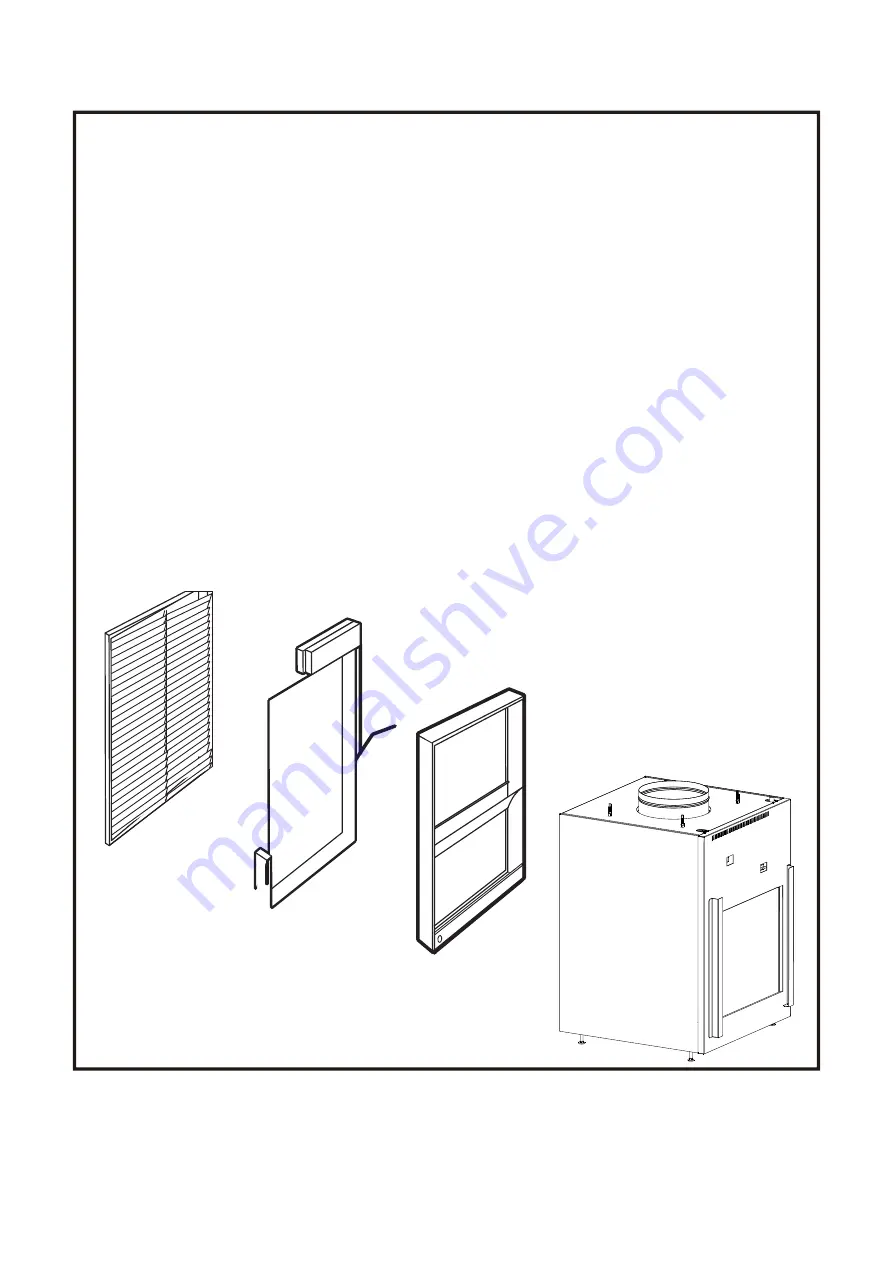
Wall Plenum And Architectural Louver Installation

     Since the unit itself does not install in the wall opening, the use of a plenum is necessary to 

contain  and  separate  the  outdoor  air  paths. The plenum  must be able to hold water in the 

bottom without leaking into the wall cavity. It also must have a “splitter” to separate the outdoor 

air paths and prevent the discharge air from being drawn back into the unit.

    The wall plenum is the first component to be installed. The wall opening location for the 

plenum needs to extend 

1” below the top of the installation platform. Since the platform must 

be a minimum of 8” off the floor, the cutout for the plenum must be a minimum of 7” off the 

interior finished floor. Four sizes of plenums ar

e available,

and the choice of the correct plenum is determined by the thickness of the building exterior


wall. Each of the plenums is 

20

W x 32”H and requires a 20

-5/16

”W x 32-

5

/

16

”H cutout in the 

wall.

    The plenum is to be installed square and level in the ope

ning or up to

 1/4 bubble tilt to outside; 

pitch to outside should be similar to that planned for the sleeve) and secured to the wall


construction with screws or nails in the sides located a minimum of 2” from the bottom of the 

plenum. No nails or screws may be used in the bottom or top of the plenum to prevent water 

entering the wall cavity.

    The plenum is not load bearing, so a proper header needs to be installed above the plenum 

the same as over any window opening in the wall. If the building construction is brick, concrete 

block or other non self-supporting material, a lintel must be installed over the plenum opening. 

The plenum must be caulked to the wall, both to outdoor wall face and to the interior wall, along 

all four sides to prevent air and water infiltration. The installation of flashing, with a 45°drip lip,


 is 

recommended under  the plenum.

Architectural Louver

Proper header for

structural support

Apply proper caulking

and flashing

Exterior/Outside Wall

Properly square

and level plenum.

Case

Wall Plenum

6"D x 

20

"W x 32"H


8"D x 

20

"W x 32"H


12"D x 

20

"W x 32"H


15"D x 

20

"W x 32"H

Содержание VI20HA09K25E6PA30

Страница 1: ...is in operation Remember it is your responsibility to install the product safely and to know it well enough to be able to instruct a customer in its safe use Safety is a matter of common sense a matter of thinking before acting Most dealers have a list of specific good safety practices follow them The precautions listed in this Installation Manual are intended as supplemental to existing practices...

Страница 2: ...onditioners contain refrigerants which under federal law must be removed prior to product disposal If you are getting rid of an old product with refrigerants check with the company handling disposal about what to do 7 These R410A Air Conditioner Systems require contractors and technicians to use tools equipment and safety standards approved for use with this refrigerant Do not use equipment certif...

Страница 3: ...s side shipping screws R FD GH B Y W GL C Orange Low fan speed Red 24VAC Front Desk Control Green High fan speed Blue Reversing valve Yellow Compressor White Heater Black Common ground ON OFF switches ON OFF Switch six terminals are still HOTand must not be touched servicing ...

Страница 4: ...t exchanger coils and reduce the risk of premature component failure The coils on the unit should be checked regularly If they are clogged with dirt or soot they may be professionally cleaned You will need to remove the unit from the case to inspect the coils because the dirt build up occurs on the coil face that first contacts the debris Operating without the filter in place or with a damaged fil...

Страница 5: ...e National Electrical Code NEC the Canadian Electrical Code CEC a n d o r local codes and ordinances as applicable For personal safety this unit and case must be properly grounded Protective devices fuses or circuit breakers acceptable for unit installations are specified on the nameplate of each unit Do not use an extension cord with this unit Aluminum building wiring may present special problems...

Страница 6: ...stallation of the receptacle must be in accordance with the NEC CEC and local codes ordinances and regulations as applicable LCDI power Cord Unit Voltage Rating Minimum Maximum 230 208 187 253 265 238 292 Operating Voltage Voltage Utilization Range 230 208V 15Amp Perpendicular 230 208V 20 Amp Large tandem 230 208V 30Amp WARNING To avoid the risk of property damage personal injury or death due to f...

Страница 7: ...ural Louver Access Panel with Return Air Grille with filter holder Cutout Dimensions 30 5 16Wx 48 5 16H 33 51 Return Air Grille with filter holder Cutout Dimensions 20 5 16Wx 20 5 16H 22 7 8 22 7 8 Cutout Dimensions 20 5 16 W x 32 5 16 H Wall Plenum 6 D x 20 W x 32 H 8 D x 20 W x 32 H 12 D x 20 W x 32 H 15 D x 20 W x 32 H ...

Страница 8: ...th return air grille Rigid ductwork metal duct Air discharge outlet Unit Wall plenum Wall plenum divider Drain fittings 3 4 Filter bracket Secure platform to the floor 8 min for drain access Platform 23 1 4 x 23 1 4 square Min load capacity 175 Ibs Outside wall Plenum cutout 32 5 16 H x 20 5 16 W Exterior Outside Bottom of case approx 2 above bottom of plenum Wall plenum Bottom of case approx 2 ab...

Страница 9: ...out is approximately 6 1 2 from left case wall and 5 1 4 from back case wall F Typical wall plug 6 12 above case G 40 min Air outlet Flex duct may be used for transitions only Use rigid duct for 90 bends and tees Outside wall A B C C D E 230 208VAC Wall receptacle for cord and plug connection as applicable Platform F G Connecting the air outlet Connecting the air outlet WARNING WARNING Supply duct...

Страница 10: ...ion that best suits your installation requirements Follow the Installation Instructions provided with the return air grille accessory for installation details NOTE Use only one filter in the installation The filter may be installed on the unit or in the access panel door Outside wall Access panel with return air grille Filter Option 1 Return air grille Filter Option 2 Unit mounted filter with a fi...

Страница 11: ...enum is to be installed square and level in the opening or up to 1 4 bubble tilt to outside pitch to outside should be similar to that planned for the sleeve and secured to the wall construction with screws or nails in the sides located a minimum of 2 from the bottom of the plenum No nails or screws may be used in the bottom or top of the plenum to prevent water entering the wall cavity The plenum...

Страница 12: ...chitectural louver to the outside Seal the gap between the plenum hole and PVC tube See the installation instructions in the figure 1 Side View Inside wall Female drain fitting 3 4 PVC Internal drain Internal Drain Attach PVC to the units female 3 4 NPTdrain connector See the Installation Instructions in the figure 2 Local codes may apply figure 1 figure 2 Left side of platform 23 1 4 min 8 min fo...

Страница 13: ...Remove the front case panel and pull the unit out of the case Place the empty case onto the platform in the closet with the outdoor side facing the wall plenum opening Align the case with plenum opening and attach High CFM Medium CFM Medium CFM Low CFM 0 00 550 425 425 410 0 04 515 395 395 375 0 10 465 350 350 320 0 15 440 300 300 270 0 20 405 240 240 205 0 25 365 180 180 120 0 30 310 0 00 550 475...

Страница 14: ...ischarge outlet 2 Secure the top duct to the unit by turning the four case top duct adjusting screws clockwise until they are tight Use a field supplied clamp to lock the top duct to the case 7 Final Check Review this Checklist before restoring power Correct line voltage Single circuit only Ductwork connected Case and wallplenum leveled to specification Wall plenum caulked Flashing Drain connected...

Страница 15: ...ch power off at the service panel and lock the area to prevent power from being switched on accidentally When the area cannot be locked securely fasten a prominent warning device such as a tag to the service panel WARNING NOTE We strongly recommend that any servicing be performed by a qualified individual For ease of service the unit can be removed from the case 1 Remove the front case panel 2 Unp...

Страница 16: ...ing is OFF indoor fan runs continuously In cooling mode when compressor is OFF indoor fan will continuously run If this switch is put to ON position when compressor is OFF indoor fan will be OFF 15 2 Switch 3 1 2 Powered vent door Duct select SW3 1 Powered vent door If this switch is put to OFF position the powered vent door will be closed always If this switch is put to ON position the powered ve...

Страница 17: ...y and correctly connected Compressor Discharge Over Heat Protection P4 1 Make sure indoor and outdoor unit vents are not blocked 2 Check the DIPswitch SW2 on the main board 3 position in red color is correctly match with the unit capacity refer to the wiring diagram Cooling Heat Pump Over Load Outdoor Indoor Coil Over Heat P5 Ensure that the indoor and outdoor air outlets are not blocked Check if ...

Страница 18: ...e The unit may be set for C instead of F see the keypad configuration section Clicking gurgling and whooshing noises are normal during operation of unit Make sure that curtains blinds or furniture are not restricting or blocking unit airflow Reset to a lower or higher temperature setting Remove and clean filters Start heating or cooling early before outdoor temperature cooking heat or gatherings o...

Страница 19: ...THIS PAGE INTENTIONALLY LEFT BLANK ...

Страница 20: ...Applied Comfort Products Inc 1210 Balmoral Road Cambridge Ontario Canada N1T 1AS ...

Отзывы: