


mPro400GC replaced by mPro400GCD
16
P2434JH | 2019-08
Apex Tool Group
3
EN
Parameterize stack lights
1. Assign each stack light its own Arcnet address:
The default Arcnet address is printed on the front of the housing, e.g. 101.
If several stack lights are used, screw on the housing and change the Arcnet address at the rotary con-
trols internally with a screwdriver.
2. Select
Navigator > Tool Setup > IO > Run it > Continue
on the controller.
→ It opens the
Programmable I/O Mapping
.
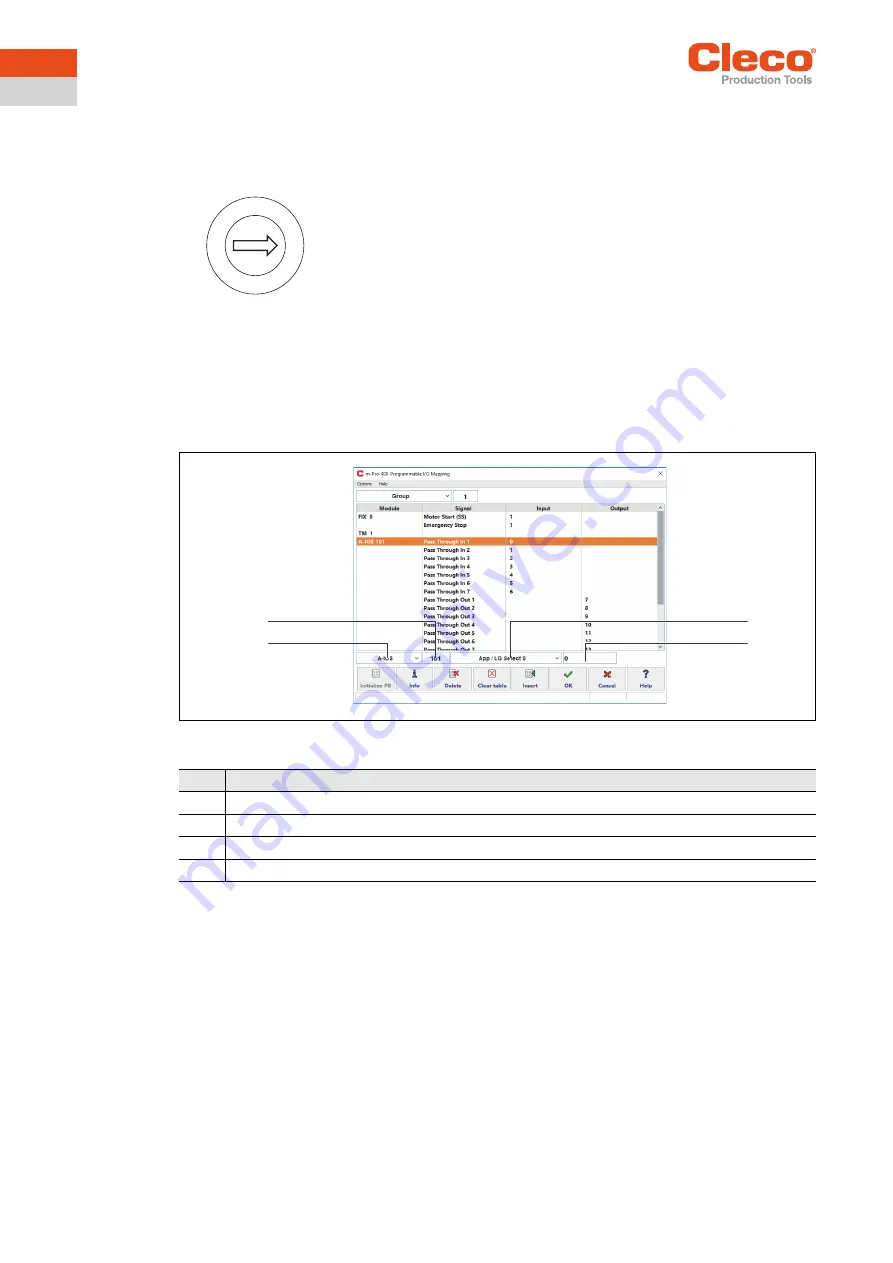
3. Parameterize the inputs and outputs of the stack lights.
Fig. 3-12: Programmable I/O Mapping
The inputs are from bit 0 - 7, the outputs are from bit 8 - 15. For more information see
ON / OUTPUTS A-OK
BRIDGE
in the supplied
BUILDING PLAN
of the stack lights.
4. Leave the I/O to save the settings.
The two rotary controls are named LOW and HIGH.
The Arcnet address consists of three digits:
•
Digit 1: fixed value „1“
•
Digit 2: setting of the rotary control „HIGH“
•
Digit 3: setting of the rotary control „LOW“
Example:
Rotary control „HIGH“: 0
Rotary control „LOW“: 3
→ Arcnet address: 103
Item
Setting
1
Select
A-IOS
.
2
Enter Arcnet address.
3
Select the desired signal.
4
Enter the bit.
0
2
3
4
5
6
7 8
9
1
3
2
1
4
Содержание Cleco mPro4000GC
Страница 19: ......


