ZONE4R
operation
and
installation
manual
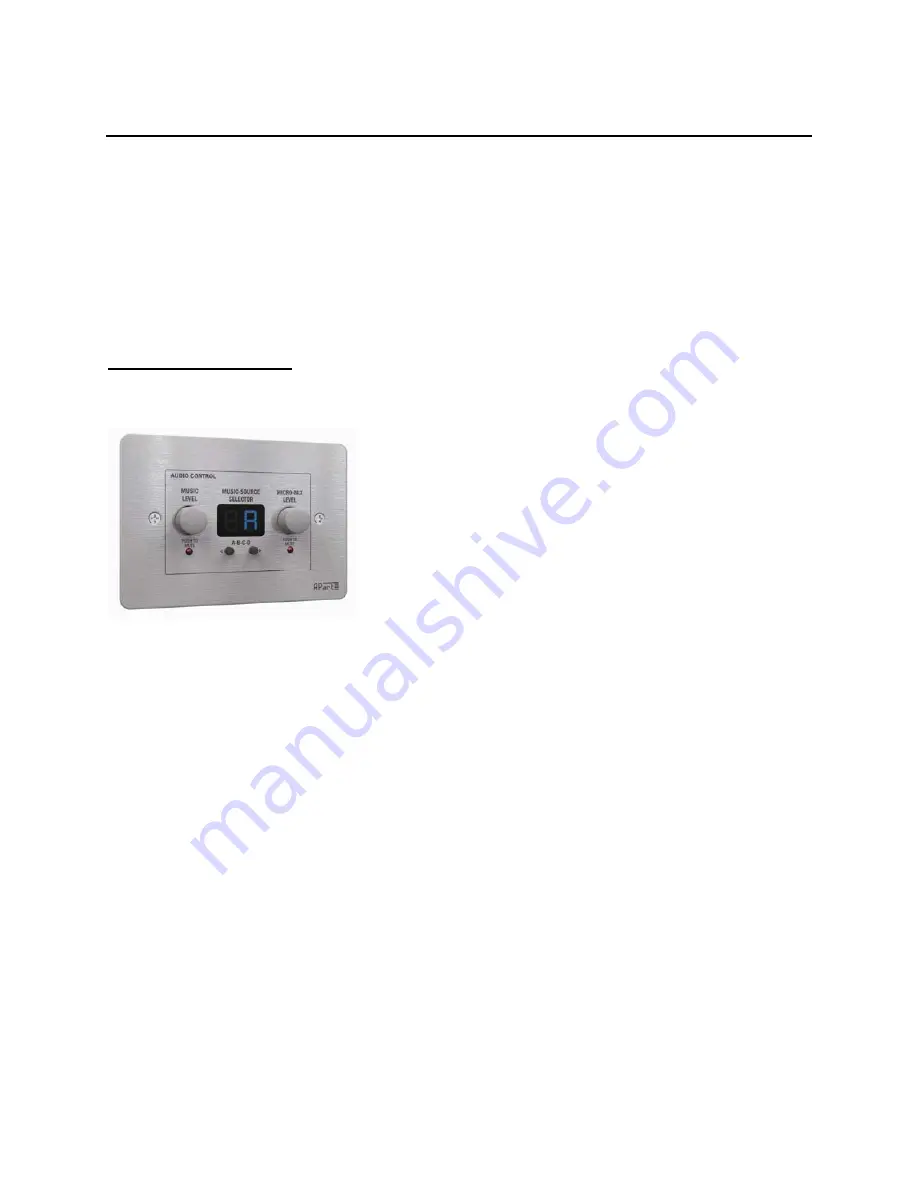
ZONE4R
remote
panel
is
designed
for
use
with
the
APart
‐
audio
ZONE4
preamplifier
only.
Wiring
is
easy,
using
industry
standard
CAT5
(or
higher)
computer
network
cable.
Both
T
‐
568A
and
T
‐
568B
cable
terminations
can
be
used.
It
is
possible
to
use
more
than
one
ZONE4R
remote
panel
per
zone.
Maximum
number
of
remote
panels
per
ZONE4
preamplifier
is
8
panels
in
any
configuration
:
e.g.
2
panels
x
4
zones
=
8
panels
or
8
panels
x
1
zone
=
8
panels
or
any
other
combination
with
a
maximum
of
8
panels
in
total.
Do
not
connect
the
ZONE4
or
the
ZONE4R
remote
panel
to
a
computer
network,
this
will
cause
serious
damage
to
the
computer
network
and
the
ZONE4/R
units
!
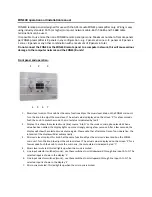
Front
panel
and
operation:
1
2
3
4
5
6
7
1.
Music
level
control:
this
knob
has
the
same
functionality
as
the
music
level
knob
on
the
ZONE4
main
unit.
Turn
the
knob
to
adjust
the
music
level.
The
actual
value
is
displayed
on
the
screen
‘2’
for
a
few
seconds.
Push
the
knob
to
mute
the
music,
the
mute
status
is
indicated
by
led
‘4’.
2.
Display:
this
shows
the
selected
music
(line)
source
‘A
to
D’
or
the
music
or
microphone
levels.
When
a
value
has
been
edited,
the
display
lights
up
more
strongly
during
a
few
seconds.
After
a
few
seconds,
the
display
will
show
the
selected
music
source
again.
Please
note
that
after
some
time
of
non
‐
operation,
the
intensity
of
the
display
will
dim
automatically.
3.
Micro
mix
level
control:
this
knob
has
the
same
functionality
as
the
micro
mix
level
knob
on
the
ZONE4
main
unit.
Turn
the
knob
to
adjust
the
micro
mix
level.
The
actual
value
is
displayed
on
the
screen
‘2’
for
a
few
seconds.Push
the
knob
to
mute
the
micro
mix,
the
mute
status
is
indicated
by
led
‘7’.
4.
Music
level
mute
led:
this
led
lights
up
when
the
music
is
muted.
5.
Line
input
selector
switches
(music)
:
use
these
switches
to
scroll
downward
through
line
input
A
to
D.
The
selected
input
is
shown
in
the
display
‘2’.
6.
Line
input
selector
switches
(music)
:
use
these
switches
to
scroll
upward
through
line
input
A
to
D.
The
selected
input
is
shown
in
the
display
‘2’.
7.
Micro
mix
mute
led:
this
led
lights
up
when
the
micro
mix
is
muted.


