background image


-11- 

Note 2: For detailed settings, refer to “8.1 Network Connection” .   

4.4 Locking key


During use, you can lock the keypad to lock the keys and touch screen to avoid 

accidental operation.   

Lock: Press the Power button to lock. 

Unlock: Press the Power button. After the screen lights up, tap and hold the unlock 

icon at the bottom left corner of the screen and drag it upward to the dot to unlock it. 

Once unlocked, the main Interface will be shown. 

4.5 Reset


If the product crashes during operation, you can tap the Reset button on the side to 

reset the system. 

Note: Under normal operation, do not use the Reset button as the Shutdown button.


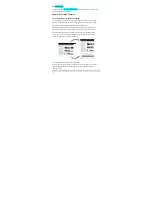
4.6 Connecting to PC and file transfer


When the product is on, plug the smaller end of the provided USB cable to the MINI USB 

port on the side, and the larger end to the USB port of PC for the use of the removable disk 

and data transfer. Then the USB connected interface will pop up, tap “Turn on USB storage”. 

When the word changed to “Turn off USB storage”, the connection is successful. You may 

copy music and video files to the product directly without using third party programs. Finally, 

tap the "Safely Remove Hardware" icon at the bottom right corner of the PC screen to 

remove the device safely. 

Note: After the product is connected to PC, you can still surf the Internet via Wi-Fi but 

you cannot play video, music, pictures, or recording voice involving the Flash drive 

and TF card.


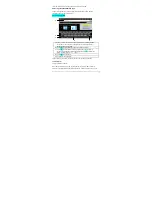
4.7 Volume adjustment


Media volume: Adjust the volume for playing music and video. 

Alarm

Adjust the volume of alarm. 

Notification volume: Adjust the volume of notification ringtones.


Содержание MW0821

Страница 1: ...R 4 BASIC OPERATIONS 10 4 1 Booting up 10 4 2 Shutdown 10 4 3 Network 10 4 4 Locking key 11 4 5 Reset 11 4 6 Connecting to PC and file transfer 11 4 7 Volume adjustment 11 4 7 1 Adjusting the media vo...

Страница 2: ...control 17 CHAPTER 6 MAIN INTERFACE 18 6 1 Main interface 18 6 2 Applications interface 19 6 3 Browser 20 6 3 1 Opening browser 20 6 3 2 Going to a webpage 20 6 3 3 Setting a home page 20 6 3 4 Browsi...

Страница 3: ...8 COMMON TOOLS 37 8 1 E mail 37 8 1 1 Opening e mail 38 8 1 2 Creating and sending e mails 38 8 1 3 Receiving and reading e mail 39 8 1 4 Replying or forwarding e mail 39 8 1 5 Managing e mail 40 8 1...

Страница 4: ...nts sync 52 9 2 7 Privacy 52 9 2 8 Storage 52 9 2 9 Language keyboard 53 9 2 10 Voice input output 53 9 2 11 Accessibility 53 9 2 12 Date time 54 9 2 13 Touch screen calibration 54 9 2 14 About device...

Страница 5: ...layer Photo Browser Camera and Shelves z Equipped with a built in microphone enabling audio recording z Support 1080P HDMI output z Eco settings enables the brightness to be freely adjusted 1 2 Notes...

Страница 6: ...egular Nickel Cadmium battery But if the lithium battery is degrading contact the local Service Center directly z If the battery is improperly replaced an explosion may occur Only use the same brand b...

Страница 7: ...ro SD TF card up to 32 GB LCD 8 inch HD TFT LCD touch screen resistive single touch with a resolution of 1280 768 pixels Audio output Headset Stereo output internal speakers Mixed output Power specifi...

Страница 8: ...57 in 21 5 x 14 65 x 1 45 cm Weight 1 16 lbs 0 525kg with battery Port Mini USB 2 0 high speed port OTG 3 5mm headset Environmental conditions Operating temperature 0 C 40 C Storage temperature 20 C 5...

Страница 9: ...5 Chapter 2 Buttons and Appearance A Built in MIC Recording B Power button C Operation indicator D Volume and buttons E Front camera F Home button G Touch screen Screen A BC D E F G H I J K L M N P O...

Страница 10: ...cally output from the external speaker if there is audio output Note 2 In the Instructions Press means pressing a button while Press and Hold means continuously pressing a button for 2 3 seconds Note...

Страница 11: ...w will pop up It includes Language Date Time and Wi Fi settings Tap Click to setup language then choose a language you want If the settings take effect the Default Language bar will show the choice Ta...

Страница 12: ...for Wi Fi network Scan Search for the available wireless networks in the vicinity Advanced settings 1 Tap Advanced to set the network address within the IP locale 2 Select Use static IP to configure t...

Страница 13: ...you use dynamic IP addresses you do not have select Use static IP addresses to configure the network settings Tap the wireless network you want to connect to If the connection status under the name o...

Страница 14: ...t is connected to the charger disconnect the charger and perform the shutdown operation again Note 3 If the product crashes during operation press and hold the Power button for 6 seconds to force shut...

Страница 15: ...lug the smaller end of the provided USB cable to the MINI USB port on the side and the larger end to the USB port of PC for the use of the removable disk and data transfer Then the USB connected inter...

Страница 16: ...otification volume In the main interface tap the menu icon tap Settings Sound Volume tap the notification volume bar to adjust the volume after the Volume window appears 4 8 Charging When the battery...

Страница 17: ...ce and slide your finger on the screen Slide your finger up or down to scroll up or down or if the list has a scroll bar slide your finger up or down in the list to page down or up when you are browsi...

Страница 18: ...nds and tilt it to the left or right When it is tilted to a position 90 to the horizontal plane the gravity sensor built in the product senses the action and the screen switches to Portrait mode from...

Страница 19: ...so possible B Tap this key to switch between uppercase and lowercase text C Tap this key to switch between numeric keypad and symbol keyboard For numeric keypad and symbol keyboard tap the ATL key to...

Страница 20: ...sages and played music 5 3 1 Opening notification panel After a new notification icon appears in the status bar tap and hold the status bar and slide your finger downward to open the notification pane...

Страница 21: ...the space to pop up the Add to Home screen menu and tap Widgets Power Control to go to the power control interface as shown below A Wireless network on off Tap to turn on or off the wireless network B...

Страница 22: ...main interface as shown below A Notification Tap the space in the taskbar to show the date Tap and hold this taskbar and scroll down to see notifications B Quick search choice Tap to choose a search...

Страница 23: ...e adjustment Tap to adjust the volume K Back Tap to return to the previous level L Menu icon Tap this icon to open the corresponding menu M Main interface Tap this icon to go to the main interface N A...

Страница 24: ...home page 2 Enter the URL of the webpage or tap use current page as home page and tap OK Tap the back icon to return to the previous page Tap the menu icon and tap Windows to close the currently brows...

Страница 25: ...e opened To open a new window tap the menu icon and tap New Window to open a new browser window and go to the preset home page Tip If more than two browser windows have been opened tap the menu icon a...

Страница 26: ...L Finding text on a webpage 1 When browsing a webpage tap the menu icon and tap More Find on Page 2 Type the item to be found After the content is typed the shade of the text of the matches is highlig...

Страница 27: ...ou want to open Tap and hold the bookmark you want to open and tap Open or Open in new window Editing bookmark 1 In the browser interface tap the menu icon and tap Bookmarks 2 In the bookmark interfac...

Страница 28: ...een orientation Enable JavaScript Enable JavaScript language Enable plug ins Allow plug ins in a webpage Open in background Open new windows behind the current one Set home page Set a webpage URL as h...

Страница 29: ...arch engine Select a search engine Website settings View advanced settings for individual websites Reset to default settings Clear all browser data and reset all setting to default User agent Select a...

Страница 30: ...st F Screen extension Tap to select Full Screen Normal 16 9 4 3 I J Decrease increase volume H More Delete bookmarks and play from the beginning of the title Tap this option to delete the video bookma...

Страница 31: ...by the unit Convert them on the PC and play the converted files by this unit Note 3 This product does not guarantee that all kinds of video files are supported While some are only recognizable in the...

Страница 32: ...Playlist In the music file list tap playlists to go to the playlist Tap and hold Recently added to play or edit the time of the Recently added list In the music file list tap and hold a song or a fol...

Страница 33: ...twork connection is established tape it to check the link information about the currently played music file E Rewind previous Tap Switch to the previous song Tap and hold Rewind F Play pause Play paus...

Страница 34: ...e Tap User EQ to go to User EQ Select interface Set your favorite sound effects by sliding your finger left and right on the sound effect bar Note Few MP3 WMA audio files that are specifically encoded...

Страница 35: ...ng pictures In the directory tap the pictures you want to browse to open the picture browsing interface Tap the screen to pop up or hide the menu A Slideshow Automatically browse pictures B Menu Tap t...

Страница 36: ...32 Tap the menu icon to show the menu options D C B A...

Страница 37: ...p this icon to rotate the picture clockwise in the following order 90 180 270 Restore Rotate left Rotate the picture 90 anti clockwise Tap this icon to rotate the picture anti clockwise in the followi...

Страница 38: ...re clockwise in the following order 90 180 270 Restore Rotate left Rotate the selected picture 90 anti clockwise Tap this icon to rotate the picture anti clockwise in the following order 90 180 270 Re...

Страница 39: ...en will switch to another interface At this time place the icon to the desired position and release 7 2 Deleting a program icon In the applications interface tap and hold the program icon you want to...

Страница 40: ...Creating a folder Create a folder in the interface to store the application icons or controls Tap and hold the space of the main interface and tap Folders to create a folder in the interface Tap and h...

Страница 41: ...il account and tap Next 2 Select an account type Tap POP3 for a POP3 account 3 Tap POP3 Server and enter pop account suffix For example if the e mail account is 123456 163 com enter pop 163 com and ta...

Страница 42: ...tc 8 1 1 Opening e mail In the Tools interface tap E mail to enter Tip 1 By default this product can be used to browse the inbox after the e mail application is performed All e mails you received will...

Страница 43: ...l attaching 4 After composing your e mail tap Send Tip When you compose your e mail tap the Save as draft or back icon to save your e mail to Draft 8 1 3 Receiving and reading e mail When a new e mail...

Страница 44: ...with an e mail Mark as read The unread e mails in the Inbox are displayed with a green line to the left 8 1 6 Create new account In the e mail interface tap the menu icon and tap Accounts to display...

Страница 45: ...outgoing settings Display and change the sending server settings 8 1 8 Delete e mail account In the e mail interface tap the menu icon to display the e mail menu Tap Accounts Tap and hold the e mail a...

Страница 46: ...ORD folder so that you can find them in the AudioPlayer playlists My recordings to play Note The naming rule of the recorded file recording_Year Month Date_Serial Number 8 3 Alarm In the main interfac...

Страница 47: ...e menu icon and tap Add alarm The number of alarms you can add is unlimited 8 3 3 Delete alarm Tap and hold the alarm you want to delete and tap Delete Alarm OK to delete it 8 3 4 Alarm settings Tap t...

Страница 48: ...e next operation Note This product complies with the fat32 file system When you name a file do not use special characters or you may not rename it later 8 6 Installing applications 1 Copy the setup fi...

Страница 49: ...ttings menu 3 Select Applications 4 Select Manage Application 5 Tap the application you want to uninstall 6 Tap Uninstall 7 Tap OK to start uninstalling Tip You cannot delete the pre installed factory...

Страница 50: ...nd tap Connect Note 1 When you connect Wi Fi for the first time and the prompt Failed appears disconnect Wi Fi and reconnect it Note 2 You do not have to re enter the password when you re connect to t...

Страница 51: ...ork address within the IP locale 2 Select Use static IP to configure the network settings and enter the IP address gateway network mask and DNS1 required for Wi Fi network connection After configurati...

Страница 52: ...e number of the bars lighting up Wi Fi network In the network connection interface tap Wi Fi settings and tap the currently connected wireless network to show the information such as name status speed...

Страница 53: ...ngs and the Bluetooth zone show the name of the available Bluetooth device Device name Tap to change the name of your device Discoverable Tap to make your device discoverable so that the other device...

Страница 54: ...luetooth Bluetooth settings Enter Bluetooth settings Connect with Bluetooth headset Bluetooth Keyboard and other Bluetooth device 9 2 2 Sound Silent mode Silence all sounds except media alarms Volume...

Страница 55: ...seconds 30 seconds 1 minute 2minutes 10 minutes and 30 minutes 9 2 4 Security Use wireless networks Location determined by Wi Fi Set up screen lock Lock screen with a pattern PIN or password Visible...

Страница 56: ...the screen will not enter hibernation mode during charging allow mock locations 9 2 6 Accounts sync Background data After enabled applications can sync send and receive data at any time Auto sync All...

Страница 57: ...data on the Internal Memory System Memory Available space Show the available storage space of the system 9 2 9 Language keyboard Select language Show the text in corresponding language based on the s...

Страница 58: ...alibration When the touch screen is not sensitive or the cursor drifts you can use the calibration settings Set the touch points according to the steps in the on screen prompt Tip After the product is...

Страница 59: ...Micro SD card downward to eject it Note Insert cards face up into the card slot Do not bend the card The chip on the card should be protected cautiously Keep the chip clean and avoid dust and chemica...

Страница 60: ...duct Open Explorer and you can see the USB directory This directory is your USB drive Tap USB to check the files on USB drive Note that when this unit is connected to the USB drive it should shutdown...

Страница 61: ...takes about 7 hours to charge The actual time depends on the remaining battery level It is recommended to fully charge and discharge the product once every 3 months to maintain the lithium battery Do...

Страница 62: ...disconnect the product and PC and the screen shows a prompt similar to one shown below Tap Install After a short while the updating message is displayed It may take a few minutes please be patient 4...

Страница 63: ...nd buttons and the M button is used for entering If it cannot be turned on after charged and reset and restore factory default compulsory contact our seller No sounds from headset Check if the volume...

Страница 64: ...l Cannot be connected to computer Make sure the product is turned on Make sure the product is not in sleep mode Make sure to use the proper USB cable Cannot view files in AudioPlayer PhotoBrowser Vide...

Страница 65: ...For example the motion scenes of some videos have a bit rate of 5 6M and image lag may occur High resolution video If the max frames are reached non synchronization may occur The upper limit size of...

Страница 66: ...his tablet s capacity is calculated by 1000 bytes So the actual free space of the tablet will be slightly different from indicated capacity also the operating system uses part of the available space 7...

Страница 67: ...diate radio frequency energy and if not installed and used in accordance with the instructions may cause harmful interference to radio communications However there is no guarantee that interference wi...

Отзывы: