


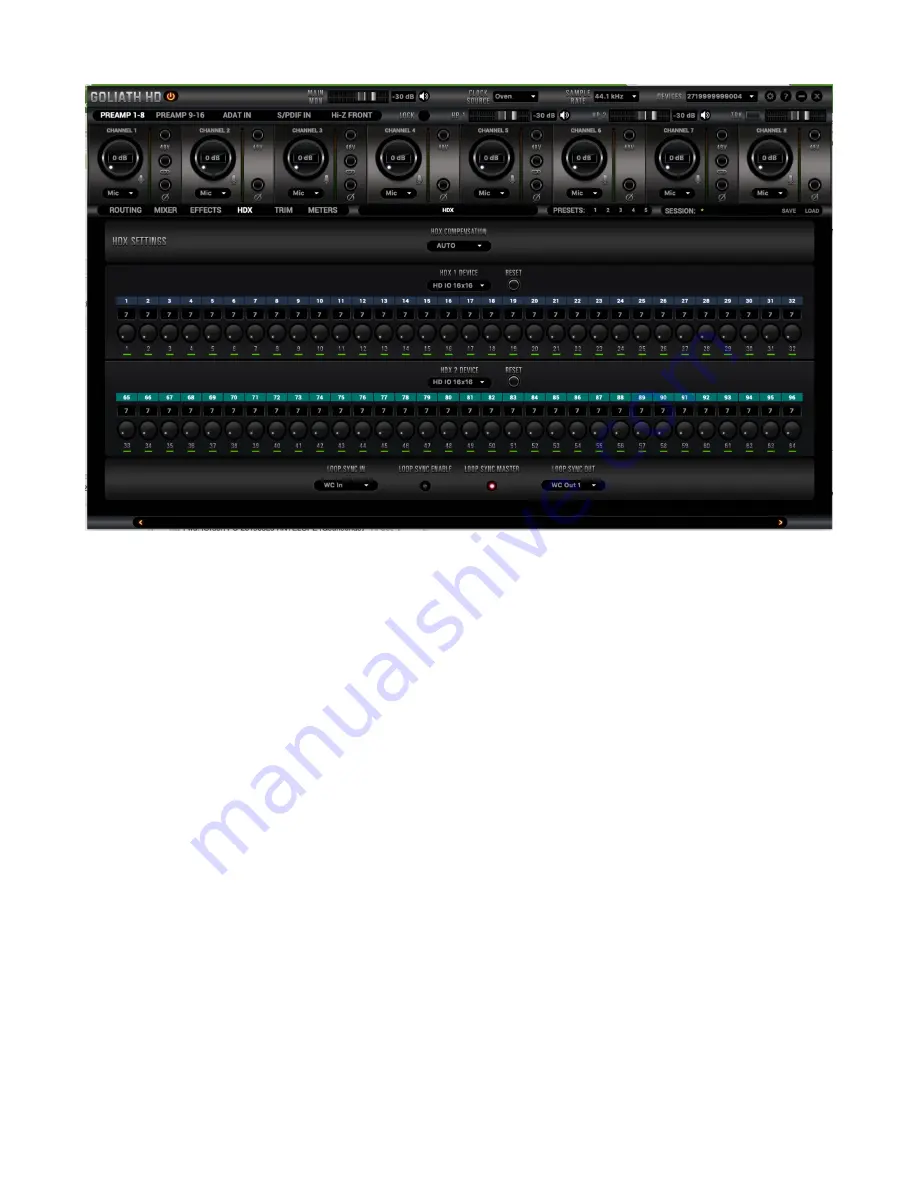
6.6 HDX Tab
The HDX tab lets you choose the HDX Delay Compensation mode and control all HDX audio
channels.
Note: The Goliath HD | Gen. 3’s HDX channels are disabled by default and can be enabled after an
optional upgrade. Visit antelopeaudio.com to learn more.
1. HDX Compensation Mode Dropdown Menu
Choose how latency is compensated – automatically or manually, in user-defined samples. Use the
rotating knobs to adjust latency compensation for each individual channel.
2. HDX 1 Device Dropdown Menu & Reset Button
Choose how the Goliath HD | Gen. 3 is being represented to the DAW. Use the Reset button to go back
to default.
Note: To enable streaming of up to 64 audio channels simultaneously, the Goliath HD | Gen 3 has to be
represented to the DAW as a pair of 32-channel audio devices. These settings in the Control Panel are
the result of this.
3. HDX 1 Channels
Shows whether the audio channel is active (green) or not (red).
4. HDX 2 Device Dropdown Menu & Reset Button
Choose how the Goliath HD | Gen. 3 is being represented to the DAW. Use the Reset button to go back
to default.
Note: To enable streaming of up to 64 audio channels simultaneously, the Goliath HD | Gen 3 has to be
represented to the DAW as a pair of 32-channel audio devices. These settings in the Control Panel are
the result of this.


