background image

UG-169 

Evaluation Board User Guide


Rev. 0 | Page 4 of 12 

USING I

2

C SERIAL PORT MODE 

0

91

71

-00

4


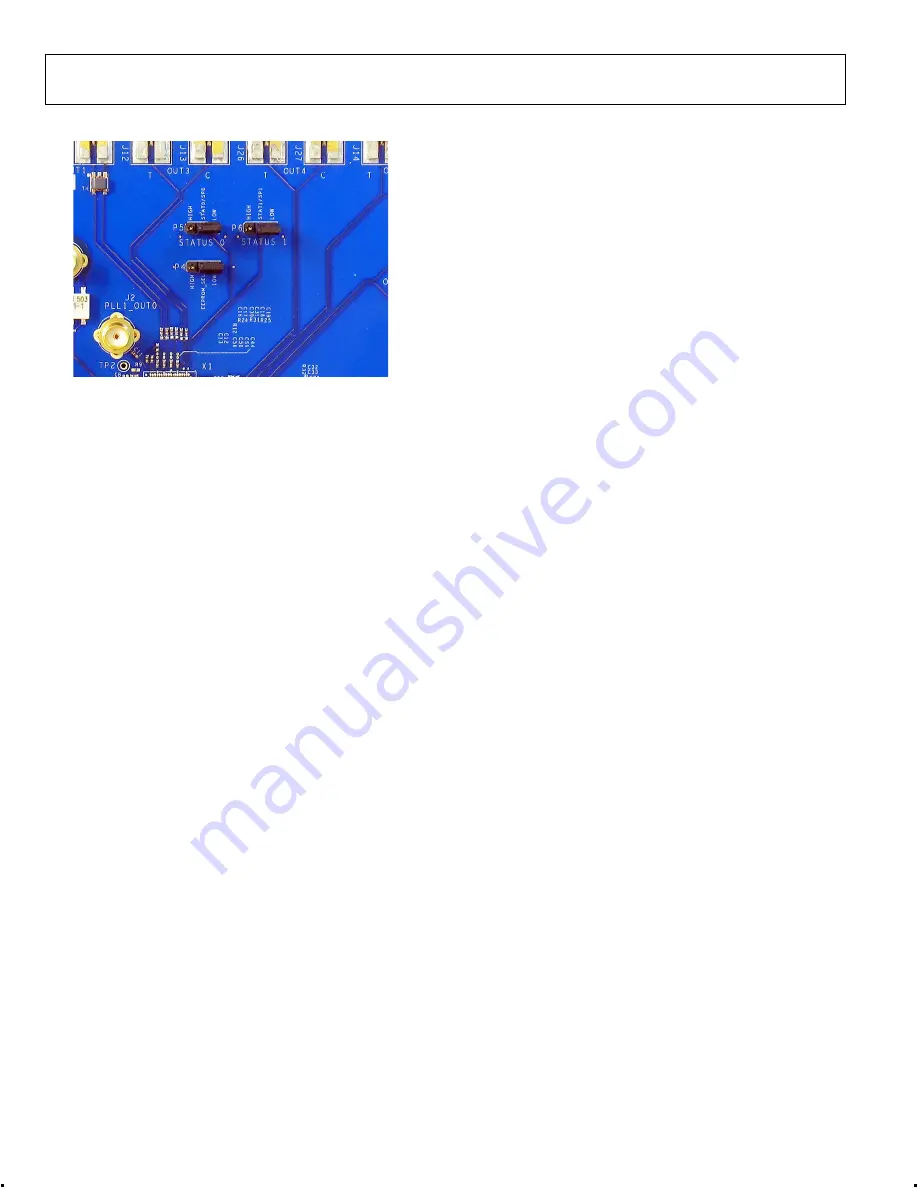
Figure 3. I

2

C Address Jumper Setting 

1.


Select the desired I

2

C address using Jumpers P5 and P6 

(see Figure 3). Note that setting P5 and P6 low is reserved 
for SPI mode. 

2.


On the evaluation software, select 

Configure Serial Port


from the 

I/O

 menu (see the I/O Menu section). 

3.


Click the 

Reset Serial Port

 button, and then click 

Detect 

Current Configuration

 (see Figure 8). A dialog bo

should appear to acknowledge the I

2

C mode and address. 


Содержание AD9523

Страница 1: ...ity allowing programming of almost any rational input output frequency ratio GENERAL DESCRIPTION This user guide describes the hardware and software of the AD9523 and AD9524 evaluation boards and incl...

Страница 2: ...he Signal Connections 3 Bypassing the 6 V Wall Socket Power Supply 3 Using I2 C Serial Port Mode 4 Evaluation Board Software Setup 5 Installing the Software 5 Using the Software 5 Software Operation 6...

Страница 3: ...erminated 50 to ground An amplitude setting of 6 dBm is sufficient 2 Connect an oscilloscope spectrum analyzer or other lab equipment to any of the OUTx SMA connectors on the right side of the board T...

Страница 4: ...ss using Jumpers P5 and P6 see Figure 3 Note that setting P5 and P6 low is reserved for SPI mode 2 On the evaluation software select Configure Serial Port from the I O menu see the I O Menu section 3...

Страница 5: ...nd connect the evaluation board to the PC 2 Double click AD9523 Eval Software to run the AD9523 evaluation software A hardware installation window appears Depending on whether the evaluation board was...

Страница 6: ...r own window are outlined in this section From the main window the window for each functional block can be accessed by clicking the appropriate box When a subsection window closes after clicking OK th...

Страница 7: ...to select which evaluation board the software controls see Figure 7 Click Refresh List to detect a recently connected evaluation board 09171 008 Figure 7 Select USB Device Window Selecting Configure...

Страница 8: ...the evaluation software to write the register changes to the evaluation board automatically when they occur Selecting the Auto checkbox adjacent to the UPDATE box forces the evaluation software to is...

Страница 9: ...box from the main window see Figure 16 w configuration of PLL2 see Figure 17 g the CHARGE PUMP box i This window is most often used to vary the charge pump current PLL 2 CONTROLS Clicking t opens a w...

Страница 10: ...o vary the phase offset by changing the phase offset bits setting under the Divider Phase box in Figure 20 However for the new phase to take effect the SYNC signal must be toggled by clicking the SYNC...

Страница 11: ...PROM Control window is shown in Figure 25 is accessed by clicking the EEPROM button near the lower left corner of the main window To store the current register settings of the AD9523 to the EEPROM cli...

Страница 12: ...grants to Customer a free limited personal temporary non exclusive non sublicensable non transferable license to use the Evaluation Board FOR EVALUATION PURPOSES ONLY Customer understands and agrees t...

Отзывы: