0 Degrees - 8 Degrees
-
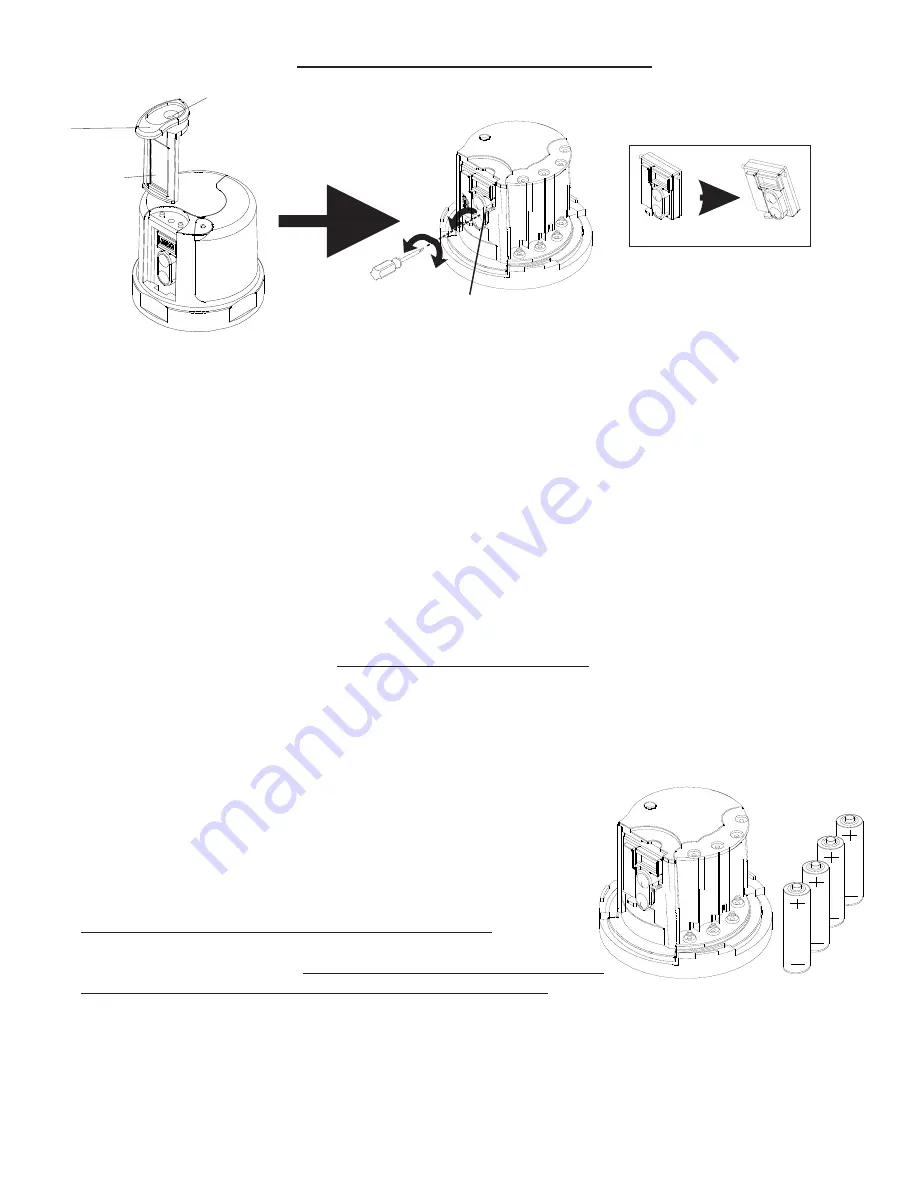
Sensor Angle Adjustment
Angle Adjustment Screw
OUTSIDE VIEW
INSIDE VIEW
Sensor Window
Latch
Latch Screw
1. Loosen the Latch using the provided Allen Wrench and remove the Sensor Window.
2. Using a small Phillips Head Screwdriver slowly turn the Angle Adjustment Screw clockwise
to increase the sensor angle downward or counter-clockwise to decrease the angle.
(Sensor angle can be adjusted downward a maximum of 8 degrees).
Important Note: When the sensor is angled, the sensor beam becomes longer.
Therefore, the sensor range must be offset by applying a shorter sensor range using
the switch adjustments. Make sure to set switches 1 & 2 up (18”) or 1 up & 2 down (22”)
when angling the sensor for proper operation.
3. Re-install Sensor Window and lock the Latch into place with the provided Allen Wrench.
Directions:
Replacing Batteries
Directions:
To install batteries or make battery changes please refer to the following
diagram.
1. Remove the Latch Screw Cover and slightly loosen the
Latch Screw with the provided Allen Wrench.
2. Turn the Latch forward and remove the Battery Cover by
pulling it slightly up and out to the right.
3. Install Four (4) AA Alkaline Batteries.
Note: Make sure batteries are inserted correctly.
4. Check to see that the red light comes on and then turns off
inside the Sensor Window.
Note: If the light does not come on,
then the batteries might not be making proper contact.
5. Re-install Battery Cover, lock into place with Allen Wrench, and
insert Latch Screw Cover.
6


