User's Guide
2-6 Set Up
Installing the Ribbon Cartridge
Both black and color ribbon cartridges
install the same way. To install a ribbon
cartridge, use the following procedure:
1. Make sure the printer is off, raise the top
cover, and slide the carriage to the center
of the printer.
2. If a ribbon cartridge is already installed,
remove it by gently pushing outwards on
the retaining tabs and lifting the cartridge
out of the printer.
3. Remove a new ribbon cartridge from its
packaging. Be sure to remove the red
ribbon lock from the bottom of the rib-
bon cartridge. Also, remove any slack in
the ribbon fabric by turning the ribbon
knob on the cartridge
counterclockwise.
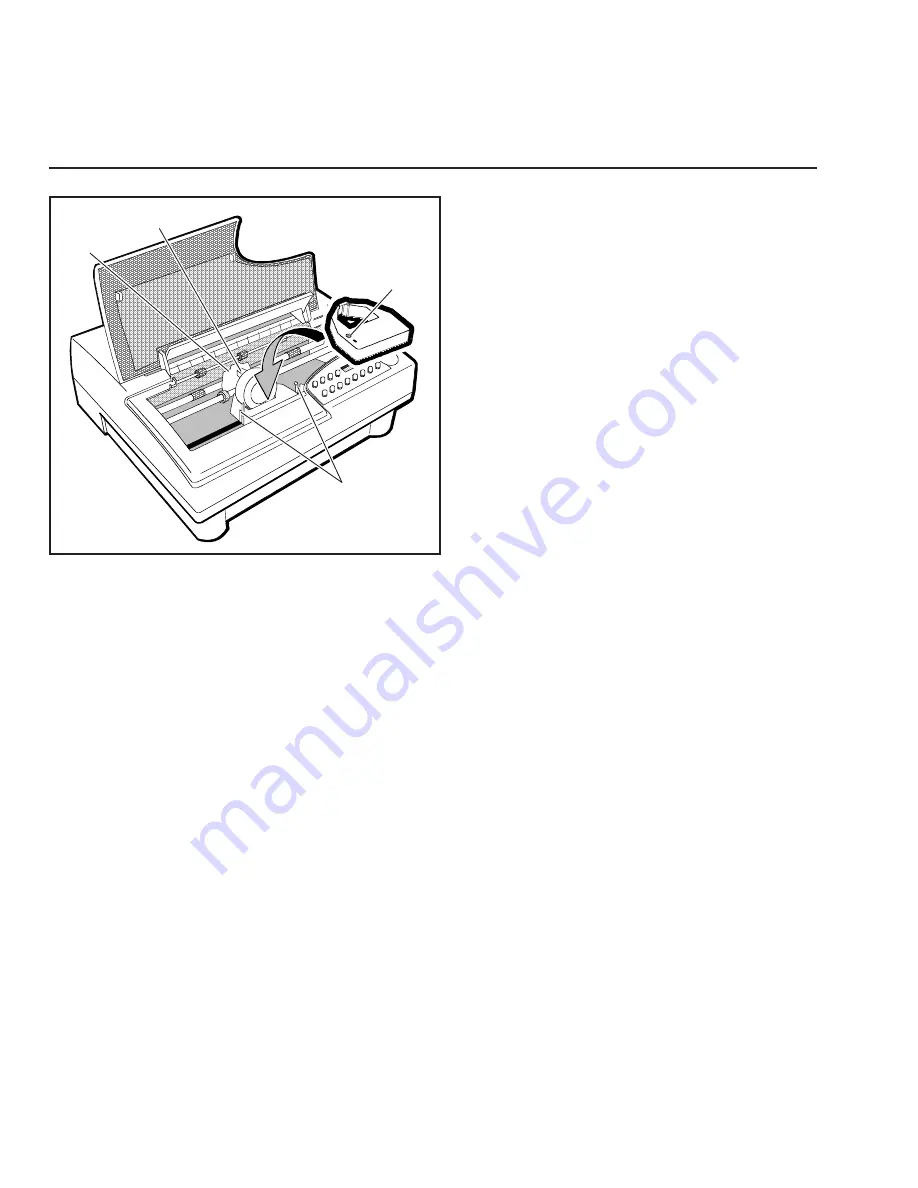
4. Insert the exposed portion of the ribbon
between the printhead and the shield, as
shown in figure 2-6.
5. Push down the ribbon cartridge until the
retaining tabs snap into place. You may
need to turn the ribbon knob slightly to
get the cartridge to seat properly.
6. Slide the carriage from side-to-side and
make sure the ribbon knob turns. Make
sure the exposed ribbon is between the
printhead and the shield. Then, lower
the top cover.
If you try to print without a ribbon cartridge
installed or if the cartridge is installed incor-
rectly, the message RIBBON ERROR will
appear on the control panel to warn you.
Figure 2-6. Installing a Ribbon Cartridge
RETAINING
TABS
KNOB
SHIELD
PRINTHEAD
Содержание AMT ACCEL-5350
Страница 1: ...Document No 397000 B User s Guide AMTACCEL 5350 ...
Страница 2: ......
Страница 4: ...User s Guide ii Preface ...
Страница 22: ...User s Guide xx Contents ...
Страница 26: ......
Страница 44: ...User s Guide 2 14 Set Up ...
Страница 62: ...User s Guide 3 18 Loading Paper ...
Страница 106: ...User s Guide 4 44 Control Panel ...
Страница 158: ......
Страница 164: ...User sGuide B 6 Bar Codes ...
Страница 178: ......
Страница 242: ......
Страница 254: ......
Страница 255: ...AMT Datasouth Corp 4765 Calle Quetzal Camarillo CA 93012 8546 www amtdatasouth com ...


