33
C2X
Amphenol Telect
All rights reserved. 07.10.18 149825 A0
1-509-926-6000
Section Twelve: Installing the Cable Clamp
The IFC cable is brought in from above or below the C2X patch and splice panel and mounted to the rear of
the panel.
The cable clamp halves contain removable center layers to accommodate various sizes of cable. You can
remove center layers until the correct diameter of IFC cable is met.
NOTE:
Cable clamps are specific to chassis sizes. See the table below.
Chassis Size
Cable Clamp
4RU/3RU
C2X-KIT-CLMP
2RU
C2X-KIT-CLMP2RU
1RU
NO CLAMP
12.1 Installing on a 4RU or 3RU Chassis
1. Measure the diameter of the incoming IFC cable.
2. If needed, remove and discard leaves from the center of the cable clamp until the correct dimensions (the
diameter of the IFC) is obtained.
3. Clamp the remaining bushing halves of the cable clamp around the IFC.
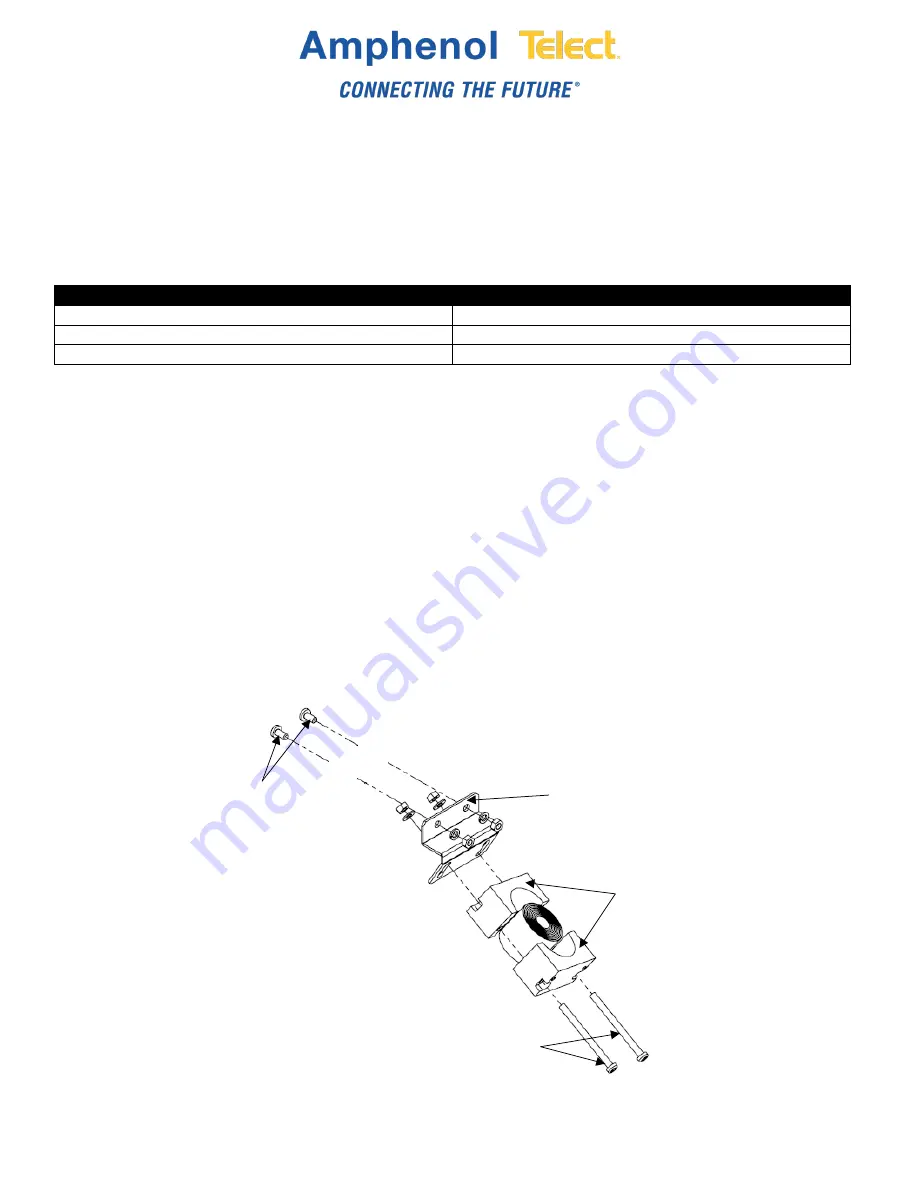
4. Attach the IFC cable and cable clamp to the cable clamp bracket using the two (2) .7 x 50 mm screws,
washers and nuts.
NOTE:
Loosely tighten clamp to IFC to allow for adjusting length of cable.
5. Attach bracket to C2X chassis using the two (2) .7 x 8 mm screws, lock washers and nuts.
6. Adjust cable to desired length and tighten down cable clamp to IFC.
NOTE:
Overtightening clamp to the IFC can lead to damaging fiber.
IFC cable clamp
Cable clamp bracket
.7 x 8 mm screws
.7 x 50 mm screws
Fig. 12-1: 4RU and 3RU cable clamp

