www.amico.com
24
Automatic Height Adjustment Advanced Interface
1. Initialize the cart by briefly plugging it into a power outlet. Advanced Interface should illuminate (it may take up to
30 seconds).
NOTE:
After initializing the cart, a No Home symbol (
) will appear in the top right hand corner of the
Advanced Interface, indicating that the user must set the cart's Home (lowest) position.
2. Hold the Down Touch Icon to lower the cart’s Work Surface until the collision symbol ( ) appears.
3. Release the Down Touch Icon and reverse the direction, by holding the Up Touch Icon, to raise the Work Surface to
the desired position.
Users are able to save sit and stand positions into a user profile.
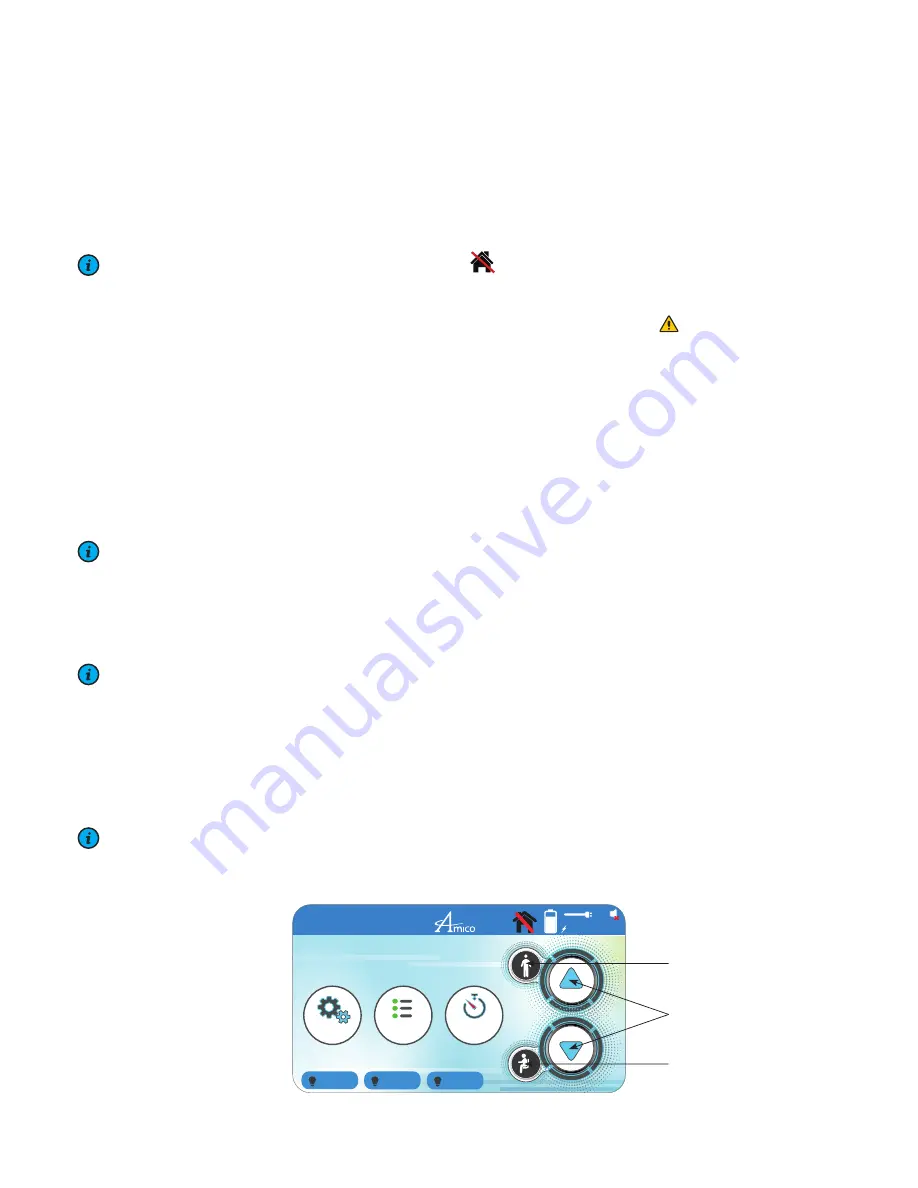
4. To create or edit a user profile, tap on Settings from Main Menu
(Figure 1)
and then tap User Setup
(Figure 2)
.
5. Enter User Name.
NOTE:
ONCE THE HEIGHT HAS BEEN ENTERED, SITTING AND STANDING POSITIONS WILL AUTOMATICALLY BE
SET BASED ON HEIGHT. TRY THESE SETTINGS FIRST BEFORE SETTING NEW ONES.
6. Tap OK when finished.
NOTE:
TO CHANGE SAVED POSITIONS, TAP ON UPDATE PROFILE FROM THE USER SETUP MENU. IF THERE ARE
MULTIPLE USERS SAVED, SELECT THE PROFILE BY TAPPING ON USER NAME AND SELECTING FROM A DROP
DOWN LIST.
7. When height is at desired sit/stand position, select Save next to respective position icons. Tap OK twice to return to
Main Menu.
NOTE:
AT IDEAL OPERATING HEIGHT, THE OPERATOR’S FOREARMS SHOULD BE PARALLEL TO THE FLOOR WHEN
USING THE KEYBOARD/MOUSE (90° BEND AT ELBOWS).
Section 6: Adjustments
Figure 1
Settings
Notes
4:50 pm
07/10/2014
Timer
10h:50m
GUEST
Top
Middle
Bottom
Up/Down Icons
Standing Icon
Sitting Icon


