background image

19

OPERATION

The child lock function  


The child lock function protects the induction hob from being accidentally switched on by children, 

pets, etc. 

Switching on the child lock function

Touching the on/off sensor field (

1

) switches 

on the induction hob, and a flashing „

0

” ap

-

pears on the right front sensor field (

3

) for 

10 seconds.

Then, during these 10 seconds, press sen-

sor  fields  (

2

)  and  (

4

)  simultaneously. After 

hearing  the  short  beep,  press  sensor  field 

(

+

)(

5

) and the letter „

L

” will be displayed on 

all the indicators (

3

).

Switching off the child lock function

Start this by pressing the main sensor field 

(

1

), the letter „

L

” will be displayed on all the 

indicators (

3

).

Within 10 seconds of the on/off sensor (

1

being touched, press sensor fields (

2

) and (

4

simultaneously. After hearing the short beep, 

press sensor field (

-

)(

4

) and the letter „

L

” will 

vanish from all the indicators (

3

).

Start switching the locking function on/off when the induction hob is off.

When the mains power is off, the child lock function is automatically deacti-

vated.

Switching off the appliance

The  induction  hob  operates  when  at  least 

one cooking zone is on. Pressing the on/off 

sensor field (

1

) switches off the appliance, 

and the letter „

h

” for residual heat appears 

on the cooking zone indicator (

3

).

3

1

4

2

3

5

1

3

4

2

3

4

3

1

Содержание PB*4VQ247CF

Страница 1: ...PB 4VQ247CF IOAA 646 10 2014 1 OPERATING MANUAL ...

Страница 2: ...d the instruction manual carefully By following these instructions carefully you will be able to avoid any problems in using the appliance It is important to keep the instruction manual and store it in a safe place so that it can be consulted at any time It is necessary to follow the instructions in the manual carefully in order to avoid possible accidents Certificate of compliance CE The Manufact...

Страница 3: ...3 TABLE OF CONTENTS Basic information 2 Safety instructions 4 Description of the appliance 8 Installation 9 Operation 12 Cleaning and maintenance 20 Emergency procedures 22 Technical data 24 Warranty 24 ...

Страница 4: ...ck of experience and knowledge if they have been given supervision or instruction concerning use of the appliance in a safe way and understand the hazards involved Children shall not play with the appliance Cleaning and user maintenance shall not be made by children without supervision Warning Unattended cooking on a hob with fat or oil can be dangerous and may result in fire NEVER try to extingui...

Страница 5: ...ll be protected from accidental contact with live components Electric appliances can be repaired only by qualified specialists Unprofessional repairs may compromise the safety of the appliance The appliance is disconnected from the mains only when the mains plug is pulled out from the socket or when the fuse has been switched off Never allow children to remain unattended near the cooktop nor to pl...

Страница 6: ...ly damaged The heating surface of the ceramic plate is resistant to thermal shock It is neither hot nor cold sensitive Avoid dropping objects on the plate A point hit for example a falling bottle with spices may in unfavourable circumstances lead to cracks and splits appearing on your ceramic plate Boiled over residuals of food may penetrate damaged places and get to the live compo nents of the ce...

Страница 7: ...d have been identified with ap propriate symbol Caution Packing materials polyethylene bags pieces of polystyrene etc should be kept away from children during unpacking UNPACKING Disposing of the de vice SAVING ENERGY Everybody who properly uses energy not only saves money but also consciously acts in aid of the natural environment So let s save electric energy by Using proper cookware Pots and pa...

Страница 8: ...ntrol sensor panel 1 On off sensor 2 Cooking zone selector sensor 3 Cooking zone indicators 4 Lower heat setting selector 5 Higher heat setting selector Back left cooking zone Ø 145 Back right cooking zone Ø 180 Front left cooking zone Ø 210 Front right cooking zone Ø 145 2 4 5 1 3 ...

Страница 9: ...orktop The distance between the edge of the opening and the side wall of the furniture should be at least 55 mm Worktop must be made of materials including veneer and adhesives resistant to a tem perature of 100 C Otherwise veneer could come off or surface of the worktop become deformed Edge of the opening should be sealed with suitable materials to prevent ingress of water Worktop opening must cu...

Страница 10: ...en cabinet worktop above oven Note When installing the hob in the kit chen worktop install a partition panel as shown on the picture If the hob is to be installed above a built in oven instal lation of the partition panel is not requ ired If the hob was installed in the kitchen worktop above the drawer the bottom cover of the hob must be covered with a wooden panel or protective board for ceramic ...

Страница 11: ... on figure 4 and 5 Check if adhesive seal is properly applied to the hob s flange Loosely attach fixing brackets to the bottom of the hob Remove dust from the worktop insert hob into the opening and press in firmly Position fixing brackets perpendicularly to the hob s edge and tighten firmly 1 worktop 2 screw 3 fixing bracket 4 hob 5 seal 2 3 5 4 1 worktop 2 screw 3 fixing bracket 4 hob 5 seal 6 w...

Страница 12: ...for the installer The plate is factory set for three phase alternating current power supply 400 V 2N 50 Hz It may be adapted for one phase current power supply 230 V by adequate bridging on the connection strip in accordance with the attached wiring diagram The wiring diagram is also provided in the bottom part of the lower cover The connection strip can be accessed once the lid on the bottom cove...

Страница 13: ...ion with a neutral lead 1 2 terminals are shorted together neutral lead connected to 4 PE protective earth lead connected to 1N H05VV F or H05RR F 3X 4 mm2 2 For 400 230 V power supply 2 phase connection with a neu tral lead neutral lead connected to 4 PE protective earth lead connected to 2N H05VV F or H05RR F 4X 2 5 mm2 L1 R L2 S L3 T N neutral lead terminal PE lead terminal Connect the remainin...

Страница 14: ...y the cookware manufacturers Cookware with aluminium or copper bottoms can leave metallic discoloration very difficult to remove Be particularly careful when using enamelware as it may irreparably damage your plate when left on a hotplate with the content boiled down To achieve optimal power consumption optimal cooking times and to avoid burning of food boiled over on the plate observe the followi...

Страница 15: ...trol sensor panel When the cooking surface is connected to the electricity mains the symbol should light up briefly on the indicator 3 after which the induction hob can be switched on No objects should be placed on the sensor surfaces this could cause an error Touch sensor surfaces should be always kept clean If the induction hob is on i e at least one cooking zone is on then the next cooking zone...

Страница 16: ...desired cooking zone using the cooking zone selector sensor 2 Then when the cooking zone indicator 3 shows 0 and a digit is flashing start setting the required heating power using the sensor 5 or the sensor 4 If you do not wish the automatic warm up function to operate start the heating po wer selection by touching the sensor 4 first You can then gradually increase the heating power by operating t...

Страница 17: ...ng the heating power by touching the sensor 4 the letter A is not lit Each cooking zone is equipped with an auto matic warm up function When this is activa ted then the given cooking zone is switched on at full power for a time dpending on the heat setting selected and is then switched back to the heat setting set Activate the automatic warm up function by setting the required heating power by tou...

Страница 18: ...e indicator will be lighted If you want to continue cooking switch on the hotplate again at the required level of heating power Heating power level Maximal time of operation in hours 1 10 2 5 3 5 4 4 5 3 6 2 7 2 8 2 9 1 During the supply voltage drop the H is no more shown In spite of this the hot fields can be still hot Important If the cooking plate is started again after the renewed switching o...

Страница 19: ...ock function Start this by pressing the main sensor field 1 the letter L will be displayed on all the indicators 3 Within 10 seconds of the on off sensor 1 being touched press sensor fields 2 and 4 simultaneously After hearing the short beep press sensor field 4 and the letter L will vanish from all the indicators 3 Start switching the locking function on off when the induction hob is off When the...

Страница 20: ...nts scrubbing powders or scratching sponges Removal of stains Li ght pearly stains aluminium re si du es can be removed from cooled plate using special cleaning agents Cal ca re ous re si du es i e boiled over wa ter can be re mo ved with vinegar or spe cial cle aning agents Do not switch off the hotplate when re mo ving sugar sugar containing food plastic or aluminium foil Immediately scrape off ...

Страница 21: ...an have caustic effect Failure to observe the ceramic plate main tenance instructions can result in losing your warranty rights Caution If from any reason you are not able to control the switched on plate switch off the main switch or screw out the fuse and call the Customer Service Caution Should cracks or splits appear on the surface of your ceramic plate immediately disconnect the plate from th...

Страница 22: ...ave been to uched at the same time always touch only one sen sor except when switching off a hotplate 3 The appliance does not re spond and emits a short si gnal children lock has been activated switch off the children lock 4 The appliance does not re spond and emits a long si gnal improper operation im pro per sen sors have been to uched or pro per sensors have been touched for too short time aga...

Страница 23: ...connect the ceramic plate from the mains fuse and call the nearest Cus tomer Service Centre 9 If the fault still remains Disconnect the ceramic plate from the mains fuse and call the nearest Customer Service Centre Important You are the person responsible for proper condition and operation of the appliance in your household If you call the Service for a fault which resulted from improper opera tio...

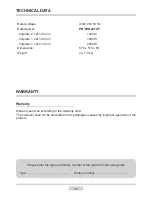
Страница 24: ...otplate 1 x Ø 210 mm 2300 W Dimensions 576 x 518 x 50 Weight ca 7 8 kg WARRANTY Warranty Warranty services according to the warranty card The producer shall not be held liable for any damages caused by improper operation of the product Please enter the type and factory number of the plate from the rating plate Type Factory number ...

Страница 25: ...25 ...

Страница 26: ...26 ...

Страница 27: ...27 ...

Страница 28: ......

Отзывы: