background image

94

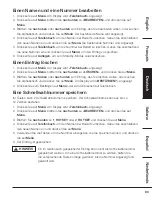
Anrufbeantworter

Das Telefon kann Nachrichten mit einer Länge bis zu 12 Minuten digital aufnehmen. Neben der 
Aufnahme eingehender Nachrichten kann es auch Notizen für andere Benutzer aufnehmen.
Der Anrufbeantworter kann bedient werden über:
1.  Das Basisgerät (nur Wiedergabe und Löschen von Nachrichten).
2.  Das Mobilteil.
3.  Extern über jedes andere DTMF-Telefon, siehe Seite 30.

Anrufbeantworter ein-/ausschalten

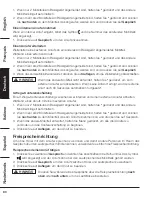
1.  Drücken Sie auf 

Menü

, blättern Sie 

nach oben

 oder 

nach unten

 zu «ANRUFBEANTWORTER» 

und drücken Sie auf 

Menü

.

2.  Blättern Sie 

nach unten

 zu 

«ANTWORTMODUS»

 und drücken Sie auf 

Menü

.

3.  Drücken Sie 

nach oben

 oder 

nach unten

, um 

«NUR ANTWORT»

«A 

AUFNAHME»

 oder 

«AUS»

 zu wählen, und drücken Sie zum Bestätigen auf 

Menü

.

Nachrichten anhören

Am Basisgerät:

1.  Wenn es neue Nachrichten gibt, drücken Sie auf 

Wiedergabe

. Es werden nur neue 

Nachrichten abgespielt. Halten Sie 

Wiedergabe

 gedrückt, um alle Nachrichten abzuspielen.

2.  Wenn es keine neuen Nachrichten gibt, drücken Sie auf Wiedergabe und alle Nachrichten 

werden abgespielt.

Während der Wiedergabe:

Drücken Sie auf Wiedergabe, um das Abspielen zu beenden. Drücken Sie auf Löschen, um die 
aktuelle Nachricht zu löschen.

Halten Sie im Standby-Modus 

Löschen

 für 2 Sekunden gedrückt, um alle alten 

Nachrichten zu löschen.

Am Mobilteil:

1.  Drücken Sie auf 

Menü

, blättern Sie nach unten zu 

«ANRUFBEANTWORTER»

 und drücken 

Sie auf 

Menü

.

2. 

«WIEDERGABE»

 wird angezeigt. Drücken Sie auf 

Menü

.

3.  Am Display wird die Anzahl der abgespielten Nachrichten angezeigt, sowie abwechselnd Datum 

und Uhrzeit, zu denen die Nachricht hinterlassen wurde.

4.  Drücken Sie während der Wiedergabe auf 

Menü

, um eine Liste aller Optionen anzuzeigen.

5.  Blättern Sie nach oben oder 

nach unten

, um zwischen den Optionen zu wechseln. 

«WIEDERHOLEN»

 Drücken Sie auf 

Menü

, um die aktuelle Nachricht zu wiederholen.  

«WEITER»

 Drücken Sie auf 

Menü

, um die nächste Nachricht abzuspielen. 

«ZURÜCK»

 Drücken Sie auf 

Menü

, um die vorige Nachricht abzuspielen. 

«LÖSCHEN»

 Drücken Sie auf 

Menü

, um die aktuelle Nachricht zu löschen.

HINWEIS

Содержание B07PDGMMFD

Страница 1: ...B07PGJTRSJ B07PGJR7MG B07PDGMMFD B07PHNQQR4 DECT Home Telephone With Answering Machine Téléphone sans Fil avec Répondeur DECT Telefon mit Anrufbeantworter Telefono Fisso DECT con Segreteria Telefonica Teléfono DECT Doméstico con Contestador Automático DECT Huistelefoon met Antwoordapparaat ...

Страница 2: ...English 3 Français 36 Deutsch 69 Italiano 103 Español 136 Nederlands 169 ...

Страница 3: ... product from the mains socket before cleaning Do not use liquid cleaners or aerosol cleaners Use a damp cloth for cleaning Keep this product away from hot humid conditions or strong sunlight and don t let it get wet or use it near water for example near a bath tub kitchen sink or swimming pool Do not overload wall outlets and extension cords as this can result in the risk of fire or electric shoc...

Страница 4: ...standards for a DECT phone Maximum range up to 300 metres outdoors or 50 metres indoors Be aware that Large metal objects such as refrigerators mirrors or filing cabinets between the handset and the base unit may block the radio signal Solid structures such as walls may reduce the signal strength Electrical equipment may cause interference and or affect the range Do not place the base unit close t...

Страница 5: ...5 Getting to Know Your Phone Handset Overview 1 2 3 4 5 6 7 8 9 10 11 12 13 14 ...

Страница 6: ...firm a displayed option During a call press to turn mute on off 5 Talk Hands free Press to make and receive calls Press to switch hands free on off during a call 6 Pulse to Tone dialling Intercom Dial a star During a call press to switch from pulse dialling to tone dialling Press and hold to make internal calls and transfer calls to other handsets registered to the base 7 Recall Use with switchboa...

Страница 7: ...arpiece volume When the phone is ringing press to decrease the handset ringer volume Press to scroll through the menu options redial list calls list and phone book entries In standby mode press to open the calls list 12 Pause Dial a Press and hold to enter a pause P when pre dialling or storing numbers 13 Keypad lock Press and hold to lock and unlock the keypad 14 Do Not Disturb Press to automatic...

Страница 8: ...lashes when there are new messages Flashes when there is an incoming call Press to stop message playback 2 Delete Press to delete recorded messages during playback In standby press and hold to delete all old messages 3 Page In standby mode press to ring the handset s Press and hold to enter registration mode when registering handsets ...

Страница 9: ...s is ON Handset ringer is off Indicates a missed call Steady when making an outgoing call Flashes to indicate an incoming or internal call Indicates an incoming call when viewing the calls list Indicates an outgoing call when viewing the redial list Hands free is on Menu is open Keypad is locked Alarm is set Indicates when any block mode is turned on ...

Страница 10: ...enu map on the following page When the handset is switched on and in standby 1 Press Menu to open the main menu 2 Then use the Up or Down buttons to scroll through the available options 3 Press Menu to select an option To return to the previous menu level press Phonebook To exit the menu and return to standby press End call If no buttons are pressed for 30 seconds the handset returns to standby au...

Страница 11: ...nly available if a phone book entry is stored Installing Your Phone Connecting the Base Station 1 Plug the mains cable and telephone line cord into their corresponding sockets in the back of the base station 2 Plug the mains adaptor into a 100 240 VAC 50 60 Hz mains outlet and the telephone line cord into a telephone line socket Always use the cables provided in the box Use only the supplied adapt...

Страница 12: ...d NiMH rechargeable batteries 3 Slide the battery cover back over the battery compartment until it clicks into place 4 Place the handset on the base and charge for 15 hours before using the handset for the first time The handset will give a double beep when it is properly placed on the base to indicate charging The handset may become warm when the batteries are being charged or during prolonged pe...

Страница 13: ...e rings and the icon flashes on the display 1 Press Talk to answer the call or if Auto Answer is set to On simply lift up the handset to answer the call To answer calls by pressing Talk even when the handset is lifted switch Auto Answer off see page 24 Adjust the earpiece volume During a call press Up or Down to increase or decrease the volume Mute The handset can be muted so that a conversation c...

Страница 14: ...econds if there is no answer 3 way conference call To hold a 3 way conference call between 2 internal callers and 1 external caller During a call with an external caller 1 If only 2 handsets are registered to the base press and hold and the other handset rings automatically 2 If more than 2 handsets are registered to the base press and hold and scroll Down to the handset that you want to join the ...

Страница 15: ...ired entry 3 Press Menu The display shows VIEW 4 Scroll Up or Down to SAVE NUMBER 5 Press Menu The display shows ENTER NAME 6 Enter the name and press Menu The number is displayed 7 Edit the number if necessary then press Menu The number is stored See Entering names and Writing tips on page 17 Delete an entry 1 Press Up to open the Redial list 2 Scroll Up or Down to the required entry and press Me...

Страница 16: ...ows ENTER NAME 4 Enter the name and press Menu The display shows ENTER NUMBER 5 Enter the number and press Menu the entry is saved 6 Press End Call to return to standby Entering names Use the keypad letters to enter names e g to store TOM Press 8 once to enter T Press 6 three times to enter O Press 6 once to enter M Writing tips Press Phonebook to delete the last character or digit Press Up or Dow...

Страница 17: ...ETE and press Menu 3 Scroll Up or Down to the entry you wish to delete or search alphabetically and press Menu The display shows CONFIRM 4 Press Menu to confirm or Phonebook to cancel Store a quick dial number Your phone can store 2 quick dial numbers The quick dial name can be up to 12 characters 1 Press Menu The display shows Phonebook 2 Press Menu scroll Down to EDIT and press Menu 3 Scroll Dow...

Страница 18: ...or OFF 5 Press Menu to confirm or Phonebook to return to the previous menu Block all withheld calls 1 Press Menu scroll Down to CALL BLOCK and press Menu 2 The display shows BY CALLTYPE press Menu 3 Scroll down to WITHHELD press Menu 4 Scroll Up or Down to ON or OFF 5 Press Menu to confirm or Phonebook to return to the previous menu Block all unavailable calls 1 Press Menu scroll Down to CALL BLOC...

Страница 19: ...u Add a number to the call block list 1 Press Menu scroll Down to CALL BLOCK and press Menu 2 Scroll Down to BY NUMBER press Menu 3 Scroll Down to ADD NEW press Menu 4 Enter the number and press Menu to save 5 Press End Call to return to standby Edit a number in the call block list 1 Press Menu scroll Down to CALL BLOCK and press Menu 2 Scroll Down to BY NUMBER press Menu 3 Scroll Down to EDIT pre...

Страница 20: ...played If the call is from the operator OPERATOR will be displayed If the call is from a payphone PAYPHONE will be displayed If the call is from a ring back request RINGBACK will be displayed Caller Display If subscribed to caller ID the caller s number will be displayed provided it is not withheld prior to answering the call The display can show the first 12 digits or characters of phone numbers ...

Страница 21: ...Enter the name and press Menu The number is displayed 6 Edit the number if necessary then press Menu to confirm See Entering names and Writing tips on page 17 Delete an entry 1 Press Down to open the calls list 2 Scroll Up or Down to the desired entry 3 Press Menu scroll Down to DELETE 4 Press Menu the display shows CONFIRM 5 Press Menu to confirm or Phonebook to cancel Delete the entire calls lis...

Страница 22: ...ss Menu 3 Scroll Up or Down to select ON or OFF and press Menu 4 If you select ON enter the time using the keypad e g 04 45A for 4 45 AM and press Menu to confirm Once the alarm is set to on the icon is displayed When the alarm rings the icon flashes To stop the alarm press any button on the handset Personal Set Handset tones Handset ringer volume The handset ring volume can be set to different vo...

Страница 23: ...menu Base tones Base ringer volume The base ring volume can be set to different volume levels Choose from 5 volume levels or Off 1 Press Menu scroll Down to PERSONAL SET and press Menu 2 Scroll Down to BASE TONE and press Menu 3 The display shows RING VOLUME press Menu 4 Press Up or Down to select the volume 1 5 or OFF 5 Press Menu to confirm or Phonebook to return to the previous menu When the ph...

Страница 24: ...o that calls can only be answered by pressing Talk 1 Press Menu scroll Down to PERSONAL SET and press Menu 2 Scroll Down to AUTO ANSWER and press Menu 3 Press Up or Down to select ON or OFF 4 Press Menu to confirm or Phonebook to return to the previous menu Language 1 Press Menu scroll Down to PERSONAL SET and press Menu 2 Scroll Down to LANGUAGE and press Menu 3 Press Up or Down to select the pre...

Страница 25: ... ON or OFF 4 Press Menu to confirm or Phonebook to return to the previous menu Auto Prefix You can set the phone to detect a dialling number and replace it with another number The number to be detected can be up to 5 digits long It can be replaced with a number up to 10 digits long 1 Press Menu scroll Down to ADVANCED SET and press Menu 2 Scroll Down to AUTO PREFIX press Menu 3 DIGIT DETECT is dis...

Страница 26: ...hold Page for 5 seconds The base will remain in registration mode for 90 seconds On the handset 1 If the handset is not registered to a base press Menu and then enter the 4 digit PIN code default 0000 and press Menu 2 If the handset is already registered to a base press Menu Scroll Down to ADVANCED SET and press Menu 3 Scroll Down to REGISTER and press Menu 4 Enter the 4 digit PIN code default 000...

Страница 27: ... Phonebook to return to the previous menu 5 The phone will restart automatically Once reset the handset will prompt you to reset the date and time see page 28 Answering Machine The phone can digitally record up to 12 minutes of messages As well as recording incoming messages it can record memos for other users The answering machine can be operated from 1 The base play and delete messages only 2 Th...

Страница 28: ...ndby Delete all messages 1 Press Menu scroll Up or Down to ANSW MACHINE and press Menu 2 Scroll Down to DELETE ALL and press Menu 3 Display shows CONFIRM press Menu Record a memo You can record memo messages for other users which can be played back just like normal messages Memos can only be recorded using the handset 1 Press Menu scroll Up or Down to ANSW MACHINE and press Menu 2 Scroll Down to R...

Страница 29: ...DE and press Menu 3 Press Up or Down to select either ANSWER ONLY or ANSWER REC and press Menu to confirm Ring delay Select the duration of rings before your answering machine picks up the call Choose from 3 8 rings or Time Saver 1 When set to Time Saver if you have new messages your phone answers after 3 rings 2 If there are no new messages it will answer after 5 rings This affords you the option...

Страница 30: ...ically 4 If the security code is accepted use the codes on the other side of this card for remote operations If your answering machine is switched off the phone will enter remote access mode after 14 rings You can then enter the 4 digit remote access PIN default remote access PIN is 0000 to activate the remote access feature NOTICE NOTICE Remote access on off and change remote PIN 1 Press Menu scr...

Страница 31: ...r after use Make sure the mains adaptor is securely plugged into a functioning mains outlet Make sure the telephone line cord is plugged firmly into the telephone base and the telephone wall jack Unplug the electrical power to the telephone base Wait for approximately 15 seconds then plug it back in Allow up to one minute for the handset and telephone base to synchronise Remove and re insert the b...

Страница 32: ...ed in The adaptor cord is not plugged in correctly in the base station Another handset is using the base to make a call Wrong telephone line cord Check the connections Unplug and plug back in the mains Check that the telephone cord has been plugged into the base station and the phone socket Check the base station plug and the 230V plug remove and plug in Wait until the line is unoccupied Use the o...

Страница 33: ...ngs and recording stops A call is being received Answer the incoming call and try again later to record your outgoing message Disposal The Waste Electrical and Electronic Equipment WEEE Directive aims to minimise the impact of electrical and electronic goods on the environment by increasing re use and recycling and by reducing the amount of WEEE going to landfill The symbol on this product or its ...

Страница 34: ... C to 60 C Electrical power Base and charge unit BLJ05W060040P B HJ 0600400A1 UK HJ 0600400P1 EU BLJ05W060040P VA INPUT 100 240VAC 50 60HZ 0 2 0 15A OUTPUT 6VDC 400MA Battery information TYPE NI MH Rechargeable battery 300MAH 2 X 1 2V AAA use only adaptors and batteries listed above Risk of explosion if the battery is replaced by an incorrect type Dispose of used batteries according to the instruc...

Страница 35: ...liability for your phone system However if something does go wrong please do not try to repair the product yourself but consult your supplier or call our helpline Warranty Information To obtain a copy of the warranty for this product amazon co uk basics warranty 44 0 800 279 7234 Feedback and Help Love it Hate it Let us know with a customer review AmazonBasics is committed to delivering customer d...

Страница 36: ...s instructions Suivez tous les avertissements et instructions concernant le produit Débranchez ce produit de la prise secteur avant de le nettoyer N utilisez pas de nettoyants liquides ou en aérosol Utilisez un chiffon humide pour le nettoyage Gardez ce produit à l abri de la chaleur de l humidité et de la lumière directe du soleil ne le mouillez pas ni ne l utilisez près de l eau comme près d une...

Страница 37: ...e DECT portée maximale de 300 mètres à l extérieur et de 50 mètres à l intérieur Prenez en considération que les gros éléments métalliques comme les réfrigérateurs les miroirs ou les armoires métalliques situés entre le combiné et la base peuvent bloquer le signal radio les structures rigides comme les murs peuvent réduire l intensité du signal les équipements électriques peuvent occasionner des i...

Страница 38: ...38 Familiarisez Vous Avec Votre Téléphone Vue d Ensemble du Combiné 1 2 3 4 5 6 7 8 9 10 11 12 13 14 ...

Страница 39: ...iver ou désactiver la sourdine 5 Conversation Mains libres Pressez pour passer et recevoir des appels Pressez pour activer ou désactiver le mode mains libres pendant un appel 6 Numérotation par impulsion ou tonalité Interphone Compose un astérisque Pendant un appel pressez pour passer de la numérotation par impulsions à la numérotation par tonalité Maintenez pressé pour réaliser des appels interne...

Страница 40: ...léphone sonne pressez pour diminuer le volume de la sonnerie du combiné Pressez cette touche pour faire défiler les rubriques du menu la liste de rappel la liste des appels et les contacts du répertoire téléphonique En mode veille pressez pour ouvrir la liste des appels 12 Pause Compose un Maintenez pressé pour placer une pause P quand vous précomposez ou enregistrez des numéros 13 Verrouillage du...

Страница 41: ...de nouveaux messages Clignote en cas d appel entrant Pressez pour interrompre la lecture d un message 2 Effacer Pressez pour effacer des messages pendant leur lecture En veille maintenez pressé pour effacer tous les vieux messages 3 Bipeur En mode veille pressez pour faire sonner le s combiné s Maintenez pressé pour entrer en mode enregistrement afin d enregistrer des combinés ...

Страница 42: ...ésactivée Indique un appel manqué Fixe en cas d appel sortant Clignote pour indiquer un appel entrant ou un appel interne Indique un appel entrant pendant l affichage de la liste des appels Indique un appel sortant quand vous consultez la liste de rappel Mode mains libres actif Le menu est ouvert Le clavier est verrouillé Alarme programmée Indique que l un des modes blocage est activé ...

Страница 43: ... à la page suivante Lorsque le combiné est allumé et en veille 1 pressez Menu pour ouvrir le menu principal 2 puis pressez les touches Haut ou Bas pour faire défiler les options disponibles 3 pressez Menu pour sélectionner une option Pour revenir au niveau de menu précédent pressez Répertoire Pour sortir du menu et retourner au mode veille pressez Fin d Appel Si aucune touche n est actionnée penda...

Страница 44: ...t prédéfini en numérotation par tonalité Uniquement disponible si le répertoire téléphonique contient au moins un contact Installation de Votre Téléphone Connecter la Base 1 Branchez le câble d alimentation et le câble téléphonique dans les prises appropriées à l arrière de la base 2 Branchez l adaptateur secteur dans une prise secteur 100 240 V CA 50 60 Hz et le câble téléphonique dans une prise ...

Страница 45: ...les NiMH fournies 3 Refermez le couvercle du compartiment des piles en le glissant jusqu à ce qu il s enclenche 4 Posez le combiné sur sa base et rechargez le pendant 15 heures avant la première utilisation Lorsqu il est correctement posé sur sa base le combiné émet un double bip pour indiquer qu il est en chargement Le combiné peut chauffer lorsque les piles sont en cours de chargement ou pendant...

Страница 46: ...Pressez Conversation pour décrocher l appel ou si Décroché Auto est réglé sur Activé soulevez tout simplement le combiné pour décrocher l appel Pour répondre aux appels en appuyant sur Conversation même lorsque le combiné est soulevé désactivez la fonction Décroché Auto voir page 24 Régler le volume de l écouteur Pendant un appel pressez Haut ou Bas pour augmenter ou réduire le volume de l écouteu...

Страница 47: ...que à trois Tenir une conférence à trois entre 2 interlocuteurs internes et 1 interlocuteur externe Pendant un appel avec un interlocuteur externe 1 si seulement 2 combinés sont enregistrés dans la base maintenez pressé et l autre combiné sonne automatiquement 2 si plus de 2 combinés sont enregistrés dans la base maintenez pressé et faites défiler vers le Bas jusqu à arriver au combiné qui doit êt...

Страница 48: ...ressez Menu L écran affiche VOIR 4 Faites défiler vers le Haut ou vers le Bas jusqu à ENREGISTRER LE NUMÉRO 5 Pressez Menu L écran affiche SAISIR LE NOM 6 Saisissez le nom puis pressez Menu Le numéro s affiche 7 Modifiez le numéro si nécessaire puis pressez Menu Le numéro est enregistré Reportez vous aux sections Saisir des noms et Astuces de saisie à la page 17 Effacer une entrée 1 Pressez Haut p...

Страница 49: ...sez Menu L écran affiche SAISIR NUMÉRO 5 Saisissez le numéro et pressez Menu la saisie est enregistrée 6 Pressez Fin d Appel pour revenir au mode veille Saisir les noms Saisissez les noms à l aide des lettres du clavier Par exemple pour mémoriser TOM pressez une fois 8 pour saisir la lettre T pressez trois fois 6 pour saisir la lettre O pressez une fois 6 pour saisir la lettre M Astuces de saisie ...

Страница 50: ...u à la saisie que vous souhaitez effacer ou cherchez alphabétiquement et pressez Menu L écran affiche CONFIRMER 4 Pressez Menu pour confirmer ou Répertoire pour annuler Mémoriser un numéro d appel rapide Vous pouvez mémoriser 2 numéros d appel rapide Le nom associé au numéro d appel rapide peut compter jusqu à 12 caractères 1 Pressez Menu L écran affiche RÉPERTOIRE 2 Pressez Menu faites défiler ve...

Страница 51: ... au menu précédent Bloquer tous les appels masqués 1 Pressez Menu faites défiler vers le Bas jusqu à BLOCAGE D APPEL puis pressez Menu 2 L écran affiche PAR TYPE D APPEL pressez Menu 3 Faites défiler vers le Bas jusqu à MASQUÉ pressez Menu 4 Faites défiler vers le Haut ou vers le Bas jusqu à ACTIVER ou DÉSACTIVER 5 Pressez Menu pour confirmer ou Répertoire pour revenir au menu précédent Bloquer to...

Страница 52: ...faites défiler vers le Bas jusqu à BLOCAGE D APPEL puis pressez Menu 2 Faites défiler vers le Bas jusqu à PAR NUMÉRO pressez Menu 3 Faites défiler vers le Bas jusqu à AJOUTER NOUVEAU pressez Menu 4 Saisissez le numéro et pressez Menu pour enregistrer 5 Pressez Fin d Appel pour revenir au mode veille Modifier un numéro dans la liste des appels bloqués 1 Pressez Menu faites défiler vers le Bas jusqu...

Страница 53: ...ational INTERN L est affiché Si l appel provient de votre opérateur OPÉRATEUR est affiché Si l appel provient d une cabine téléphonique CABINE PUBLIQUE est affiché Si l appel provient d un système de rappel RAPPEL est affiché Affichage de l appelant Si vous disposez du service de présentation du numéro le numéro de l appelant est affiché s il n est pas masqué avant de décrocher L afficheur peut af...

Страница 54: ...puis pressez Menu Le numéro s affiche 6 Modifiez le numéro si nécessaire puis pressez Menu pour confirmer Reportez vous aux sections Saisir des noms et Astuces de saisie à la page 17 Effacer une entrée 1 Pressez Bas pour ouvrir la Liste des Appels 2 Faites défiler vers le Haut ou vers le Bas jusqu au numéro souhaité 3 Pressez Menu faites défiler vers le Bas jusqu à EFFACER 4 Pressez Menu l écran a...

Страница 55: ... vers le Bas pour sélectionner ACTIVER ou DÉSACTIVER puis pressez Menu 4 Si vous sélectionnez ACTIVER saisissez l heure à l aide du clavier p ex 04 45A pour 04 45 du matin puis pressez Menu pour confirmer Une fois que l alarme est réglée le pictogramme apparaît Quand l alarme retentit le pictogramme clignote Pour stopper l alarme pressez n importe quelle touche du combiné Réglages Personnels Sons ...

Страница 56: ...e la sonnerie de la base Le volume de la sonnerie de la base peut être réglé sur plusieurs niveaux de volume Choisissez parmi 5 niveaux de volume ou Désactivé 1 Pressez Menu faites défiler vers le Bas jusqu à RÉGLAGES PERSONNELS puis pressez Menu 2 Pressez Bas pour sélectionner SON BASE puis pressez Menu 3 L écran affiche VOLUME SONNERIE pressez Menu 4 Pressez Haut ou Bas pour sélectionner le volu...

Страница 57: ...ation 1 Pressez Menu faites défiler vers le Bas jusqu à RÉGLAGES PERSONNELS puis pressez Menu 2 Faites défiler vers le Bas jusqu à DÉCROCHÉ AUTO et pressez Menu 3 Faites défiler vers le Haut ou vers le Bas pour sélectionner ACTIVER ou DÉSACTIVER 4 Pressez Menu pour confirmer ou Répertoire pour revenir au menu précédent Langue 1 Pressez Menu faites défiler vers le Bas jusqu à RÉGLAGES PERSONNELS pu...

Страница 58: ...R 4 Pressez Menu pour confirmer ou Répertoire pour revenir au menu précédent Indicatif auto Vous pouvez paramétrer le téléphone pour qu il reconnaisse une composition de numéro et remplace ce dernier par un autre numéro Le numéro à reconnaître peut comporter jusqu à 5 chiffres Il peut être remplacé par un numéro comportant jusqu à 10 chiffres 1 Pressez Menu faites défiler vers le Bas jusqu à RÉGLA...

Страница 59: ...egistrés Sur la base 1 maintenez pressé le bouton Bipeur pendant 5 secondes La base reste en mode enregistrement pendant 90 secondes Sur le combiné 1 si le combiné n est pas enregistré dans une base pressez Menu puis entrez le code PIN à 4 chiffres par défaut 0000 et pressez Menu 2 si le combiné est déjà enregistré dans une base pressez Menu faites défiler vers le Bas jusqu à RÉGLAGES AVANCÉS et p...

Страница 60: ...e RÉINITIALISER 4 Pressez Menu pour confirmer ou Répertoire pour revenir au menu précédent 5 Le téléphone redémarre automatiquement Une fois réinitialisé le combiné vous invite à réinitialiser la date et l heure voir page 28 Répondeur Le téléphone peut enregistrer numériquement jusqu à 12 minutes de messages En plus d enregistrer les messages entrants il peut enregistrer des mémos à destination d ...

Страница 61: ... le Haut ou vers le Bas jusqu à RÉPONDEUR et pressez Menu 2 Faites défiler vers le Bas jusqu à EFFACER TOUT et pressez Menu 3 L écran affiche CONFIRMER pressez Menu Enregistrer un mémo Vous pouvez enregistrer des mémos destinés à d autres utilisateurs et qui peuvent être lus comme des messages normaux Les mémos ne peuvent être enregistrés qu à l aide du combiné 1 Pressez Menu faites défiler vers l...

Страница 62: ... MODE RÉPONDEUR et pressez Menu 3 Faites défiler vers le Haut ou vers le Bas pour sélectionner RÉPONDEUR UNIQUEMENT ou RÉPONDEUR ENR puis pressez Menu pour confirmer Nombre de sonneries Sélectionnez le nombre de sonneries avant que le répondeur ne décroche l appel Choisissez de 3 à 8 sonneries ou choisissez Gain de Temps 1 Quand vous optez pour Gain de temps si vous avez de nouveaux messages le ré...

Страница 63: ...es codes au verso de cet encart pour les manœuvres à distance Si votre répondeur est désactivé le téléphone passe en mode d accès à distance après 14 sonneries Vous pouvez alors saisir le code PIN d accès à distance à 4 chiffres le code PIN d accès à distance par défaut est 0000 pour activer la fonction d accès distant REMARQUE REMARQUE Activer et désactiver l accès distant et changer le PIN d acc...

Страница 64: ...cteur est correctement branché sur une prise secteur en état de fonctionner Assurez vous que le câble de la ligne téléphonique est solidement enfiché dans la base du téléphone et dans la prise téléphonique murale Débranchez l alimentation électrique de la base du téléphone Attendez environ 15 secondes puis rebranchez la Patientez jusqu à une minute pour que le combiné et la base du téléphone se sy...

Страница 65: ...nché sur la base Un autre combiné utilise la base pour passer un appel Mauvais câble de ligne téléphonique Vérifiez les connexions Débranchez puis rebranchez le câble d alimentation Vérifiez que le câble téléphonique est bien branché sur la base et sur la prise téléphonique Vérifiez la fiche de la base et la fiche 230 V débranchez puis rebranchez Attendez que la ligne ne soit plus occupée Utilisez...

Страница 66: ...ndez à l appel entrant et réessayez d enregistrer votre message d accueil plus tard Mise Au Rebut La directive relative aux déchets d équipements électriques et électroniques DEEE vise à réduire au minimum l impact des produits électriques et électroniques sur l environnement en augmentant la réutilisation et le recyclage et en réduisant la quantité de DEEE mis en décharge Le symbole figurant sur ...

Страница 67: ...60 C Puissance électrique base et module de chargement BLJ05W060040P B HJ 0600400A1 UK HJ 0600400P1 EU BLJ05W060040P VA 100 240 V CA 50 60 HZ 0 2 0 15 A EN ENTRÉE 6 V CC 400 mA EN SORTIE Caractéristiques des piles 2 x AAA 1 2 V 300 mAh TYPE NiMH piles rechargeables N utilisez que les adaptateurs et les piles indiqués ci dessus Risque d explosion si les piles sont remplacées par un modèle inadapté ...

Страница 68: ...système téléphonique Cependant en cas de problème n essayez pas de réparer vous même le produit mais consultez votre fournisseur ou appelez notre service d assistance téléphonique Informations Sur La Garantie Pour obtenir une copie de la garantie portant sur ce produit amazon fr basics garantie 33 0 800 947 715 Vos Avis et Aide Vous l adorez Vous le détestez Faites le nous savoir en laissant un co...

Страница 69: ...einigungsmittel oder Reinigungssprays Verwenden Sie zur Reinigung ein feuchtes Tuch Schützen Sie das Produkt vor warmen feuchten Umgebungen vor starker Sonneneinstrahlung und lassen Sie es nicht nass werden oder in die Nähe von Wasser gelangen beispielsweise in der Nähe einer Badewanne Küchenspüle oder eines Schwimmbeckens Setzen Sie Steckdosen und Verlängerungsleitungen keinen Überlastungen aus d...

Страница 70: ...eichweite beträgt bis zu 300 Meter im Freien bzw bis zu 50 Meter in Innenbereichen Beachten Sie Große Metallgegenstände wie Kühlschränke Spiegel oder Aktenschränke die sich zwischen dem Mobilteil und dem Basisgerät befinden können das Funksignal blockieren Massive Strukturen wie etwa Wände können die Signalstärke reduzieren Elektronische Geräte können Störungen verursachen und oder die Reichweite ...

Страница 71: ...71 Lernen Sie Ihr Telefon kennen Übersicht Mobilteil 1 2 3 4 5 6 7 8 9 10 11 12 13 14 ...

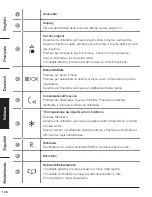
Страница 72: ...on zu bestätigen Während eines Anrufs drücken um die Stummschaltung ein auszuschalten 5 Gespräch Freisprechfunktion Drücken um Anrufe zu starten und anzunehmen Drücken um während eines Anrufs die Freisprechfunktion ein auszuschalten 6 Impulswahl zu Tonwahl Sprechanlage Einen Stern wählen Während eines Anrufs drücken um von Impulswahl zu Tonwahl zu wechseln Gedrückt halten um interne Anrufe zu star...

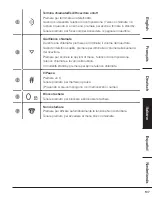
Страница 73: ...u verringern Wenn das Telefon läutet drücken um die Klingelton Lautstärke des Mobilgerätes zu verringern Drücken um durch Menüoptionen Wahlwiederholungslisten Anruflisten und Telefonbuch Einträge zu scrollen Im Standby Modus drücken um die Anrufliste zu öffnen 12 Pause Ein Zeichen wählen Gedrückt halten um eine Pause P einzufügen wenn Sie Nummern vorwählen oder speichern 13 Tastensperre Gedrückt h...

Страница 74: ... vorliegen Blinkt wenn ein Anruf eingeht Drücken um die Wiedergabe der Nachricht zu anzuhalten 2 Löschen Drücken um aufgezeichnete Nachrichten während der Wiedergabe zu löschen Im Standby Modus gedrückt halten um alle alten Nachrichten zu löschen 3 Seite Im Standby Modus drücken um das die Mobilteil e klingeln zu lassen Gedrückt halten um bei der Anmeldung von Mobilteilen in den Anmeldemodus zu ge...

Страница 75: ...eigt einen entgangenen Anruf an Leuchtet kontinuierlich bei ausgehendem Anruf Blinkt um einen eingehenden oder internen Anruf anzuzeigen Zeigt einen eingehenden Anruf an wenn Sie die Anrufliste ansehen Zeigt einen ausgehenden Anruf an wenn Sie die Wahlwiederholungsliste ansehen Freisprechfunktion ist aktiviert Menü ist geöffnet Tasten sind gesperrt Alarm ist eingestellt Zeigt an dass ein Sperrmodu...

Страница 76: ...erwenden Sie anschließend die Tasten Nach oben oder Nach unten um durch die verfügbaren Optionen zu scrollen 3 Drücken Sie auf Menü um eine Option auszuwählen Um zur vorigen Menüebene zurückzukehren drücken Sie auf Telefonbuch Um das Menü zu verlassen und in den Standby Modus zurückzukehren drücken Sie auf Auflegen Wenn für 30 Sekunden keine Tasten gedrückt werden kehrt das Mobilteil automatisch i...

Страница 77: ... VERZÖGERUNG REMOTE ACC FERNZUGRIFF Der Wählmodus ist von der Landesversion abhängig für einige Länder wird er im Menü nicht angezeigt und vorab auf Tonwahl eingestellt Nur verfügbar wenn ein Telefonbucheintrag gespeichert ist Telefon einrichten Basisstation anschließen 1 Stecken Sie die Anschlussleitung und das Telefonleitungskabel in die entsprechenden Buchsen an der Rückseite der Basisstation 2...

Страница 78: ...haltenen NiMH Akkus 3 Schieben Sie die Akkufach Abdeckung wieder auf das Akkufach bis sie einrastet 4 Positionieren Sie das Mobilteil auf der Basisstation und laden Sie es vor der ersten Verwendung 15 Stunden lang auf Das Mobilteil gibt einen zweifachen Signalton ab wenn es korrekt auf der Basisstation positioniert wurde um anzuzeigen dass es geladen wird Während die Akkus geladen werden oder währ...

Страница 79: ...linkt am Display 1 Drücken Sie auf Gespräch um den Anruf entgegenzunehmen Wenn für die automatische Anrufbeantwortung die Option Ein ausgewählt ist heben Sie einfach das Mobilteil ab um den Anruf entgegenzunehmen Um Anrufe anzunehmen indem Sie auf Gespräch drücken auch wenn das Mobilteil abgehoben ist deaktivieren Sie die automatische Anrufbeantwortung siehe Seite 24 Lautstärke der Hörmuschel anpa...

Страница 80: ... nach 60 Sekunden automatisch fortgesetzt 3 Wege Konferenzschaltung Eine 3 Wege Konferenzschaltung zwischen zwei internen und einem externen Anrufer abhalten Während eines Anrufs mit einem externen Anrufer 1 Wenn nur 2 Mobilteile am Basisgerät angemeldet sind halten Sie gedrückt und das andere Mobilteil klingelt automatisch 2 Wenn mehr als 2 Mobilteile am Basisgerät angemeldet sind halten Sie gedr...

Страница 81: ...ewünschten Eintrag 3 Drücken Sie auf Menü Am Display wird ANZEIGE angezeigt 4 Blättern Sie nach oben oder nach unten zu NUMMER SPEICHERN 5 Drücken Sie auf Menü Am Display wird NAMEN EINGEBEN angezeigt 6 Geben Sie den Namen ein und drücken Sie auf Menü Die Nummer wird angezeigt 7 Bearbeiten Sie die Nummer bei Bedarf und drücken Sie anschließend auf Menü Die Nummer ist gespeichert Siehe Namen eingeb...

Страница 82: ...rd NUMMER EINGEBEN angezeigt 5 Geben Sie die Nummer ein und drücken Sie auf Menü Der Eintrag ist gespeichert 6 Drücken Sie auf Auflegen um zum Standby Modus zurückzukehren Namen eingeben Verwenden Sie die Buchstaben der Tastatur um Namen einzugeben Um z B TOM zu speichern Drücken Sie einmal auf 8 um T einzugeben Drücken Sie dreimal auf 6 um O einzugeben Drücken Sie einmal auf 6 um M einzugeben Tip...

Страница 83: ...e auf Menü 3 Blättern Sie nach oben oder nach unten zum Eintrag den Sie löschen wollen oder suchen Sie alphabetisch und drücken Sie auf Menü Am Display wird BESTÄTIGEN angezeigt 4 Drücken Sie zum Bestätigen auf Menü oder zum Abbrechen auf Telefonbuch Eine Schnellwahlnummer speichern Ihr Telefon kann 2 Schnellwahlnummern speichern Der Schnellwahlname kann aus bis zu 12 Zeichen bestehen 1 Drücken Si...

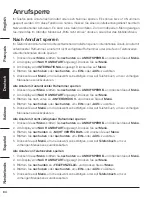
Страница 84: ...en Sie auf Menü blättern Sie nach unten zu ANRUFSPERRE und drücken Sie auf Menü 2 Am Display wird NACH ANRUFART angezeigt Drücken Sie auf Menü 3 Blättern Sie nach unten zu UNTERDRÜCKT und drücken Sie auf Menü 4 Blättern Sie nach oben oder nach unten um EIN oder AUS zu wählen 5 Drücken Sie auf Menü um die Auswahl zu bestätigen oder auf Telefonbuch um zur vorherigen Menüebene zurückzukehren Alle Anr...

Страница 85: ...ten zu ANRUFSPERRE und drücken Sie auf Menü 2 Blättern Sie nach unten zu NACH NUMMER und drücken Sie auf Menü 3 Blättern Sie nach unten zu NEUEN EINTRAG HINZUFÜGEN und drücken Sie auf Menü 4 Geben Sie die Nummer ein und drücken Sie auf Menü um den Eintrag zu speichern 5 Drücken Sie auf Auflegen um zum Standby Modus zurückzukehren Eine Nummer der Anrufsperren Liste bearbeiten 1 Drücken Sie auf Menü...

Страница 86: ...r kommt wird INTERNATIONAL angezeigt Wenn der Anrufer vom Netzbetreiber kommt BETREIBER angezeigt Wenn der Anruf von einer Telefonzelle kommt wird TELEFONZELLE angezeigt Wenn der Anruf von einer Rückrufanfrage kommt wird RÜCKRUF angezeigt Anrufer Anzeige Wenn Sie die Anruferkennung aktiviert haben wird die Nummer des Anrufers angezeigt sofern sie nicht unterdrückt ist bevor Sie den Anruf annehmen ...

Страница 87: ...ummer wird angezeigt 6 Bearbeiten Sie die Nummer bei Bedarf und drücken Sie anschließend zum Bestätigen auf Menü Siehe Namen eingeben und Tipps zur Eingabe auf Seite 17 Einen Eintrag löschen 1 Drücken Sie nach unten um die Anrufliste zu öffnen 2 Blättern Sie nach oben oder nach unten zum gewünschten Eintrag 3 Drücken Sie auf Menü und blättern Sie nach unten zu LÖSCHEN 4 Drücken Sie auf Menü Am Dis...

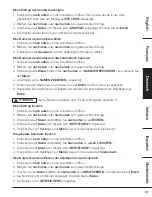
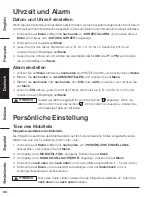
Страница 88: ...ie auf Menü 4 Wenn Sie EIN wählen geben Sie mit den Tasten die Uhrzeit ein z B 04 45A für 04 45 und drücken Sie zum Bestätigen auf Menü Sobald der Alarm eingestellt ist wird das Symbol angezeigt Wenn der Alarm ertönt blinkt das Symbol Um den Alarm zu beenden drücken Sie eine beliebige Taste am Mobilteil Persönliche Einstellung Töne des Mobilteils Klingelton Lautstärke des Mobilteils Die Klingelton...

Страница 89: ...elton Lautstärke der Basisstation kann auf fünf unterschiedliche Stufen eingestellt werden Wählen Sie eine der 5 Lautstärke Stufen oder Aus 1 Drücken Sie auf Menü blättern Sie nach unten um PERSÖNLICHE EINSTELLUNG auszuwählen und drücken Sie auf Menü 2 Blättern Sie nach unten zu BASISSTATION TON und drücken Sie auf Menü 3 Am Display wird KLINGELTON LAUTSTÄRKE angezeigt Drücken Sie auf Menü 4 Drück...

Страница 90: ...n um PERSÖNLICHE EINSTELLUNG auszuwählen und drücken Sie auf Menü 2 Blättern Sie nach unten zu AUTOMATISCHE ANRUFBEANTWORTUNG und drücken Sie auf Menü 3 Drücken Sie nach oben oder nach unten um EIN oder AUS zu wählen 4 Drücken Sie auf Menü um die Auswahl zu bestätigen oder auf Telefonbuch um zur vorherigen Menüebene zurückzukehren Sprache 1 Drücken Sie auf Menü blättern Sie nach unten um PERSÖNLIC...

Страница 91: ...unten zu ERWEITERTE EINSTELLUNG und drücken Sie auf Menü 2 Blättern Sie nach unten zu ECO PLUS und drücken Sie auf Menü 3 Drücken Sie nach oben oder nach unten um EIN oder AUS zu wählen 4 Drücken Sie auf Menü um die Auswahl zu bestätigen oder auf Telefonbuch um zur vorherigen Menüebene zurückzukehren Automatisches Präfix Sie können das Telefon so einstellen dass eine gewählte Nummer erkannt und du...

Страница 92: ...ch unten zu PIN ÄNDERN und drücken Sie auf Menü 3 Geben Sie eine neue 4 stellige PIN ein und drücken Sie auf Menü 4 Geben Sie die neue PIN erneut ein 5 Drücken Sie auf Menü um die Auswahl zu bestätigen oder auf Telefonbuch um zur vorherigen Menüebene zurückzukehren Wenn Sie den PIN Code ändern notieren Sie die neue Nummer Anmeldung eines zusätzlichen Mobilteils Am Basisgerät können bis zu vier Mob...

Страница 93: ...enü 2 Blättern Sie nach unten zu ABMELDEN und drücken Sie auf Menü 3 Geben Sie den 4 stelligen PIN Code Standard 0000 ein und drücken Sie auf Menü 4 Blättern Sie nach unten um das Mobilteil zu markieren das Sie abmelden wollen Zur Bestätigung ertönt ein Signalton und das Display kehrt zur vorherigen Menüebene zurück Zurücksetzen auf die Standardeinstellungen Das Telefon kann auf seine Standardeins...

Страница 94: ...n abzuspielen 2 Wenn es keine neuen Nachrichten gibt drücken Sie auf Wiedergabe und alle Nachrichten werden abgespielt Während der Wiedergabe Drücken Sie auf Wiedergabe um das Abspielen zu beenden Drücken Sie auf Löschen um die aktuelle Nachricht zu löschen Halten Sie im Standby Modus Löschen für 2 Sekunden gedrückt um alle alten Nachrichten zu löschen Am Mobilteil 1 Drücken Sie auf Menü blättern ...

Страница 95: ...achricht die Anrufer am Anrufbeantworter hören Es stehen zwei vorab aufgenommene Ansagen zur Auswahl oder Sie können Ihre eigene aufnehmen Antwort und Aufnahme Die voreingestellte Ansage für Antworten und aufnehmen die es dem Anrufer ermöglicht eine Nachricht zu hinterlassen lautet Hallo Ihr Anruf kann derzeit nicht entgegengenommen werden hinterlassen Sie bitte eine Nachricht nach dem Signalton N...

Страница 96: ...önen an wenn Sie neue Nachrichten haben 2 Wenn es keine neuen Nachrichten gibt nimmt es den Anruf nach 5 Klingeltönen an So haben Sie die Möglichkeit aufzulegen und die Zeit und Kosten eines Anrufs zu sparen 3 Wenn der Speicher voll ist kehrt das Gerät automatisch zum Modus Nur Antwort zurück Drücken Sie auf Menü blättern Sie nach unten zu ANRUFBEANTWORTER und drücken Sie auf Menü Blättern Sie nac...

Страница 97: ...ung die Codes auf der Rückseite dieser Karte Wenn Ihr Anrufbeantworter ausgeschaltet ist wechselt das Telefon nach 14 Klingeltönen in den Fernzugriffs Modus Dann können Sie die 4 stellige Fernzugriffs PIN eingeben die Standard Fernzugriffs PIN lautet 0000 um die Fernzugriffs Funktion zu aktivieren HINWEIS HINWEIS Fernzugriff aktivieren deaktivieren und Fernzugriffs PIN ändern 1 Drücken Sie auf Men...

Страница 98: ...oder das Ladegerät Achten Sie darauf dass der Netzadapter sicher an eine funktionierende Steckdose angeschlossen ist Achten Sie darauf dass das Telefonleitungskabel fest an der Basisstation und an der Telefonanschlussdose angeschlossen ist Trennen Sie die Basisstation vom Stromnetz Warten Sie etwa 15 Sekunden und schließen Sie sie anschließend wieder an Es kann bis zu einer Minute dauern bis Mobil...

Страница 99: ...anderes Mobilteil verwendet die Basisstation um einen Anruf zu tätigen Falsches Telefonleitungskabel Überprüfen Sie die Anschlüsse Ziehen Sie den Netzstecker und schließen Sie ihn wieder an Überprüfen Sie ob das Telefonkabel an der Basisstation und an der Telefonbuchse angeschlossen ist Überprüfen Sie den Stecker der Basisstation und den 230 V Stecker ziehen und wieder anschließen Warten Sie bis d...

Страница 100: ... Abspielens der Nachricht läutet das Gerät und die Aufnahme wird beendet Ein Anruf geht ein Nehmen Sie den eingehenden Anruf entgegen und versuchen Sie später erneut Ihre Ansage aufzunehmen Entsorgung Die Richtlinie über Elektro und Elektronik Altgeräte zielt darauf ab die Auswirkungen von elektrischen und elektronischen Waren auf die Umwelt zu minimieren durch Steigerung der Wiederverwendung und ...

Страница 101: ...ung Basis und Ladestation BLJ05W060040P B HJ 0600400A1 UK HJ 0600400P1 EU BLJ05W060040P VA EINGANG 100 240 VAC 50 60 HZ 0 2 0 15 A AUSGANG 6 VDC 400 MA Akkuinformationen TYP NI MH Akku 300 MAH 2 X 1 2 V AAA Verwenden Sie ausschließlich die oben aufgelisteten Adapter und Akkus Wenn der Akku durch einen falschen Typ ersetzt wird besteht Explosionsgefahr Entsorgen Sie verwendete Akkus den Anweisungen...

Страница 102: ...u gewährleisten Sollte es jedoch zu einer Fehlfunktion kommen versuchen Sie nicht das Produkt selbst zu reparieren Kontaktieren Sie Ihren Anbieter oder rufen Sie unseren Kundendienst an Gewährleistung Eine Kopie der Gewährleistung für dieses Produkt erhalten Sie unter amazon de basics garantie DE 49 0 800 363 8469 AT 43 0800 8866 3238 Feedback und Hilfe Gefällt es Ihnen Gefällt es Ihnen nicht Dann...

Страница 103: ...sa di corrente prima di pulire Non utilizzare detergenti liquidi o spray Per la pulizia utilizzare un panno umido Tenere il prodotto lontano da condizioni di caldo umidità o forte irraggiamento solare e non lasciarlo bagnare né usarlo vicino all acqua ad esempio vicino a una vasca da bagno un lavandino da cucina o una piscina Non sovraccaricare le prese a muro e le prolunghe per evitare il rischio...

Страница 104: ...no o 50 metri all interno Tenere presente che Oggetti metallici di grandi dimensioni come frigoriferi specchi o schedari tra il ricevitore e la base possono bloccare il segnale radio Strutture solide come le pareti possono ridurre la potenza del segnale Le apparecchiature elettriche possono causare interferenze e o influire sulla portata Non collocare l unità base vicino a un altro apparecchio tel...

Страница 105: ...105 Conosci il Tuo Telefono Panoramica del ricevitore 1 2 3 4 5 6 7 8 9 10 11 12 13 14 ...

Страница 106: ...ualizzata Durante una chiamata premere per disattivare attivare l audio 5 Conversazione Vivavoce Premere per effettuare e ricevere chiamate Premere per attivare disattivare il vivavoce durante una chiamata 6 Composizione da impulsi a toni Interfono Premere l asterisco Durante una chiamata premere per passare dalla composizione a impulsi a quella a toni Tenere premuto per effettuare chiamate intern...

Страница 107: ...vitore Quando il telefono squilla premere per diminuire il volume della suoneria del ricevitore Premere per scorrere le opzioni di menu l elenco di ricomposizione l elenco chiamate e le voci della rubrica In modalità standby premere per aprire l elenco chiamate 12 Pausa Premere un Tenere premuto per mettere in pausa P quando si pre compongono o si memorizzano i numeri 13 Blocco tastiera Tenere pre...

Страница 108: ...peggia quando c è una chiamata in arrivo Premere per interrompere la riproduzione dei messaggi 2 Elimina Premere per eliminare i messaggi registrati durante la riproduzione In modalità standby tenere premuto per eliminare tutti i vecchi messaggi 3 Cercapersone In modalità standby premere per far squillare il i ricevitore i Tenere premuto per accedere alla modalità di registrazione quando si regist...

Страница 109: ...attivata Indica una chiamata persa Fisso quando si effettua una chiamata in uscita Lampeggia per indicare una chiamata in entrata o interna Indica una chiamata in entrata quando si visualizza l elenco chiamate Indica una chiamata in uscita quando si visualizza l elenco di ricomposizione Il vivavoce è attivo Il menu è aperto La tastiera è bloccata La sveglia è impostata Indica che è attivata una qu...

Страница 110: ...agina seguente Quando il ricevitore è acceso e in standby 1 Premere Menu per aprire il menu principale 2 Quindi usare i pulsanti Su o Giù per scorrere tra le opzioni disponibili 3 Premere Menu per selezionare un opzione Per tornare al livello di menu precedente premere Rubrica Per uscire dal menu e tornare in standby premere Termina chiamata Se non vengono premuti pulsanti per 30 secondi il ricevi...

Страница 111: ... per la composizione a toni Disponibile solo se è memorizzata una voce della rubrica Installazione Del Telefono Collegamento della stazione base 1 Inserire il cavo di rete e il cavo della linea telefonica nelle rispettive prese sul retro della stazione base 2 Inserire l alimentatore in una presa di rete da 100 240 VAC 50 60 Hz e il cavo telefonico in una presa del telefono Utilizzare sempre i cavi...

Страница 112: ...le batterie ricaricabili NiMH in dotazione 3 Far scorrere il coperchio sul vano batterie finché non scatta in posizione 4 Posizionare il ricevitore sulla base e caricare per 15 ore prima di utilizzare il ricevitore per la prima volta Quando è posizionato correttamente sulla base il ricevitore emette un doppio segnale acustico per indicare che è in carica Il ricevitore può riscaldarsi quando le bat...

Страница 113: ...eggia sul display 1 Premere Parla per rispondere alla chiamata oppure se Risposta automatica è impostata su On è sufficiente sollevare il ricevitore per rispondere alla chiamata Per rispondere alle chiamate premendo Parla anche quando il ricevitore è sollevato disattivare Risposta automatica vedere pagina 24 Regolare il volume del ricevitore Durante una chiamata premere Su o Giù per aumentare o di...

Страница 114: ...effettuare una teleconferenza a 3 vie tra 2 chiamanti interni e 1 chiamante esterno Durante una chiamata con un chiamante esterno 1 Se alla base sono registrati solo 2 ricevitori tenere premuto e l altro ricevitore squilla automaticamente 2 Se alla base sono registrati più di 2 ricevitori tenere premuto e scorrere Giù fino al ricevitore che si desidera far partecipare alla chiamata e premere Parla...

Страница 115: ...re Su o Giù fino alla voce desiderata 3 Premere Menu Il display indica VIEW 4 Scorrere Su o Giù fino a SAVE NUMBER 5 Premere Menu Il display indica ENTER NAME 6 Inserire il nome e premere Menu Viene visualizzato il numero 7 Modificare il numero se necessario quindi premere Menu Il numero viene memorizzato Vedere Inserimento dei nomi e Suggerimenti per la scrittura a pagina 17 Eliminare una voce 1 ...

Страница 116: ... e premere Menu Il display indica ENTER NUMBER 5 Inserire il numero e premere Menu la voce viene salvata 6 Premere Termina chiamata per tornare alla modalità standby Inserimento dei nomi Utilizzare le lettere della tastiera per inserire i nomi ad esempio per memorizzare TOM Premere 8 una volta per inserire la T Premere 6 tre volte per inserire la O Premere 6 una volta per inserire la M Suggeriment...

Страница 117: ... voce che si desidera eliminare oppure cercare in ordine alfabetico e premere Menu Il display indica CONFIRM 4 Premere Menu per confermare o Rubrica per annullare Memorizzazione di un numero di selezione rapida Il telefono è in grado di memorizzare 2 numeri di selezione rapida Il nome della selezione rapida può contenere fino a 12 caratteri 1 Premere Menu Il display indica Phonebook 2 Premere Menu...

Страница 118: ... 4 Scorrere Su o Giù fino a ON o OFF 5 Premere Menu per confermare o Rubrica per tornare al menu precedente Blocca tutte le chiamate rifiutate 1 Premere Menu scorrere Giù fino a CALL BLOCK e premere Menu 2 Il display indica BY CALLTYPE premere Menu 3 Scorrere giù fino a WITHHELD premere Menu 4 Scorrere Su o Giù fino a ON o OFF 5 Premere Menu per confermare o Rubrica per tornare al menu precedente ...

Страница 119: ... del blocco chiamate 1 Premere Menu scorrere Giù fino a CALL BLOCK e premere Menu 2 Scorrere Giù fino a BY NUMBER premere Menu 3 Scorrere Giù fino a ADD NEW premere Menu 4 Inserire il numero e premere Menu per salvare 5 Premere Termina chiamata per tornare alla modalità standby Modifica di un numero nell elenco del blocco chiamate 1 Premere Menu scorrere Giù fino a CALL BLOCK e premere Menu 2 Scor...

Страница 120: ...ene visualizzato OPERATOR Se la chiamata proviene da un telefono a pagamento viene visualizzato PAYPHONE Se la chiamata proviene da una richiesta di chiamata in attesa viene visualizzato RINGBACK Visualizzazione del chiamante Se si è abbonati all ID chiamante il numero del chiamante verrà visualizzato a condizione che non venga rifiutato prima di rispondere alla chiamata Il display può visualizzar...

Страница 121: ...premere Menu Viene visualizzato il numero 6 Modificare il numero se necessario quindi premere Menu per confermare Vedere Inserimento dei nomi e Suggerimenti per la scrittura a pagina 17 Eliminare una voce 1 Premere Giù per aprire l elenco chiamate 2 Scorrere Su o Giù fino alla voce desiderata 3 Premere Menu scorrere Giù fino a DELETE 4 Premere Menu il display indica CONFIRM 5 Premere Menu per conf...

Страница 122: ...nu 3 Scorrere Su o Giù per selezionare ON o OFF e premere Menu 4 Se si seleziona ON immettere l ora utilizzando la tastiera ad es 04 45A per le 4 45 e premere Menu per confermare Una volta che la sveglia è impostata su on viene visualizzata l icona Quando suona l allarme l icona lampeggia Per arrestare l allarme premere un pulsante qualsiasi sul ricevitore Impostazioni Personali Toni ricevitore Vo...

Страница 123: ...base Volume suoneria base Il volume della suoneria della base può essere impostato su diversi livelli Scegliere tra 5 livelli di volume o Off 1 Premere Menu scorrere Giù fino a PERSONAL SET e premere Menu 2 Scorrere Giù fino a BASE TONE e premere Menu 3 Il display indica RING VOLUME premere Menu 4 Premere Su o Giù per selezionare il volume 1 5 o OFF 5 Premere Menu per confermare o Rubrica per torn...

Страница 124: ...sta funzione può essere disattivata in modo che le chiamate possano ricevere risposta solo premendo Parla 1 Premere Menu scorrere Giù fino a PERSONAL SET e premere Menu 2 Scorrere Giù fino a AUTO ANSWER e premere Menu 3 Premere Su o Giù per selezionare ON o OFF 4 Premere Menu per confermare o Rubrica per tornare al menu precedente Lingua 1 Premere Menu scorrere Giù fino a PERSONAL SET e premere Me...

Страница 125: ... Giù per selezionare ON o OFF 4 Premere Menu per confermare o Rubrica per tornare al menu precedente Prefisso automatico È possibile impostare il telefono per rilevare un numero da chiamare e sostituirlo con un altro numero Il numero da rilevare può avere una lunghezza massima di 5 cifre Può essere sostituito con un numero fino a 10 cifre 1 Premere Menu scorrere Giù fino a ADVANCED SET e premere M...

Страница 126: ...lità di registrazione per 90 secondi Sul ricevitore 1 Se il ricevitore non è registrato alla base premere Menu quindi immettere il codice PIN a 4 cifre valore predefinito 0000 e premere Menu 2 Se il ricevitore è già registrato a una base premere Menu scorrere Giù fino ADVANCED SET e premere Menu 3 Scorrere Giù fino a REGISTER e premere Menu 4 Immettere il codice PIN a 4 cifre predefinito 0000 e pr...

Страница 127: ...e o Rubrica per tornare al menu precedente 5 Il telefono si riavvia automaticamente Una volta resettato il ricevitore richiede di azzerare la data e l ora vedere pagina 28 Segreteria Telefonica Il telefono può registrare digitalmente fino a 12 minuti di messaggi Oltre a registrare i messaggi in arrivo può registrare dei promemoria per gli altri utenti La segreteria telefonica può essere utilizzata...

Страница 128: ...minare tutti i messaggi 1 Premere Menu scorrere Su o Giù fino a ANSW MACHINE e premere Menu 2 Scorrere Giù fino a DELETE ALL e premere Menu 3 Sul display appare CONFIRM premere Menu Registrare un memo È possibile registrare messaggi promemoria per altri utenti che possono essere riprodotti come i normali messaggi I promemoria possono essere registrati solo con il ricevitore 1 Premere Menu scorrere...

Страница 129: ...R MODE e premere Menu 3 Premere Su o Giù per selezionare ANSWER ONLY o ANSWER REC e premere Menu per confermare Ritardo squillo Selezionare la durata degli squilli prima che la segreteria telefonica risponda alla chiamata Scegliere tra 3 8 squilli o Time Saver 1 Quando si imposta su Time Saver se si hanno nuovi messaggi il telefono risponde dopo 3 squilli 2 Se non ci sono nuovi messaggi il telefon...

Страница 130: ...e il codice di sicurezza viene accettato utilizzare i codici sull altro lato di questa carta per le operazioni a distanza Se la segreteria telefonica è disattivata il telefono entra in modalità di accesso remoto dopo 14 squilli È quindi possibile immettere il PIN di accesso remoto a 4 cifre il PIN di accesso remoto predefinito è 0000 per attivare la funzione di accesso remoto AVVISO AVVISO Attivaz...

Страница 131: ...base telefonica o al caricabatterie dopo l uso Accertarsi che l alimentatore sia saldamente inserito in una presa di corrente funzionante Accertarsi che il cavo telefonico sia inserito saldamente nella base telefonica e nella presa a muro del telefono Scollegare l alimentazione elettrica alla base del telefono Attendere per circa 15 secondi quindi ricollegarla Attendere fino a un minuto per la sin...

Страница 132: ... correttamente nella stazione base Un altro ricevitore utilizza la base per effettuare una chiamata Cavo telefonico errato Controllare i collegamenti Scollegare e ricollegare l alimentazione elettrica Verificare che il cavo telefonico sia stato inserito nella stazione base e nella presa telefonica Controllare la spina della stazione base e la spina da 230 V rimuovere e inserire Attendere che la li...

Страница 133: ...tà squilla e la registrazione si arresta Si sta ricevendo una chiamata Rispondere alla chiamata in arrivo e riprovare in seguito a registrare il messaggio in uscita Smaltimento La Direttiva sui rifiuti di apparecchiature elettriche ed elettroniche RAEE mira a minimizzare l impatto di suddette apparecchiature sull ambiente aumentando le pratiche di riutilizzo e riciclo e riducendo la quantità di ri...

Страница 134: ...da 20 C a 60 C Potenza elettrica Unità di base e di carica BLJ05W060040P B HJ 0600400A1 UK HJ 0600400P1 EU BLJ05W060040P VA INPUT 100 240 VAC 50 60 HZ 0 2 0 15 A OUTPUT 6 VDC 400 MA Informazioni sulla batteria TIPO NI MH batteria ricaricabile 300 MAH 2 X 1 2 V AAA utilizzare solo gli alimentatori e le batterie sopra elencati Rischio di esplosione se la batteria viene sostituita con un altra di tip...

Страница 135: ...ità Tuttavia se qualcosa dovesse andare storto non cercare di riparare il prodotto da soli ma consultare il proprio fornitore o chiamare il nostro servizio di assistenza Informazioni di Garanzia Per ottenere una copia della garanzia del prodotto amazon it basics garanzia 39 0 800 628 805 Feedback e Aiuto Ti piace Oppure no Faccelo sapere scrivendo la tua recensione AmazonBasics si impegna a distri...

Страница 136: ... producto Desenchufe el producto de la corriente antes de limpiarlo No utilice limpiadores en líquido o en spray Utilice un paño húmedo para limpiar Mantenga este producto lejos de fuentes de calor humedad o luz del sol directa y no lo moje ni lo utilice cerca del agua por ejemplo cerca de la bañera del fregadero o de la piscina No sobrecargue las tomas de corriente de la pared ni los cables alarg...

Страница 137: ...ior Nota Los objetos metálicos grandes tales como frigoríficos espejos o archivadores entre el teléfono y la unidad base pueden bloquear la señal de radio Las estructuras sólidas como por ejemplo paredes pueden reducir la intensidad de la señal El equipamiento eléctrico puede causar interferencias y o afectar el alcance No coloque la unidad base cerca de otro teléfono televisor o aparato de audio ...

Страница 138: ...138 Conocer el Teléfono Vista general del teléfono 1 2 3 4 5 6 7 8 9 10 11 12 13 14 ...

Страница 139: ...na opción visualizada Durante una llamada presione para activar el sonido o silenciar 5 Conversación Manos libres Presione para hacer y recibir llamadas Presione para activar desactivar el manos libres durante una llamada 6 Marcación de pulso a tono Intercomunicador Marcar una estrella Durante una llamada presione para cambiar de marcación por pulso a marcación por tono Mantenga presionado para re...

Страница 140: ...el teléfono Si el teléfono está sonando presione para bajar el teléfono del timbre Presione para desplazarse por las opciones del menú la lista de rellamadas la lista de llamadas y las entradas de la agenda del teléfono En el modo de reposo presione para abrir la lista de llamadas 12 Pausa Marque una Mantenga presionado para introducir una pausa P al marcar o guardar números 13 Bloqueo del teclado...

Страница 141: ...vos Parpadea cuando hay una llamada entrante Presione para detener la reproducción del mensaje 2 Borrar Presione para eliminar los mensajes grabados durante la reproducción En el modo de reposos mantenga presionado para eliminar todos los mensajes antiguos 3 Página En el modo de reposo presione para hacer sonar el o los teléfonos Mantenga presionado para entrar en el modo de registro al registrar ...

Страница 142: ...léfono está apagado Indica una llamada perdida Fija al hacer una llamada saliente Parpadea para indicar una llamada entrante o interna Indica una llamada entrante al visualizar la lista de llamadas Indica una llamada saliente al visualizar la lista de rellamadas Manos libres está activado El menú está abierto El teclado está bloqueado La alarma está configurada Indica cuando se activa cualquier mo...

Страница 143: ...l teléfono está encendido y en reposo 1 Presione Menú para abrir el menú principal 2 A continuación utilice los botones Arriba o Abajo para desplazarse por las opciones disponibles 3 Presione el Menú para seleccionar una opción Para volver al nivel de menú anterior presione Directorio Para salir del menú y regresar al modo reposo presione Terminar llamada Si no se presiona ningún botón durante 30 ...

Страница 144: ... está preestablecido para la marcación por tonos Solo disponible si se ha guardado una entrada en el directorio Instalación Del Teléfono Conexión a la estación base 1 Enchufe el cable de corriente y el cable telefónico a las tomas correspondientes en la parte trasera de la estación base 2 Enchufe el adaptador de corriente a una toma de corriente de 100 240 VCA 50 60 Hz y el cable telefónico a la t...

Страница 145: ...rrecta Utilice solo las baterías recargables NiMH incluidas 3 Vuelva a colocar la tapa en el compartimento de la batería hasta que haga clic 4 Coloque el teléfono en la base y cárguelo durante 15 horas antes de utilizarlo por primera vez Si el teléfono está correctamente colocado en la base el teléfono emitirá dos pitidos para indicar que carga El teléfono puede calentarse durante la carga o duran...

Страница 146: ...adea en la pantalla 1 Presione Hablar para responder la llamada o si Respuesta automática está activada solo debe levantar el teléfono y responder la llamada Para responder llamadas presionando Hablar incluso con el teléfono descolgado desactive Respuesta automática véase la página 24 Ajuste del volumen del auricular Durante una llamada presione Arriba o Abajo para subir el volumen del aparato Sil...

Страница 147: ...antener una conferencia telefónica a 3 bandas entre 2 personas que realizan una llamada interna y 1 persona que realiza la llamada externa Durante una llamada con una persona que realiza la llamada externa 1 Si solo se han registrado 2 teléfonos a la base mantenga presionado y el otro teléfono suena automáticamente 2 Si se han registrado más de 2 teléfonos a la base mantenga presionado y despláces...

Страница 148: ...2 Desplácese hacia arriba o abajo hasta la entrada deseada 3 Presione Menú La pantalla muestra VIEW 4 Desplácese hacia arriba o abajo hasta SAVE NUMBER 5 Presione Menú La pantalla muestra ENTER NAME 6 Indique el nombre y presione Menú Se visualiza el número 7 Si fuera necesario edite el número y presione Menú Se guarda el número Consulte Introducir nombres y Consejos de redacción en la página 17 E...

Страница 149: ... el nombre y presione Menú La pantalla muestra ENTER NAME 5 Indique el número y presione Menú se guarda la entrada 6 Presione Terminar llamada para volver al modo reposo Introducir nombres Utilice las letras del teclado para indicar nombres por ejemplo para guardar PAZ Presione 7 una vez para introducir la P Presione 2 una vez para introducir la A Presione 9 cuatro veces para introducir la Z Conse...

Страница 150: ...esione Menú 3 Desplácese hacia arriba o abajo hasta la entrada que desea eliminar o busque alfabéticamente y presione Menú La pantalla muestra CONFIRM 4 Presione Menú para confirmar o Directorio para cancelar Guardar un número de marcado rápido El teléfono puede guardar 2 números de marcado rápido El nombre de marcado rápido puede tener hasta 12 caracteres 1 Presione Menú La pantalla muestra Phone...

Страница 151: ... al menú anterior Bloquear todas las llamadas retenidas 1 Presione Menú desplácese hacia abajo hasta CALL BLOCK y presione Menú 2 La pantalla visualiza BY CALLTYPE presione Menú 3 Desplácese hacia abajo hasta WITHHELD presione Menú 4 Desplácese hacia arriba o abajo para activar ON o desactivar OFF 5 Presione Menú para confirmar o Directorio para regresar al menú anterior Bloquear todas las llamada...

Страница 152: ...adas 1 Presione Menú desplácese hacia abajo hasta CALL BLOCK y presione Menú 2 Desplácese hacia abajo hasta BY NUMBER presione Menú 3 Desplácese hacia abajo hasta ADD NEW presione Menú 4 Indique el número y presione Menú para guardar 5 Presione Terminar llamada para volver al modo reposo Editar un número en la lista de bloqueo de llamadas 1 Presione Menú desplácese hacia abajo hasta CALL BLOCK y p...

Страница 153: ...da es de una operadora se visualizará OPERATOR Si la llamada es de un teléfono público se visualizará PAYPHONE Si la llamada es de una solicitud de devolución de llamada se visualizará RINGBACK Visualización de la persona que llama Si dispone de suscripción a un servicio de identificación de llamada el número de la persona que llama se visualizará siempre que no esté retenido antes de responder la...

Страница 154: ...resione Menú Se visualiza el número 6 Si fuera necesario edite el número y presione Menú para confirmar Consulte Introducir nombres y Consejos de redacción en la página 17 Eliminar una entrada 1 Presione Abajo para abrir la lista de llamadas 2 Desplácese hacia arriba o abajo hasta la entrada deseada 3 Presione Menú desplácese hacia abajo hasta DELETE 4 Presione Menú la pantalla muestra CONFIRM 5 P...

Страница 155: ...one Menú 3 Desplácese hacia arriba o abajo para seleccionar ON u OFF y presione Menú 4 Si selecciona ON indique la hora utilizando el teclado p ej 04 45A para 4 45 AM y presione Menú para confirmar Una vez configurada la alarma se visualiza el icono Cuando la alarma suena el icono parpadea Para detener la alarma presione cualquier botón del teléfono Configuración Personal Tonos del teléfono Volume...

Страница 156: ...olumen del timbre de la base El volumen del timbre de la base se puede ajustar a diferentes volúmenes Elija uno de los 5 niveles o apáguelo 1 Presione Menú desplácese hacia abajo hasta PERSONAL SET y presione Menú 2 Desplácese hacia abajo hasta BASE TONE y presione Menú 3 La pantalla visualiza RING VOLUME presione Menú 4 Presione Arriba o Abajo para seleccionar el volumen 1 5 u OFF 5 Presione Menú...

Страница 157: ...solo se puedan responder presionando Hablar 1 Presione Menú desplácese hacia abajo hasta PERSONAL SET y presione Menú 2 Desplácese hacia abajo hasta AUTO ANSWER y presione Menú 3 Presione Arriba o Abajo para seleccionar ON u OFF 4 Presione Menú para confirmar o Directorio para regresar al menú anterior Idioma 1 Presione Menú desplácese hacia abajo hasta PERSONAL SET y presione Menú 2 Desplácese ha...

Страница 158: ... Presione Menú para confirmar o Directorio para regresar al menú anterior Prefijo automático Puede configurar el teléfono para que detecte un número de marcación y reemplazarlo con otro número El número a detectar puede tener hasta 5 dígitos Puede ser reemplazado por un número de hasta 10 dígitos 1 Presione Menú desplácese hacia abajo hasta ADVANCED SET y presione Menú 2 Desplácese hacia abajo has...

Страница 159: ...1 Mantenga presionado Localizador durante 5 segundos La base permanecerá en el modo registro durante 90 segundos En el teléfono 1 Si el teléfono no está registrado a la base presione Menú y a continuación introduzca el código PIN de 4 dígitos por defecto 0000 y presione Menú 2 Si el teléfono ya está registrado a la base presione Menú desplácese hacia abajo hasta ADVANCED SET y presione Menú 3 Desp...

Страница 160: ... Presione Menú para confirmar o Directorio para regresar al menú anterior 5 El teléfono se reiniciará automáticamente Una vez reiniciado el teléfono le pedirá que reinicie la fecha y la hora consulte la página 28 Contestador Automático El teléfono puede registrar digitalmente hasta 12 minutos de mensajes Además de grabar mensajes de entrada puede registrar notas de otros usuarios El contestador au...

Страница 161: ...producción y volver al modo reposo Eliminar todos los mensajes 1 Presione Menú desplácese hacia arriba o abajo hasta ANSW MACHINE y presione Menú 2 Desplácese hacia abajo hasta DELETE ALL y presione Menú 3 Se visualiza CONFIRM presione Menú Grabar una nota Puede grabar notas para otros usuarios que pueden reproducirse como los mensajes normales Las notas solo se pueden grabar utilizando el teléfon...

Страница 162: ... MODE y presione Menú 3 Presione Arriba o Abajo para seleccionar ANSWER ONLY o ANSWER REC y presione Menú para confirmar Retardo del tono Seleccione la duración de los tonos antes de que el contestador descuelgue la llamada Elija entre 3 y 8 tonos o Ahorro de tiempo 1 Cuando Ahorro de tiempo está activado si entran nuevos mensajes el teléfono responde al cabo de 3 tonos 2 Si no hay mensajes nuevos...

Страница 163: ...ta el código de seguridad use los códigos en el otro lado de esta tarjeta para operaciones remotas Si su contestador automático está apagado el teléfono entrará en modo de acceso remoto después de 14 tonos A continuación podrá introducir el PIN de acceso remoto de 4 dígitos PIN de acceso a distancia por defecto 0000 para activar la función de acceso a distancia AVISO AVISO Activación y desactivaci...

Страница 164: ... teléfono a la base o cargador después de cada uso Asegúrese de que el adaptador de corriente está bien enchufado a una toma de corriente que funciona Asegúrese de que el cable telefónico está bien enchufado a la base y a la toma telefónica de la pared Desenchufe la alimentación de la base del teléfono Espere unos 15 segundos y a continuación vuelva a enchufarlo Espere un minuto hasta que el teléf...

Страница 165: ... a la estación base Otro teléfono está utilizando la base para hacer una llamada Cable telefónico incorrecto Compruebe las conexiones Desenchufe y vuelva a enchufar la toma de corriente Compruebe que el cable telefónico está enchufado a la estación base y a la toma telefónica Compruebe el enchufe de la estación base y el enchufe de 230 V retírelo y enchúfelo Espere hasta que la línea esté desocupa...

Страница 166: ...je de salida o se escucha un mensaje la unidad suena y la grabación se detiene Se está recibiendo una llamada Responda la llamada entrante y vuelva a intentar grabar el mensaje saliente más tarde Eliminación El objetivo de la Directiva sobre residuos de aparatos eléctricos y electrónicos RAEE es minimizar el impacto de los bienes eléctricos y electrónicos en el medio ambiente aumentando la reutili...

Страница 167: ...C almacenamiento de 20 C a 60 C Energía eléctrica Base y unidad de carga BLJ05W060040P B HJ 0600400A1 UK HJ 0600400P1 EU BLJ05W060040P VA ENTRADA 100 240 VCA 50 60 HZ 0 2 0 15 A SALIDA 6 VDC 400 MA Información de la batería TIPO NI MH Batería recargable 300 MAH 2 X 1 2 V AAA use solo los adaptadores y baterías enumerados anteriormente Riesgo de explosión si se sustituye la batería por un tipo inco...

Страница 168: ...a su sistema telefónico Sin embargo si algo sale mal no intente reparar el producto usted mismo consulte a su proveedor o llame a nuestra línea de ayuda Información Sobre la Garantía Para obtener una copia de la garantía de este producto amazon es basics garantia 34 0 900 803 711 Comentarios y Ayuda Le encanta No le gusta nada Escriba una opinión como cliente En AmazonBasics nos comprometemos a pr...

Страница 169: ...es die op het product zijn vermeld Haal de stekker uit het stopcontact voor reiniging Gebruik geen vloeibare schoonmaakmiddelen of spuitbussen Gebruik een vochtige doek Houd dit product uit de buurt van warme vochtige omstandigheden of fel zonlicht Zorg dat het apparaat niet nat wordt of gebruik het niet in de buurt van water bijv nabij een badkuip gootsteen of zwembad Overbelast de stopcontacten ...

Страница 170: ...de normale normen voor een DECT telefoon Maximale bereik tot 300 meter buiten of 50 meter binnen Let op Grote metalen voorwerpen zoals een koelkast spiegel of archiefkast tussen de handset en het basisstation kunnen het radiosignaal belemmeren Een massieve constructie zoals een muur kan de signaalsterkte verlagen Elektrische apparatuur kan storing veroorzaken en of een impact op het bereik hebben ...

Страница 171: ...171 Maak Kennis Met uw Telefoon Overzicht van de handset 1 2 3 4 5 6 7 8 9 10 11 12 13 14 ...

Страница 172: ...te bevestigen Druk tijdens een oproep om demping in uit te schakelen 5 Spreken Handsfree Druk om oproepen te maken en te ontvangen Druk om handsfree tijdens een oproep in uit te schakelen 6 Schakelen tussen puls naar toonkiezen Intercom Een ster invoeren Druk tijdens een oproep om tussen puls en toonkiezen te schakelen Druk en houd ingedrukt om interne oproepen te maken en oproepen over te dragen ...
Страница 173: ...reker te verlagen Als de telefoon rinkelt druk om het belvolume van de handset te verlagen Druk op deze knop om de menu opties de herhaallijst de oproeplijst en het telefoonboek te doorlopen Druk in de stand bymodus om de oproeplijst te openen 12 Pauze Voer een in Druk en houd ingedrukt om een pauze P in te lassen tijdens het blokkiezen of opslaan van nummers 13 Toetsenblokvergrendeling Houd inged...

Страница 174: ...Knippert wanneer er een inkomende oproep is Druk om het afspelen van het bericht te stoppen 2 Verwijderen Druk om de opgenomen berichten tijdens het afspelen te verwijderen In de stand bymodus druk en houd ingedrukt om alle oude berichten te verwijderen 3 Pagina Druk in de stand bymodus om de handset s te laten rinkelen Druk en houd ingedrukt om de registratiemodus tijdens het registreren van de h...

Страница 175: ...it Geeft een gemiste oproep aan Stabiel tijdens het maken van een uitgaande oproep Knippert om een inkomende of interne oproep aan te geven Geeft een inkomende oproep aan tijdens het bekijken van de oproeplijst Geeft een inkomende oproep aan tijdens het bekijken van de herhaallijst Handsfree is aan Menu is open Toetsenblok is vergrendeld Alarm is ingesteld Geeft aan wanneer een blokkeringsmodus is...

Страница 176: ... in de stand bymodus staat 1 Druk op Menu om het hoofdmenu te openen 2 Gebruiken daarna de knoppen Omhoog of Omlaag om de beschikbare opties te doorlopen 3 Druk op Menu om een optie te selecteren Om naar het vorig menuniveau terug te gaan drukt u op Telefoonboek Om het menu af te sluiten en het apparaat opnieuw in de stand bymodus te zetten drukt u op Oproep beëindigen Na een inactiviteit van 30 s...

Страница 177: ...als er een item in het telefoonboek is opgeslagen Uw Telefoon Installeren Het basisstation aansluiten 1 Sluit de stroomkabel en het telefoonsnoer aan op de overeenkomstige aansluitingen aan de achterkant van het basisstation 2 Steek de netvoedingsadapter in een stopcontact van 100 240 V wisseltroom bij 50 60 Hz en steek het telefoonsnoer in een telefoonstopcontact Gebruik altijd de kabels die in d...

Страница 178: ...dbare NiMH batterijen 3 Schuif het batterijdeksel opnieuw op het batterijvak totdat het op zijn plaats vastklikt 4 Plaats de handset op het basisstation en laad het gedurende 15 uur op voordat u de handset voor de eerste keer gebruikt U hoort twee geluidssignalen wanneer de handset juist op het basisstation is aangebracht om aan te geven dat het wordt opgeladen De handset kan warm worden wanneer d...

Страница 179: ...set terug op het basisstation of de lader Een oproep ontvangen Wanneer u een externe oproep ontvangt gaat de telefoon over en knippert het pictogram op het display 1 Druk op Spreken om de oproep te beantwoorden Als Automatisch beantwoorden is ingesteld op On hoeft u de handset alleen van het basisstation te nemen Als u oproepen wilt beantwoorden door op Spreken te drukken zelfs wanneer de handset ...

Страница 180: ... andere handset automatisch overgaat 2 Als er meer dan 2 handsets bij het basisstation zijn geregistreerd houdt u ingedrukt bladert u Omlaag naar de handset die u wilt bellen en drukt u op Spreken 3 Wanneer de andere handset de oproep heeft beantwoord drukt u op Oproep beëindigen om het doorschakelen te voltooien Als de oproep niet door de andere handset wordt beantwoord houdt u ingedrukt om terug...

Страница 181: ...w op Spreken om handsfree uit te schakelen en de oproep terug te schakelen naar de persoonlijke luidspreker Opnieuw kiezen De laatste 10 gekozen nummers worden opgeslagen in de herhaallijst Een nummer weergegeven of kiezen 1 Druk op Omhoog om de herhaallijst te openen 2 Blader Omhoog of Omlaag naar het gewenste nummer 3 Druk op Spreken om het weergegeven nummer te bellen of druk op Oproep beëindig...

Страница 182: ...t ervan op de hoogte te brengen dat iemand hem zoekt of om een ontbrekende handset te zoeken Paging oproepen kunnen niet worden beantwoord met de handset 1 Druk op Page op de onderkant van het basisstation Alle handsets die bij het basisstation zijn geregistreerd gaan over 2 Om het overgaan te stoppen drukt u opnieuw op Page op het basisstation of een willekeurige knop op de handset TELEFOONBOEK O...

Страница 183: ... te gaan naar de stand bymodus Wanneer het nummer wordt weergegeven kunt u tussen de naam en het nummer schakelen door op Menu en Telefoonboek te drukken Een naam en nummer bewerken 1 Druk op Menu Het display geeft Phonebook weer 2 Druk op Menu blader Omlaag naar EDIT en druk op Menu 3 Blader Omhoog of Omlaag naar het nummer dat u wilt bewerken of zoek op alfabetische volgorde en druk daarna op Me...

Страница 184: ...bonneerd zijn op de dienst nummerweergave van uw telefonieleverancier Mogelijk zijn er bijkomende kosten van toepassing U kunt het menu Oproepblokkering openen door Niet storen in de stand bymodus ingedrukt te houden of via het menu van de handset Blokkeren op oproeptype Uw telefoon kan oproepen blokkeren op 4 verschillende oproeptypen internationale nummers geheime nummers niet beschikbare nummer...

Страница 185: ...3 Het display geeft BLOCK MODE weer en druk daarna op Menu 4 Blader Omhoog of Omlaag naar ON of OFF 5 Druk op Menu om te bevestigen of op Telefoonboek om terug te gaan naar het vorige menu Een nummer in de lijst met geblokkeerde nummers weergeven 6 Druk op Menu blader Omlaag naar CALL BLOCK en druk daarna op Menu 7 Blader Omlaag naar BY NUMBER en druk op Menu 8 Blader Omlaag naar VIEW en druk daar...

Страница 186: ...UMBER en druk daarna op Menu 4 Het display geeft CONFIRM weer 5 Druk op Menu om te bevestigen of op Telefoonboek om te annuleren Nummerweergave en Oproeplijst Om nummerweergave te kunnen gebruiken moet u geabonneerd zijn op deze dienst van uw telefonieleverancier Mogelijk zijn er bijkomende kosten van toepassing Om ervoor te zorgen dat de naam van de beller wordt weergegeven moet het volledige tel...

Страница 187: ...geeft het scherm LIST EMPTY weer 2 Blader Omhoog of Omlaag naar het gewenste nummer 3 Druk op Menu Het display geeft VIEW weer en druk daarna op Menu 4 Het display geeft de datum en tijd van de oproep weer Een nummer in de oproeplijst kiezen 1 Druk op Omlaag om de oproeplijst te openen 2 Blader Omhoog of Omlaag naar het gewenste nummer 3 Druk op Spreken om het gewenste nummer te bellen Een oproepl...

Страница 188: ...ld wanneer u een oproep ontvangt U kunt de datum en tijd ook handmatig instellen 1 Druk op Menu blader Omlaag naar CLOCK ALARM en druk op Menu Het display geeft DATE TIME weer 2 Druk op Menu om te selecteren 3 Voer de datum net het toetsenblok bv 12 12 19 voor 12 december 2019 en druk op Menu om te bevestigen 4 Voert de tijd in en selecteer daarna A voor AM of P voor PM en druk daarna op Menu om t...

Страница 189: ...en en druk daarna op Menu 4 Druk op Omhoog of Omlaag om de belmelodie te selecteren 1 5 of OFF 5 Druk op Menu om te bevestigen of op Telefoonboek om terug te gaan naar het vorige menu Toetstonen 1 Druk op Menu blader Omlaag naar PERSONAL SET en druk daarna op Menu 2 Het display geeft HANDSET TONE weer en druk daarna op Menu 3 Druk op Omlaag om KEY TONE te selecteren en druk daarna op Menu 4 Druk o...

Страница 190: ...n Raadpleeg Namen invoeren en Schrijftips op pagina 17 Automatisch antwoord De telefoon is zodanig ingesteld dat u oproepen kunt beantwoorden door de handset van het basisstation of de lader te nemen Deze functie kan worden uitgeschakeld zodat oproepen alleen kunnen worden beantwoord door op Spreken te drukken 1 Druk op Menu blader Omlaag naar PERSONAL SET en druk daarna op Menu 2 Blader Omlaag na...

Страница 191: ...OFF te selecteren 4 Druk op Menu om te bevestigen of op Telefoonboek om terug te gaan naar het vorige menu Automatisch kengetal U kunt de telefoon zodanig instellen dat deze een telefoonnummer kan zoeken en deze door een ander nummer kan worden vervangen Het te zoeken nummer kan maximaal 5 tekens bevatten Het kan worden vervangen door een nummer van maximaal 10 tekens 1 Druk op Menu blader Omlaag ...

Страница 192: ...t het basisstation zijn meegeleverd zijn al vooraf geregistreerd Op het basisstation 1 Houd de knop Page gedurende 5 seconden ingedrukt Het basisstation blijft gedurende 90 seconden in de registratiemodus Op de handset 1 Als de handset niet geregistreerd is bij een basisstation drukt u op Menu en voert u daarna de viercijferige pincode standaard 0000 in en drukt u op Menu 2 Als de handset al is ge...

Страница 193: ...u 2 Blader Omlaag naar RESET en druk op Menu 3 Het display geeft RESET weer 4 Druk op Menu om te bevestigen of op Telefoonboek om terug te gaan naar het vorige menu 5 De telefoon wordt automatisch opnieuw opgestart Wanneer de telefoon opnieuw is ingesteld vraagt de handset u om de datum en tijd opnieuw in te stellen zie pagina 28 Antwoordapparaat De telefoon kan maximaal 12 minuten aan berichten d...

Страница 194: ... naar de stand bymodus Alle berichten verwijderen 1 Druk op Menu blader Omhoog of Omlaag naar ANSW MACHINE en druk op Menu 2 Blader Omlaag naar ALLES VERWIJDEREN en druk daarna op Menu 3 Het display geeft CONFIRM weer en druk op Menu Een herinnering opnemen U kunt herinneringsberichten voor andere gebruikers opnemen die net als normale berichten kunnen worden afgespeeld Herinneringen kunnen alleen...

Страница 195: ...uk op Omhoog of Omlaag om ANSWER ONLY of ANSWER REC te selecteren en druk op Menu om te bevestigen Belvertraging Hiermee selecteert u de duur van de beltoon voordat het antwoordapparaat de oproep beantwoord Kies uit 3 tot 8 keer overgaan of Time Saver 1 Wanneer Time Saver is ingesteld beantwoordt uw telefoon de oproep na 3 keer overgaan 2 Als er geen nieuwe berichten zijn beantwoordt uw telefoon d...

Страница 196: ...epteerd gebruikt u de codes aan de andere kant van deze kaart voor externe handelingen Als uw antwoordapparaat is uitgeschakeld gaat de telefoon na 14 keer overgaan naar de modus Toegang op afstand U kunt vervolgens de viercijferige pincode voor externe toegang invoeren de standaard pincode voor externe toegang is 0000 om de functie externe toegang te activeren KENNISGEVING KENNISGEVING Toegang op...

Страница 197: ...terug op het basisstation of de lader Zorg ervoor dat de netvoedingsadapter juist is aangesloten op een werkend stopcontact Zorg ervoor dat het telefoonsnoer juist is aangesloten op het basisstation en het telefoonstopcontact Koppel de elektrische voeding los van het basisstation van de telefoon Wacht ongeveer 15 seconden en sluit deze vervolgens weer aan Wacht een minuut tot de handset en het bas...

Страница 198: ... wordt een andere handset gebruik voor het maken van een oproep Onjuist telefoonsnoer Controleer de aansluitingen Haal de stekker uit het stopcontact en steek deze er weer in Controleer of het telefoonsnoer in het basisstation en telefoonstopcontact zit Controleer de aansluiting van het basisstation en de netvoedingsstekker van 230 V haal hem eruit en steek hem er weer in Wacht tot de lijn vrij is...

Страница 199: ...nd bericht opneemt of een bericht beluistert gaat het apparaat over en wordt de opname beëindigd Er wordt een oproep ontvangen Beantwoord de inkomende oproep en probeer uw uitgaand bericht later opnieuw op te nemen Afdanking De Richtlijn inzake Afgedankte Elektrische en Elektronische Apparatuur AEEA heeft als doel de impact van elektrische en elektrische goederen tot een minimum te beperken door h...

Страница 200: ...00A1 UK HJ 0600400P1 EU BLJ05W060040P VA INVOER 100 240 V WISSELSTROOM 50 60 HZ 0 2 0 15 A UITVOER 6 V GELIJKSTROOM 400 MA Batterijgegevens TYPE NI MH oplaadbare batterij 300 MAH 2 X 1 2 V AAA gebruik alleen de adapters en batterijen die hierboven worden vermeld Er bestaat explosiegevaar als de batterijen door een verkeerd type worden vervangen Gebruikte batterijen moeten afgedankt worden in overe...

Страница 201: ...r mogelijk te maken Als er toch iets verkeerd gaat probeer niet om het product zelf te repareren maar neem contact op met uw verkoper of bel naar onze hulplijn Garantie Informatie Om een kopie van de garantie voor dit product te krijgen amazon nl basics garantie 31 8000227380 Feedback en Hulp Vind je het leuk Vind je het niet leuk Beoordeel het product dan op onze website AmazonBasics is toegewijd...

Страница 202: ...HECHO EN CHINA PRODOTTO IN CINA GEMAAKT IN CHINA HERGESTELLT IN CHINA FABRIQUÉ EN CHINE MADE IN CHINA amazon com AmazonBasics V1 05 19 ...

Отзывы: