4.6.4 Access Control
Access control can also be called port blocking.
Specific types of traffic that is destined to a selected
LAN IP address can be blocked. To enable any of
the Access Control features, click Advanced and
under Advanced, select Access Control. A page simi-
lar to the port-forwarding page appears. Similar to
the port-forwarding page, an IP address can be
added to a rule. All Access Control rules have pre-
cedence over rules that were added via the port-for-
warding page.
The apply button will temporarily save this connec-
tion. To make the change permanent you need to
click on Save Settings (at the side of the page). At
the system commands page, click on Save All.
4.6.5 LAN clients
To add a LAN client, click Advanced and under
Advanced, select LAN Clients. If DHCP is used, all
DHCP clients are automatically assigned. If a fixed
IP address server is on the LAN and you want this
server to be visible via the WAN, you must add its IP
address. Once the IP address has been added to
you can apply Port Forwarding and Access Control
rules to this IP address.
The apply button will temporarily save this connec-
tion. To make the change permanent you need to
click on Save Settings (at the side of the page). At
the system commands page, click on Save All.
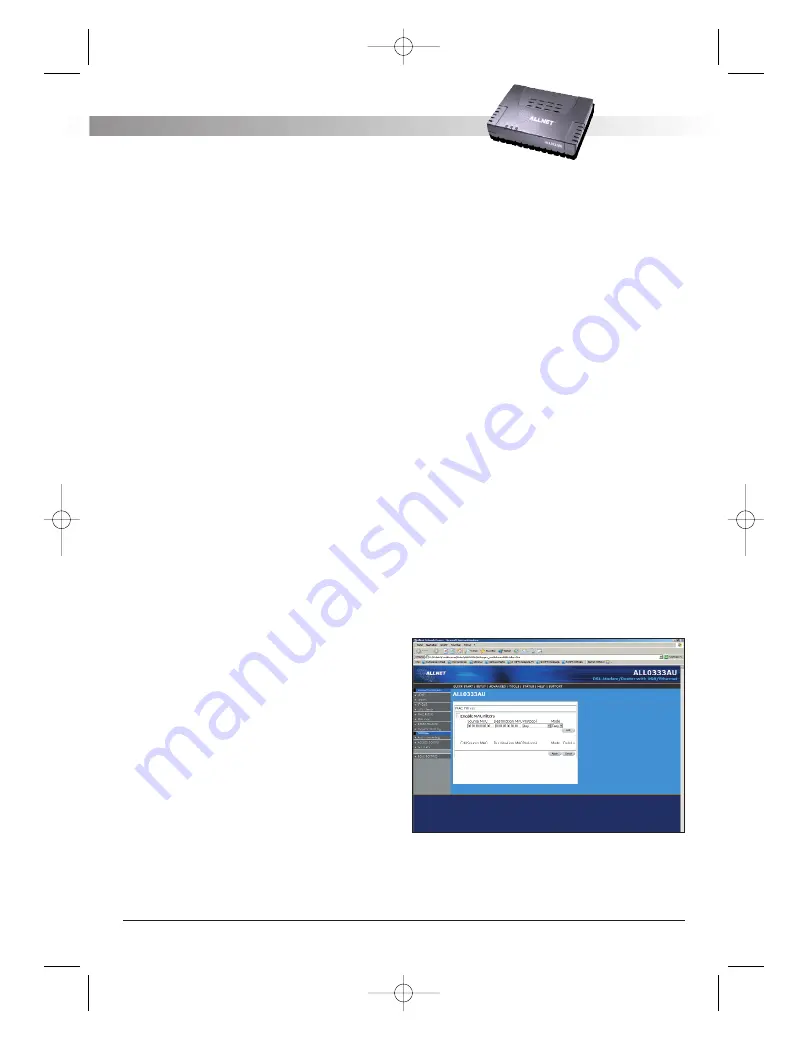
4.6.6 MAC Address Filters
The MAC filtering mechanism provides a way for the
users to define rules to allow/deny frames through
the bridge based on source MAC address, destina-
tion MAC address and/or frame type. When bridge
filtering is enabled, each frame is examined against
the defined filter rules sequentially, and when a
matched is determined, the appropriate filtering
action (determined by the access type selected ...
i.e. allow or deny) is performed. The user should
note that the MAC filter will only examined frames
from interfaces that are part of the bridge itself.
Twenty filter rules are supported with MAC filtering.
To enable MAC Filters, click Advanced and under
Advanced, select MAC Filters. Figure 15 illustrates a
typical Bridge filter configuration.
The User Interface for MAC Filter allows the user to
add/edit/delete, as well as, enables the filter rules.
To add rules, simply define the source MAC address,
destination MAC address and frame type with des-
ired filtering type (i.e. allow/deny), and press the
"Add” button. The MAC address must be in a xx-xx-
xx-xx-xx-xx format, with 00-00-00-00-00-00 as
"don’t care”. Blanks can be used in the MAC
address space, and would be considered also as
"don’t care”.
To edit/modify an existing filter rule, select the des-
ired rule created previously from "Add” in the
"Edit” select box. The selected filter rule will appear
on top section, as with the "Add” filter rule. Make
the desired change to the MAC address, frame type
and/or access type, and press "Apply”.
To delete filter rule(s), select the filter rule entry to
delete in the "Delete” selection box. Note that mul-
tiple deletions are possible. Once all the desired fil-
ter rule(s) is/are selected for deletion, press the
"Apply” button. The "Select All” select box can also
be used to delete the entire filter rule. It provides a
quick method of selecting all filter rules for deletion.
The "Enable MAC Filters” button allow the user to
enable or disable MAC filtering. It can be set/unset
during any add/edit/delete operation. It can also be
set/unset independently by just pressing the
"Apply” button.
Figure 15 (MAC Filters)
NOTE:
The MAC filter table contains 3 hidden rules.
These rules are entered automatically by the
ALL 0333AU – DSL ETHERNET MODEM ROUTER
A L L N E T
®
2 0 0 4
1 5
ALL0333AU_Manual_a 07.04.2004 14:12 Uhr Seite 15


