AT-x230-10GT, AT-x230-10GP, AT-x230-18GT, AT-x230-18GP, AT-x230-28GT and AT-x230-28GP Switch Installation Guide
67
F
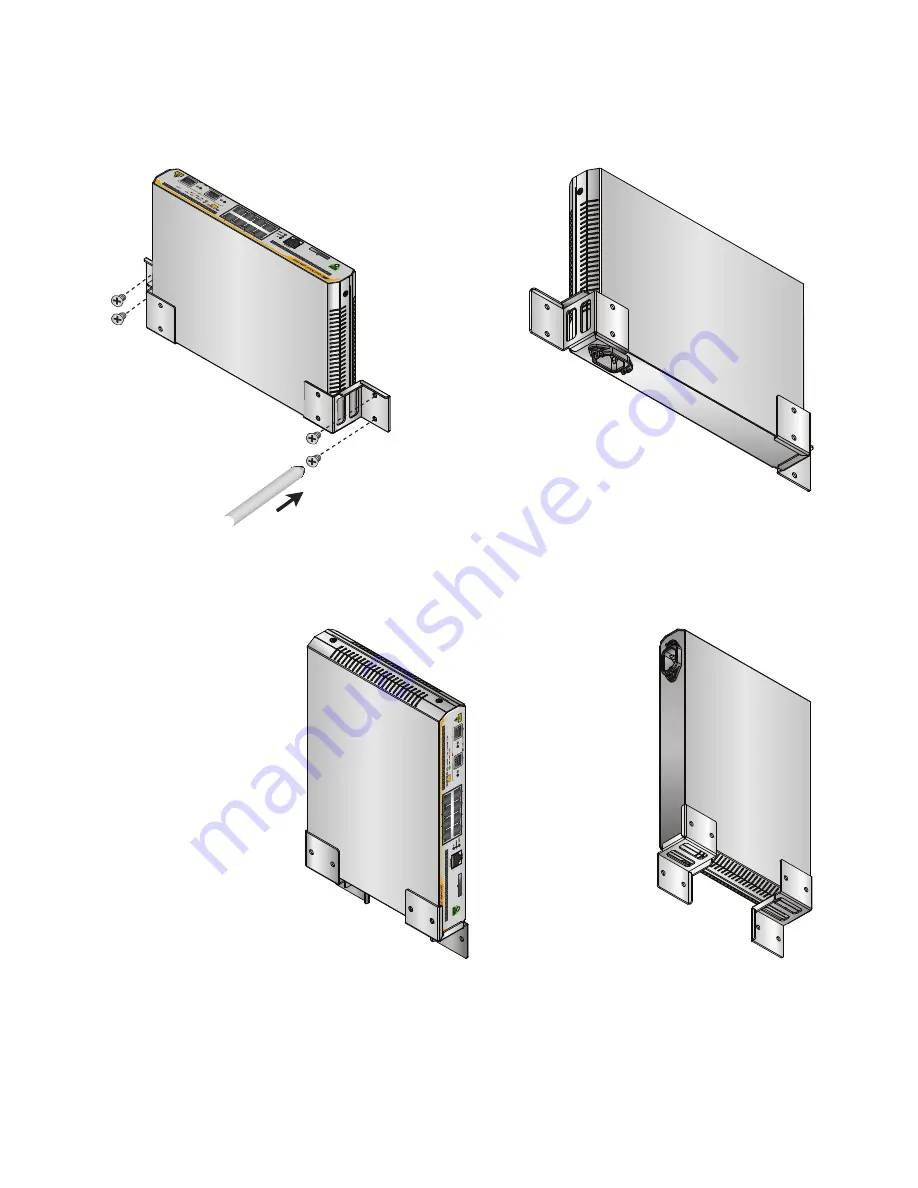
IGURE
40. S
ECURING
THE
AT-
X
230-10GT
SWITCH
TO
THE
WALL
WITH
THE
FRONT
PANEL
FACING
UP
F
IGURE
41. S
ECURING
THE
AT-
X
230-10GT
SWITCH
TO
THE
WALL
WITH
THE
FRONT
PANEL
FACING
RIGHT
3. Slide the switch between the brackets so that it rests against the
bracket, as shown in the figures above.
4. Go to “Cabling the switch” on page 70.
Bracket position, viewed from above:
Bracket position, viewed from below:
Bracket position,
viewed from below:
Bracket position,
viewed from above:
Содержание AT-x230-10GP
Страница 10: ...viii...
Страница 14: ...4...
Страница 92: ...Chapter 2 Installation 82...
Страница 102: ...Appendix A Technical specifications 92...


