AT-x230-10GT, AT-x230-10GP, AT-x230-18GT, AT-x230-18GP, AT-x230-28GT and AT-x230-28GP Switch Installation Guide
57
Installing an AT-x230-10GT switch in an equipment rack
These instructions show you how to install an AT-x230-10GT switch in an
equipment rack. The rack mount kit is AT-RKMT-J05 and can be
purchased separately from your Allied Telesis dealer.
To install an AT-x230-10GT switch in a 19-inch equipment rack, follow
these steps:
1. If rubber feet are attached to the base of the switch, remove them
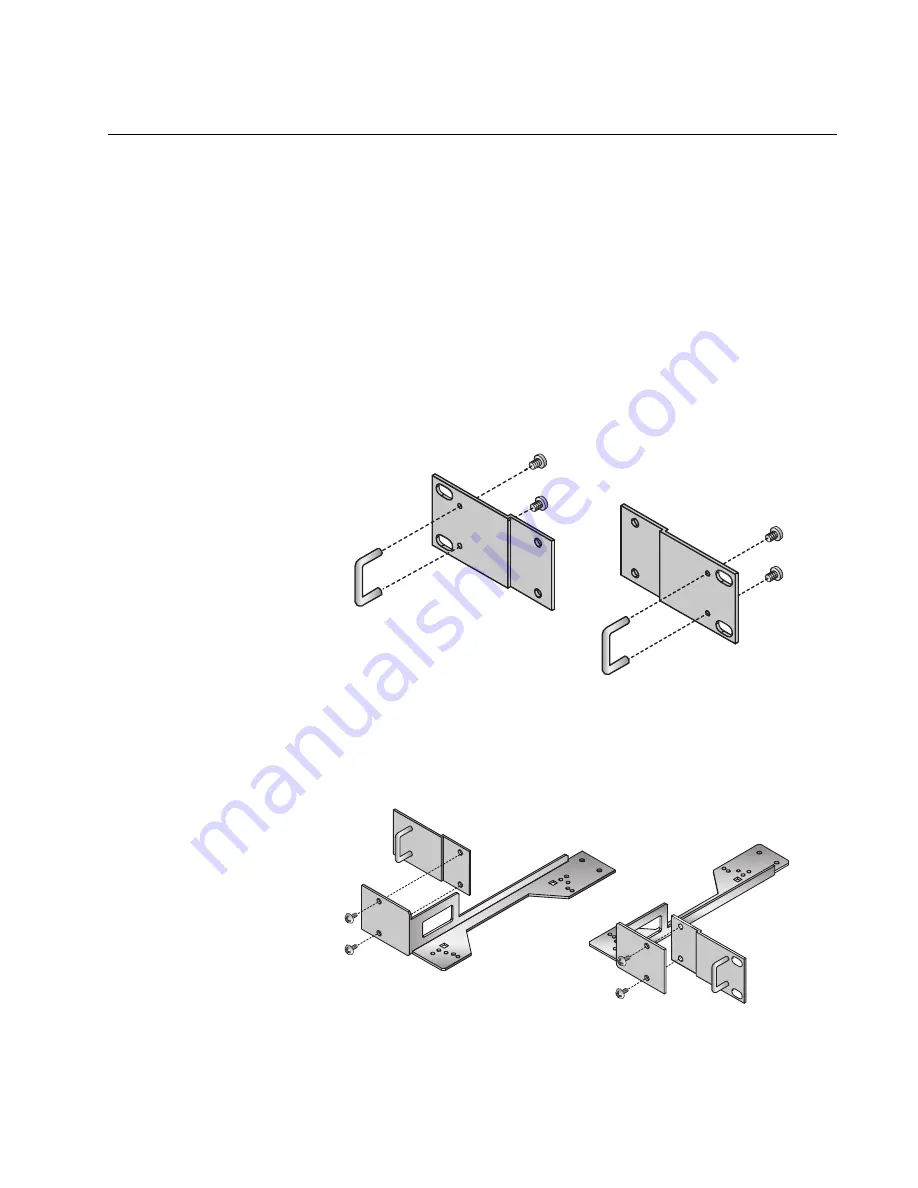
2. First fit the rack mount handles to the brackets using the supplied
M3x6mm pan head screws (Figure 27).
F
IGURE
27. F
ITTING
HANDLES
TO
RACK
MOUNT
BRACKETS
3. Fit the brackets with handles to the mounting using the supplied
M4x6mm countersunk screws (Figure 28).
F
IGURE
28. F
ITTING
BRACKETS
TO
THE
MOUNTING
Содержание AT-x230-10GP
Страница 10: ...viii...
Страница 14: ...4...
Страница 92: ...Chapter 2 Installation 82...
Страница 102: ...Appendix A Technical specifications 92...


